Survival Instinct…

•July 7, 2011 • 4 Comments

I was delighted to hear last week that the Instinct Technology Intellectual Property Rights have been acquired by www.instinctengine.com where development of the SDK will be continuing, eventually in an Open Source capacity. This is great news for Irish game development and will hopefully see  a thriving community grow around it and see the resurrection of  the real-time versions of some of the art you’ll see on this blog. I look forward to seeing some of the characters reanimated, particularly the character below. Best of luck to all involved!

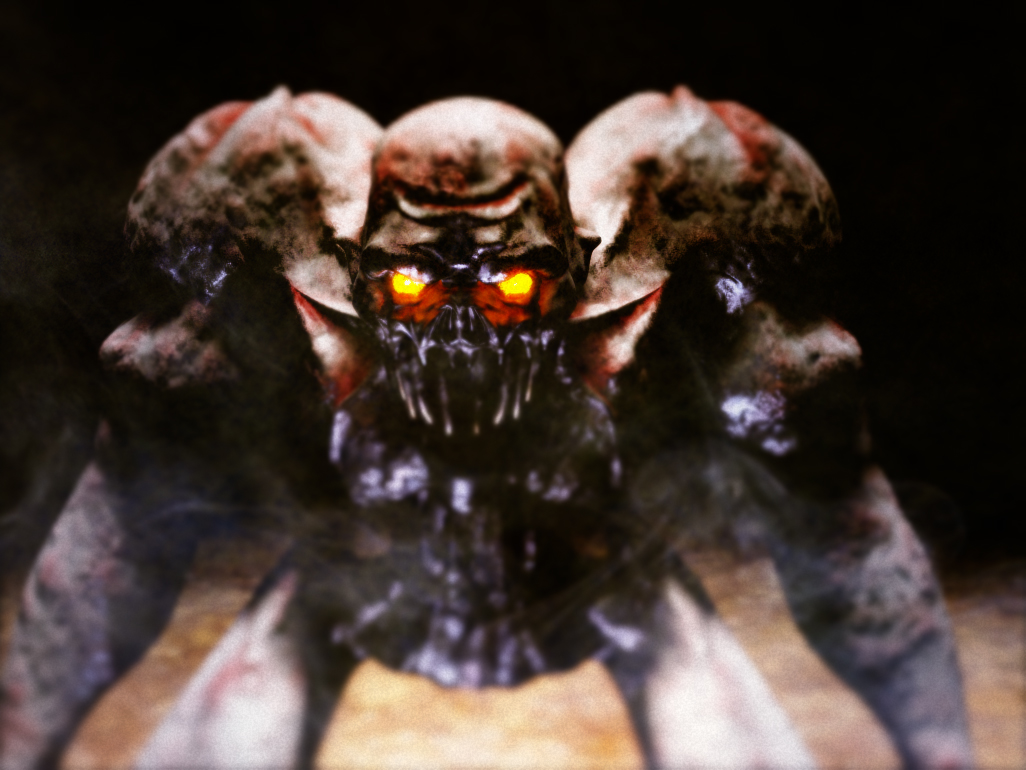
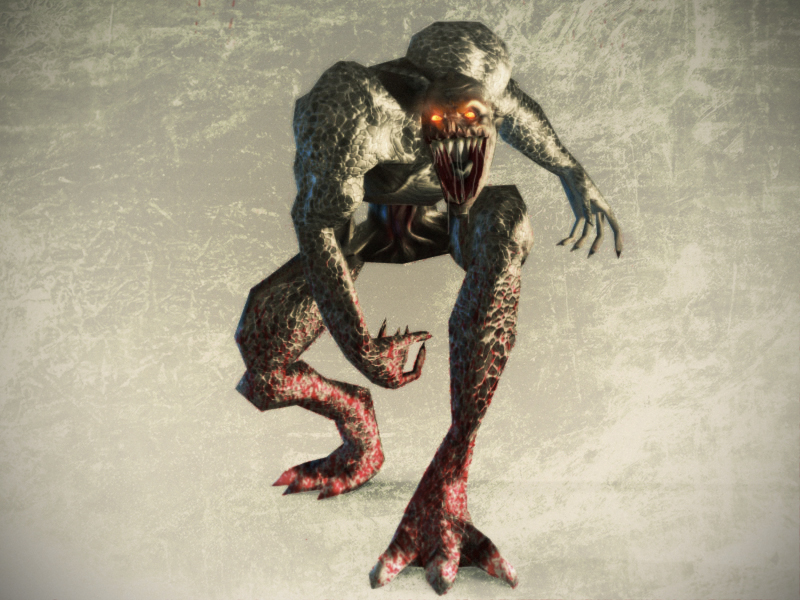
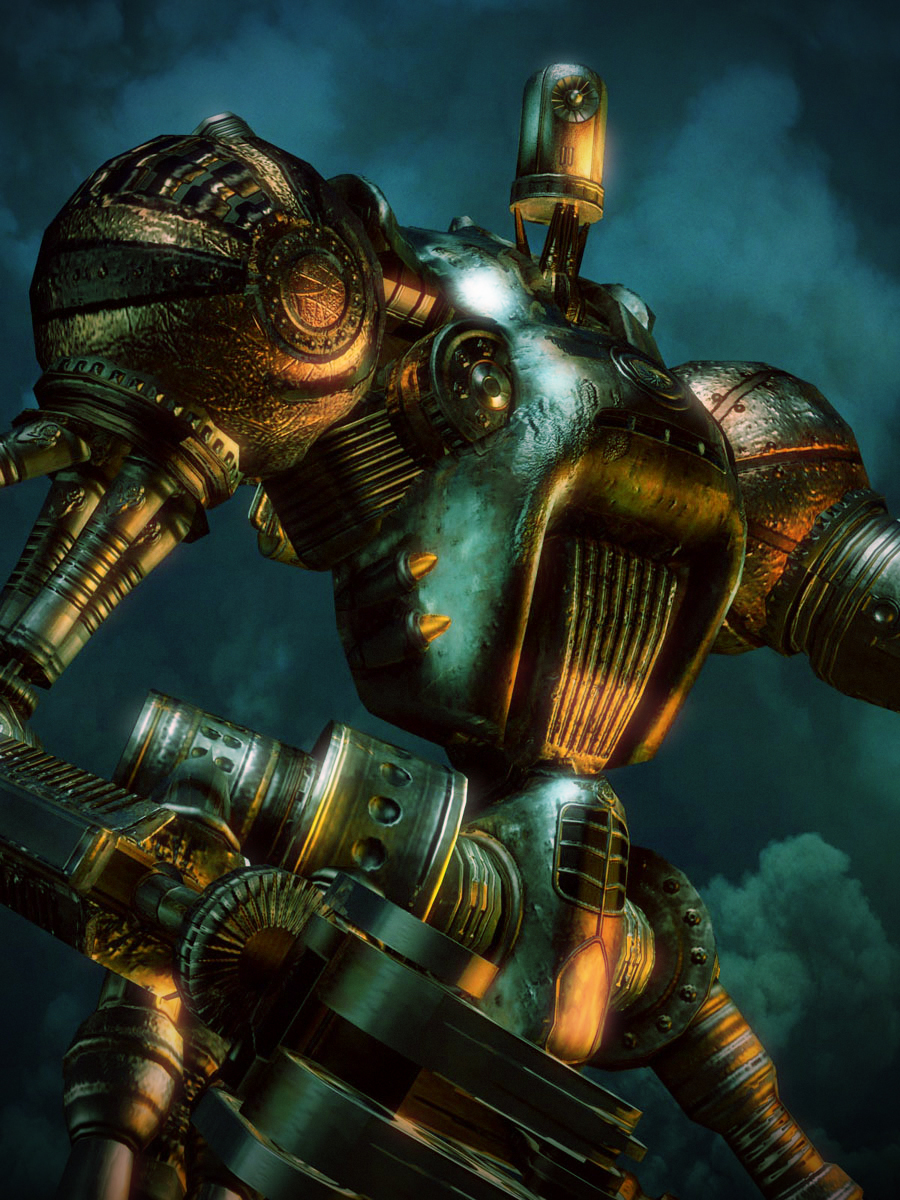
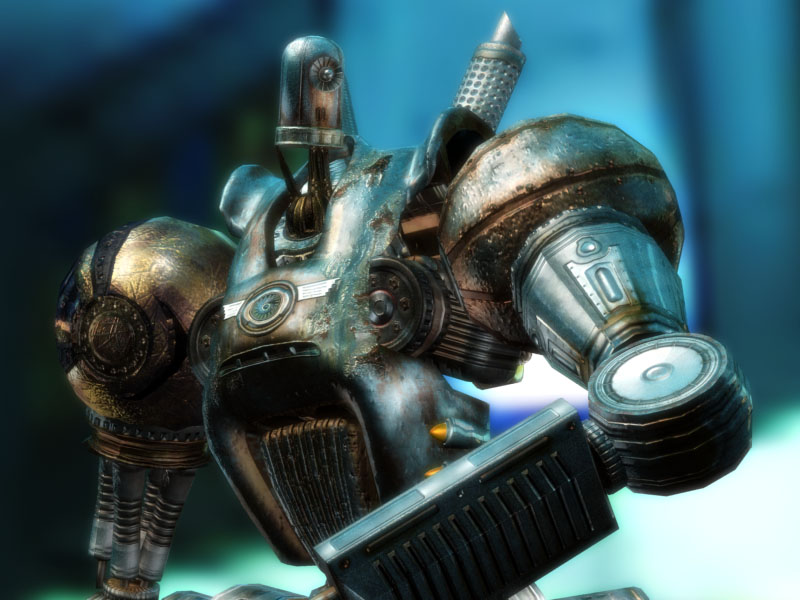
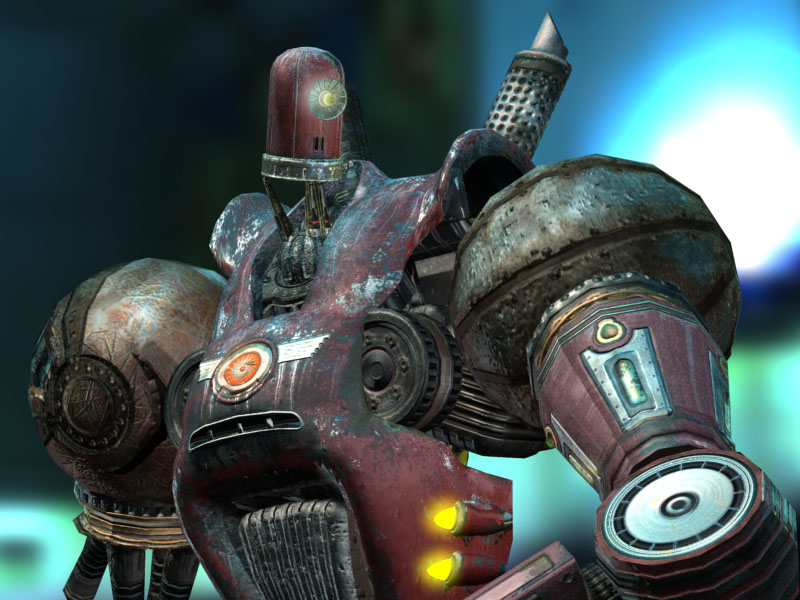
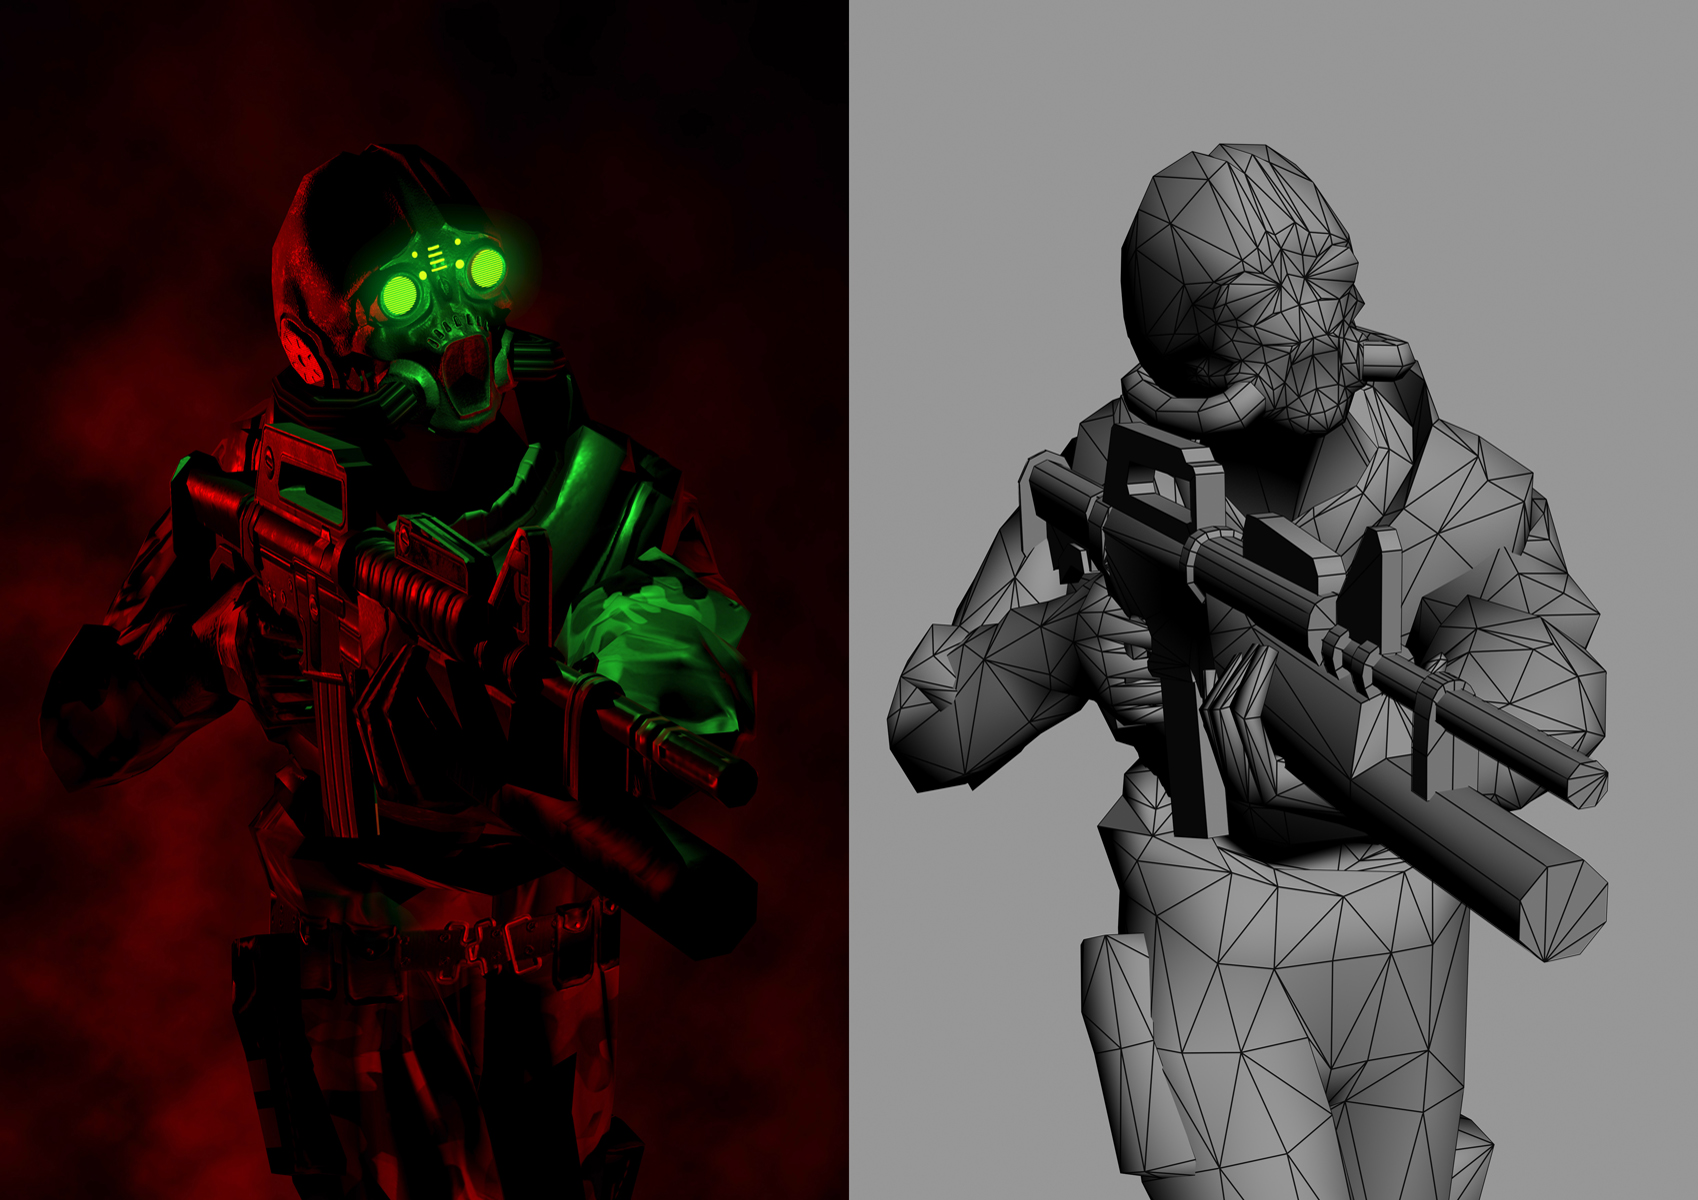
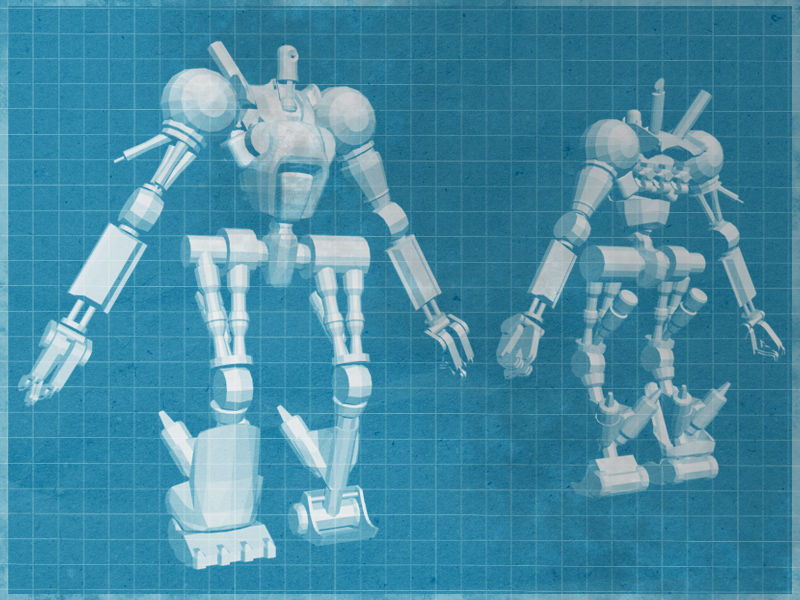
This guy was the first model I created commercially, under contract to Torc Interactive (creators of the Instinct Engine), which eventually led to my being hired full-time some months later. It was in production on this character that I knew that this was what I wanted to for a living. It was the first time I had done any proper low poly work, I had never tackled a character with a tight poly budget before, neither had I successfully unwrapped a character for texturing, both disciplines essential for the high/lowpoly normal mapping pipeline, so many iterations were required! All but one of the images below are the high res version. Unfortunately the “male banshee” as he was known, nor his female counterpart, ever made it past a few early tech demos and prototypes but he became something of a company mascot for a time and I’ve always remembered him fondly. Obviously he was a bad guy, he had a long range piercing scream that could deafen a man and close up clawed melee attacks that could cut through flesh like butter. He moved like a large ape, not particularly quickly but extremely menacing in his slow but steady advances. The high res versions here are procedurally textured, with some post work in Photoshop. Mark Cullen, a senior artist at the time, provided the diffuse and specular textures for the low res version bottom left.

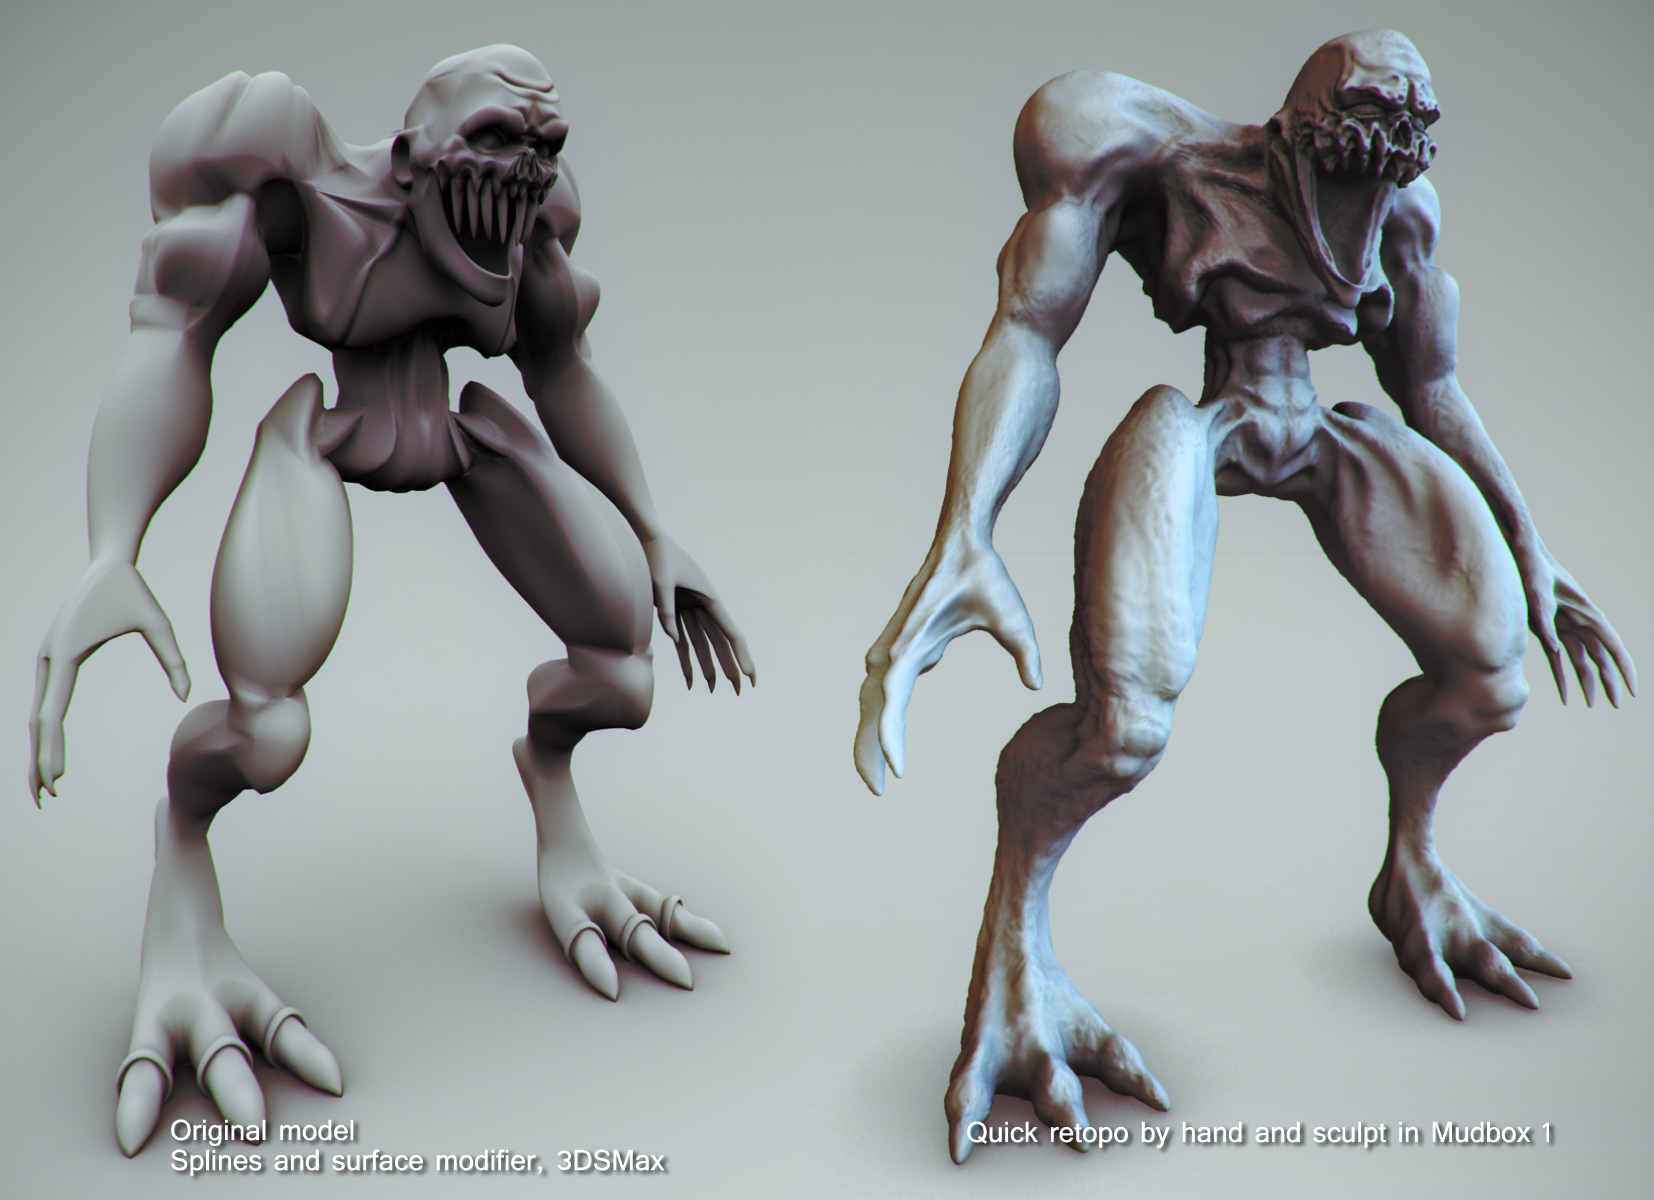
The image on the bottom right was done when Mudbox 1.0 was released, long before the acquisition by Autodesk. I retopologised the low poly version of the male banshee and sculpted the detail as part of an evaluation of the new tech. Good memories!

Tin toys…

•July 7, 2011 • Leave a Comment

A few more images of the Prospector robot. The red version was textured by Brian Mc Laughlin (diffuse and specular maps over a normal map I generated from a high poly model) and he was also originally responsible for the concept piece that I then worked up.  The realistic renders, bottom left and right, were lit and rendered in 3DSMax using HDR probes in Brazil RS, with their specular maps used as reflection masks. The probes were quite low resolution (hence the blurry blowout behind them) but had a nice effect on the metal, I always liked the way Brazil handled HDR lighting. Top right is a mood-setting scanline render from 3DSMax 5.

Oul characters…

•July 5, 2011 • 2 Comments

Some more characters from the archives. renders from 3DSMax and Scanline/Mental Ray. These guys really show how powerful normal maps can be in altering the look of a low poly model. All of these game models were used in promotional print material, and the Prospector once adorned the cover of Develop magazine. The merc character had about 1,200 polygons with about 300 for the weapon, styled on an M4 Carbine. The super soldier character had about 2,500 while the Prospector robot had about 12,000 – each reflecting the graphics hardware abilities of the day (2004-2006).

Ryan Magee did the diffuse and specular textures for the merc character, you can see more of his work here

Brian Mc Laughlin did the original textures for the super soldier character, which I reworked for the promotional renders.

Lost Dogs…

•July 1, 2011 • Leave a Comment

Quick post, a very early prototype from the look development of Dogfighter, modelled in 3DSMax, rendered in Brazil RS. The visual direction veered more in the direction of biplanes as the game was prototyped and retro futuristic craft like this one were abandoned. I’m sure I have some more concepts somewhere…

We need guns…

•July 1, 2011 • Leave a Comment

A couple of high res weapon models created for normal maps in Dreadnought. Rendered in Splutterfish Brazil RS using only HDR probes.

Churning ’em out…

•June 28, 2011 • Leave a Comment

While I’m waiting on the final render of my Photofly shell model to finish I’ve been browsing some archives on an old external hard drive. It’s full of test renders and promotional stuff from years ago, I always enjoyed taking low poly game models and seeing how they’d look with some heavy weight Mental Ray or V-Ray lighting behind them. I thought I’d share this one. This scene was hastily constructed from some throwaway world objects from the Prospector demo, you can see the wireframes on the left. Materials consisted of diffuse, specular and normal maps with slight Fresnel reflections on some objects. The highest res texture used was 512×512, with a tiling texture on the ground. I added a directional light for the sun with a projection map to act as a gobo (the tree doesn’t actually exist as a model, just it’s shadow), a blue skylight for ambient/bounce and let GI take care of the rest, adding some ambient occlusion in a separate pass.

The hypothetical Third Dimension…

•June 28, 2011 • Leave a Comment

Gimpel is now free. What does this mean? It means that now you can convert your 2D images into stereoscopic 3D ones. For free. The results in the examples on the website are pretty good, you’ll need some red/cyan anaglyph glasses to appreciate them. From the blurb “Gimpel3D converts single images or frame sequences into stereoscopic 3D using a combination of traditional approaches and a proprietary projective modeling system.”


Photoflying out the door…

•June 23, 2011 • 4 Comments

…so this is just a quick one. A very quick one. As in all Mental Ray settings set disgustingly low to lash out a quick turntable.. I’ll be off the radar for a few days now but in the meantime here is a shell captured with Photofly, rendered in Mental Ray in 3DSMax.


Animated in Ireland…

•June 22, 2011 • Leave a Comment

“Animated In Ireland” – a promo by the Irish Film Board providing a glimpse at the work of the Irish industry.

http://www.thisisirishfilm.ie/trailers/animated-in-ireland-irish-animation-promo

Eyes of the flies…

•June 20, 2011 • 6 Comments

One evening last week I set about taking Project Photofly for a spin. As I mentioned in an earlier post, photofly is a cloud based service that generates a textured 3D mesh based on photographs that you upload to their server. It really piqued my curiosity and I’ve been dying to find some time to give it a go, so one evening after work I was in the garden and saw my son’s play tunnel crumpled up on the grass. 20 photographs later and I had something to test with, so I uploaded them to Autodesk’s cloud service using the Photo Scene Editor downloadable from their site.

It took about 30 minutes in total to upload the photos , preview a draft mesh and commit the final model, progress bars advise you of the current status, or you can choose to be mailed when the job is complete. The visual fidelity of the end result was good, although there were several holes in the mesh from not having enough photo coverage. The Photo Scene Editor allows a few export options, I chose obj and imported it into 3DSMax. The scene contained three triangulated meshes and three 4096×4096 textures which were pretty high-resolution considering I used a 5mp point-and-shoot Sony Cybershot camera. Visual fidelity is high, although the mesh topology and UV layout is pretty hideous as you’d expect. It also doesn’t cope too well with long extrusions, for example flowers or poles but I’d expect that to improve with more photographs taken (they recommend about 50 pictures for a human head).

I set about retopologising the tunnel model (using Matt Clark’s excellent WrapIt) with a much lower proxy mesh, trying to keep edge loops where they could best support the circular frames beneath the canvas, then used Render To texture to export a new diffuse and normal map. You could also extract displacement in Mudbox if you need to reconstruct the initial detail, leaving you only to remove the highlights and shadows in the diffuse texture to make the model more versatile for use in other lighting conditions. Here is a clip of the results:

I like Photofly, I hope it’s a service that I hope Autodesk continue to provide for free. I like that it is portable, you can snap a sequence of photos on your camera phone, upload them on a low spec netbook and download the scene for later use on your workstation PC, without having to worry about horsepower along the way – all of the automagic is done in the cloud. Most folk never leave the house without their smartphone so it’s nice that you don’t have to carry additional heavy tech with you if you chance upon something you want to capture. With some retopology and texture work you can have a model reusable in other scenes or games with normal/displacement maps as close to real life as you’ll get without a 3D scanner. In fact, you could probably use Photofly’s stitching technique to generate a skydome for re-lighting and environment maps too.

I took my camera around the grounds of Luttrellstown Castle on Sunday and took some pictures, I’ll stick the results up here when I get to processing them, they are slightly more complex than this first go!