Here’s a two hour experiment with some displaced alien terrain, volumetric effects and procedural materials. Unfortunately there are a few shadowing artifacts due to the terrain mesh not being tesselated enough. I rendered out a couple of passes from 3DSmax and composited in Photoshop (the subtle volumetrics were rendered using Max’s scanline renderer over black and screen blended on).
Heads up…
•January 21, 2013 • 1 CommentA couple of non-photorealistic render tests in Mental Ray and V-Ray with an unhealthy dose of poly crunching to that oul fella’s head. Reminds me a bit of that talking sculpture from Art Attack back in the day!
After the Storm…
•January 17, 2013 • 2 CommentsThese images are from a series of tests I did over the Christmas holidays, cloudscapes rendered in Mental Ray with faked translucency and scattering using falloff and gradient maps. The clouds are created using facing billboard particles scattered over a basic blobby cloud mesh using Particle Flow.
Designer stubble…
•January 9, 2013 • 3 CommentsFirst post of 2013 and it’s an update to that old man’s head sculpt I was working on, specifically some facial hair. This is a first pass at the hair (using the MR prim type from 3DSMax native Hair and Fur system) and still has a long way to go. For me, the nice thing about using the MR prim is that it is not a post effect, the hairs render at render time and can easily be incorporated into a Fresnel, ambient occlusion or zdepth render pass. There are jaggy shadow artifacts but I’ll be moving to MR shadow maps for the final render which should help eliminate those. In the images below you can see a test render and the low poly geometry I used to generate the eyebrows, moustache and beard stubble.
2012 in review
•January 3, 2013 • 2 CommentsThe WordPress.com stats helper monkeys prepared a 2012 annual report for this blog.
Here’s an excerpt:
4,329 films were submitted to the 2012 Cannes Film Festival. This blog had 23,000 views in 2012. If each view were a film, this blog would power 5 Film Festivals
Happy New Year!
•December 31, 2012 • Leave a CommentThis is my last post of 2012 but hopefully there’ll be many more to come in 2013. This is a very quick render of a torus knot made to look like a cloud. Rendered in 3dsmax with the scanline renderer. Thanks for helping me bust 30k views and Happy New Year!
To tie this in I should probably add “the sky is the limit in 2013!”
Ugh…
Lunchtime doodles…
•December 11, 2012 • 2 Comments
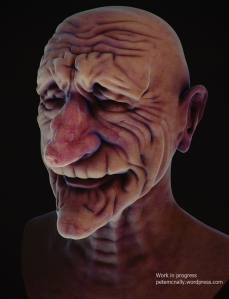
All the abstract stuff of late has been fun and all but for the past few lunchbreaks in work I’ve been doing some sculpting and texturing in Mudbox. Starting with the stock base head mesh, which I wouldn’t normally use, I worked up a series of wrinkles and creases on it based on reference collected from Google images. This was a nice, loose exercise and quite a relaxing way to spend an hour in the afternoon and I liked how it progressed so I decided to press on with it and now I plan on taking it back into Max, making some nice SSS shaders for the skin and doing a large stylised moustache on the exaggerated upper lip using Hair and Fur. I got about this far in the first hour:
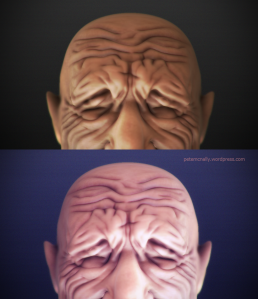
The above image is a Photoshop composite of a couple of screengrabs straight out of Mudbox, Zdepth, Ambient Occlusion and the raw viewport. After about three hours in total it looked like this:
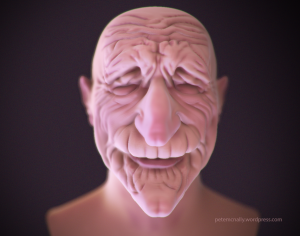
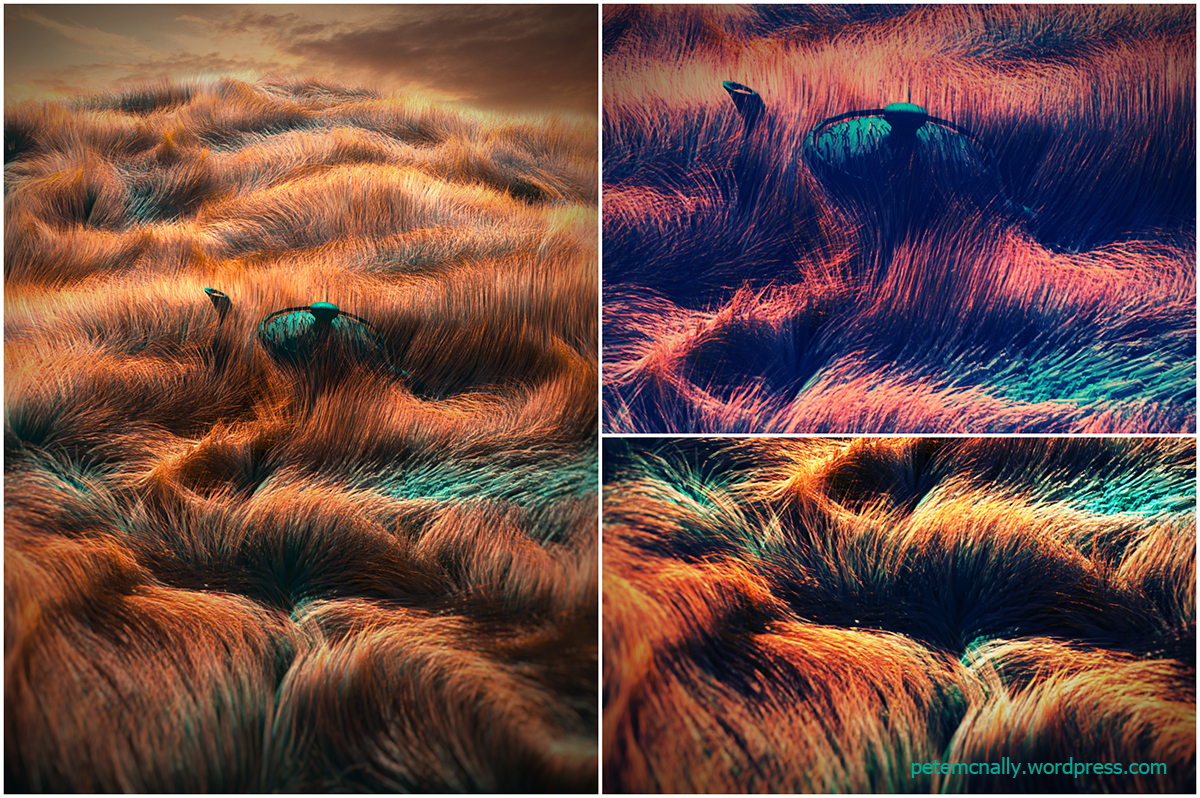
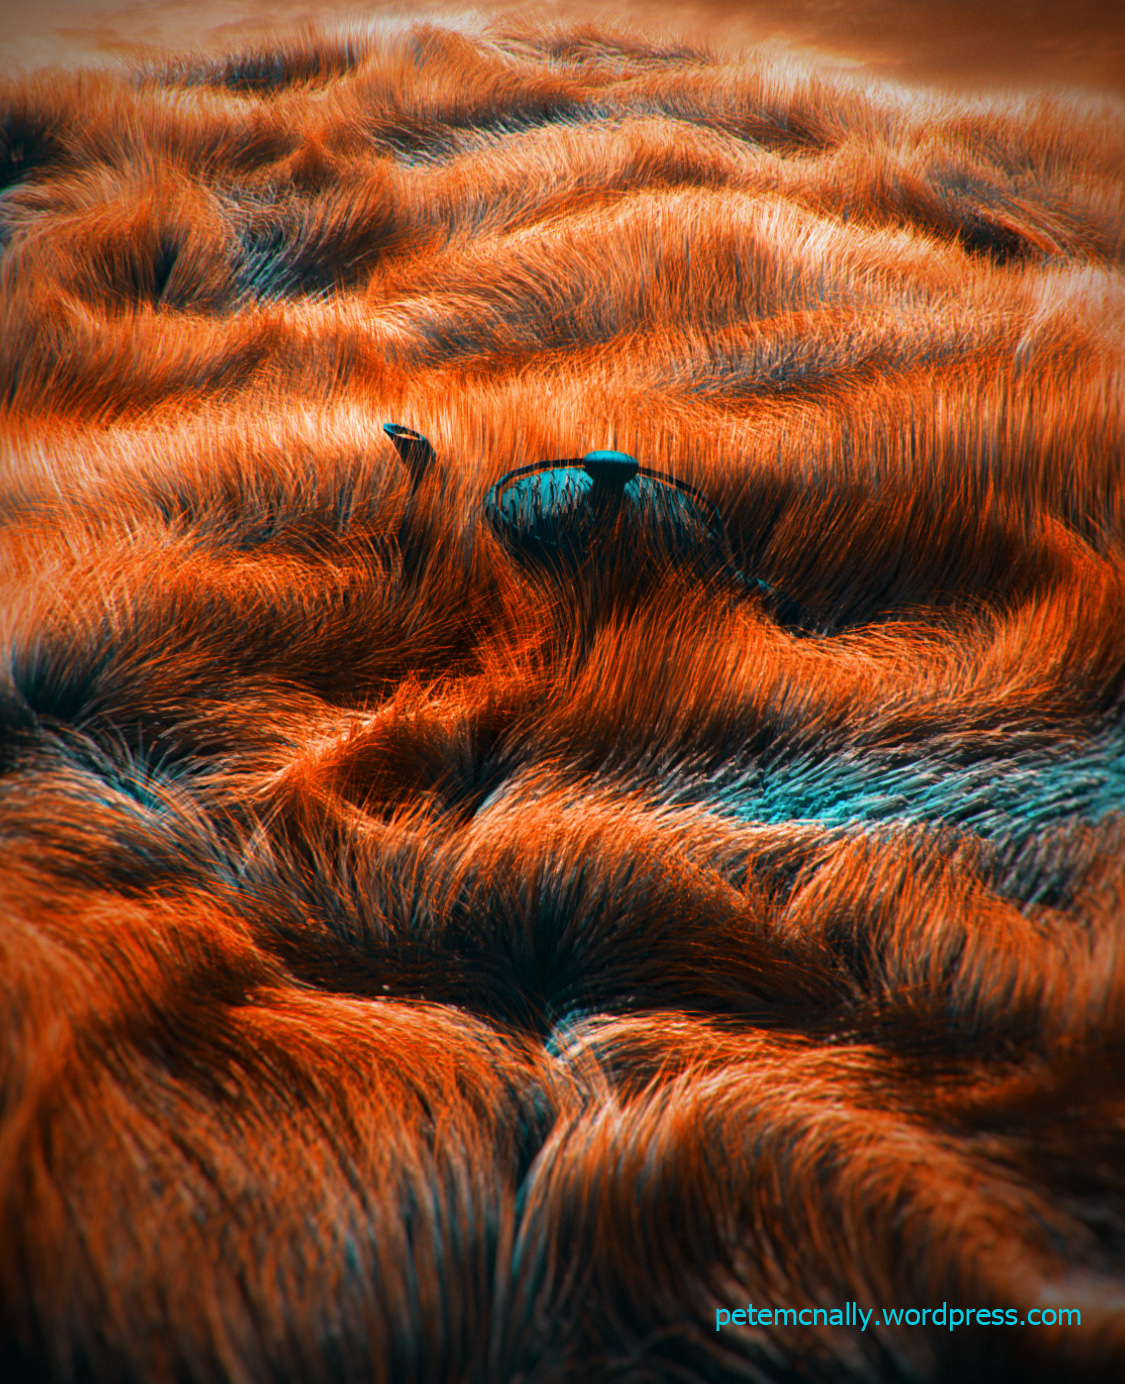
Despite a head full of mucus from a rotten cold I managed some more work today and this is a breakdown of how it looks now (all passes screengrabbed from the realtime viewport in Mudbox):
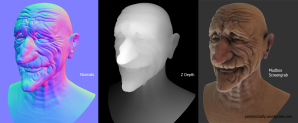
I extracted the blue channel of the normal map in Photoshop to screen blend and provide a subtle Fresnel type effect to help with skin oiliness and rim lighting. I didn’t use depth of field in the image below, but I did blend the Z Depth pass over the raw render to slightly burn the skin closer to the camera. Ambient occlusion was turned on in the screen capture from Mudbox. Here are the composited passes in Photoshop:


