
Some more look development experiments, these were done before the previous post.
Further experiments…
•November 25, 2012 • 2 CommentsLook again…
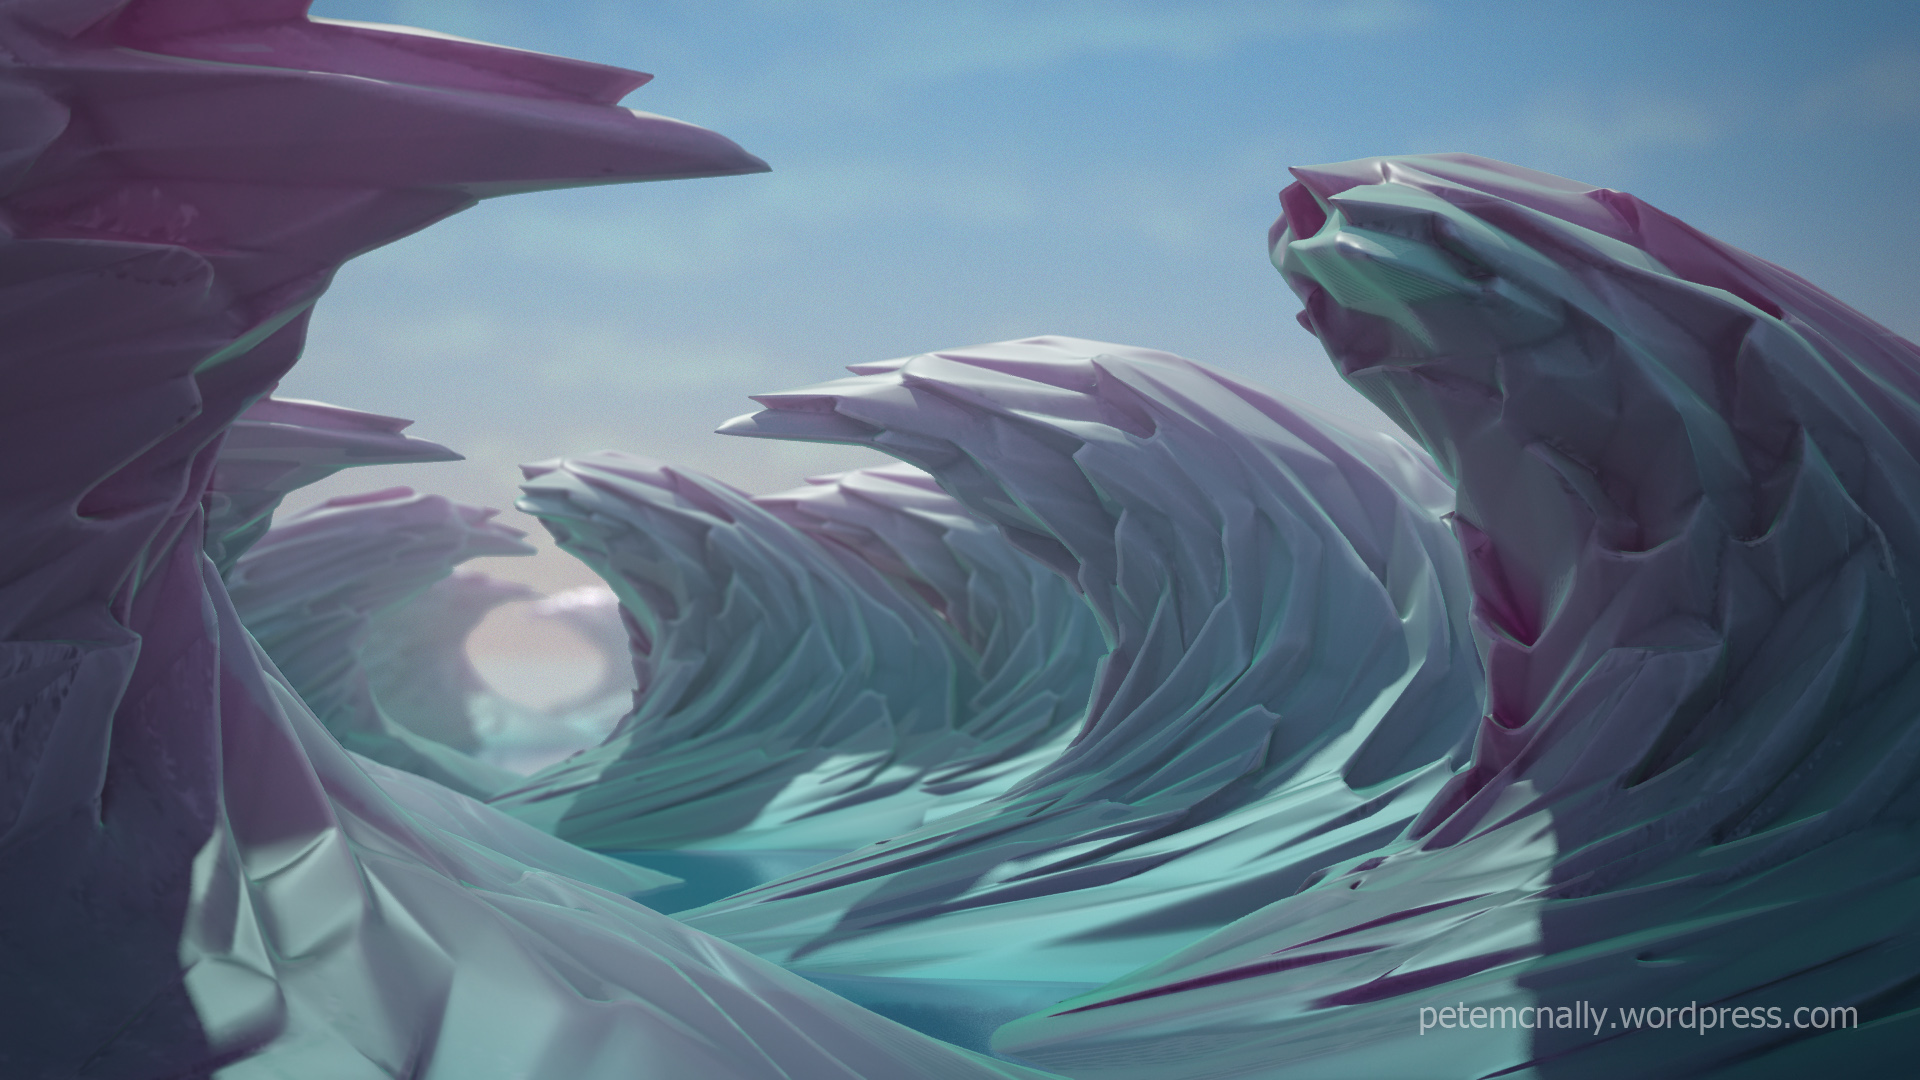
•November 22, 2012 • 8 CommentsI’ve been experimenting this past week with doing some non-photorealistic look development work in 3DSMax. I’ve been using simple materials, geometry and processes to try and create more complex organic shapes and playing with colours to make up some cartoony landscapes. No hand-painted textures have been used in these images, nor have I used photographs. I’m preparing a blog post to be stuck up soon detailing the techniques involved, here are some results:


Tapped out…
•November 14, 2012 • 10 CommentsHere is the final image as mentioned in the previous post and a bit about how it came together.

The scene itself is relatively straightforward, the ground is a flat plane with a tiling autumn leaves texture applied, I planned on using heavy depth of field here so the background didn’t have to be terribly detailed. The wooden post is also little more than a box primitive with some supporting edge loops for subdivision, hurriedly sculpted in Mudbox using high resolution rough wood textures. I then extracted an object space vector displacement map to recreate the detail at render time in Mental Ray. Here is a screen grab of the scene in 3DSMax

The tap started out as an 8 sided cylinder cobbled from reference of many images of outdoor taps, with the hex nut near the handle modelled seperately and attached afterwards. The low poly geometry was easy to unwrap and smoothed quite well. This is the low geometry and the tap UV layout in Max

I used Surface Mapper in 3DSMax to render off a dust and cavity map for use in texturing, the body of which was done using photo sourced projection maps in Mudbox. I extracted the white areas of oxidisation on the metal to a new texture and applied it as a reflection mask and displacement map back in Max to break up the silhouette on the tap model. I also did some full scene passes – ambient occlusion, zdepth, Fresnel falloff on the tap and a gradient to be composited in Photoshop. The raw pass was rendered to EXR format so that there would be room to play with exposure afterwards, I was hoping to achieve several Instagram style effects at the end. Lighting is a simple daylight system (MR sun and physical sky) with some foliage added off camera for light breaks and shadows.

All that remained when these were composited was to add some light leak effects, a little colour grading and a grunge border. The full resolution versions are below, if you have any questions about the making of please drop me a line in the comments area below!


Tap that…
•November 13, 2012 • 2 Comments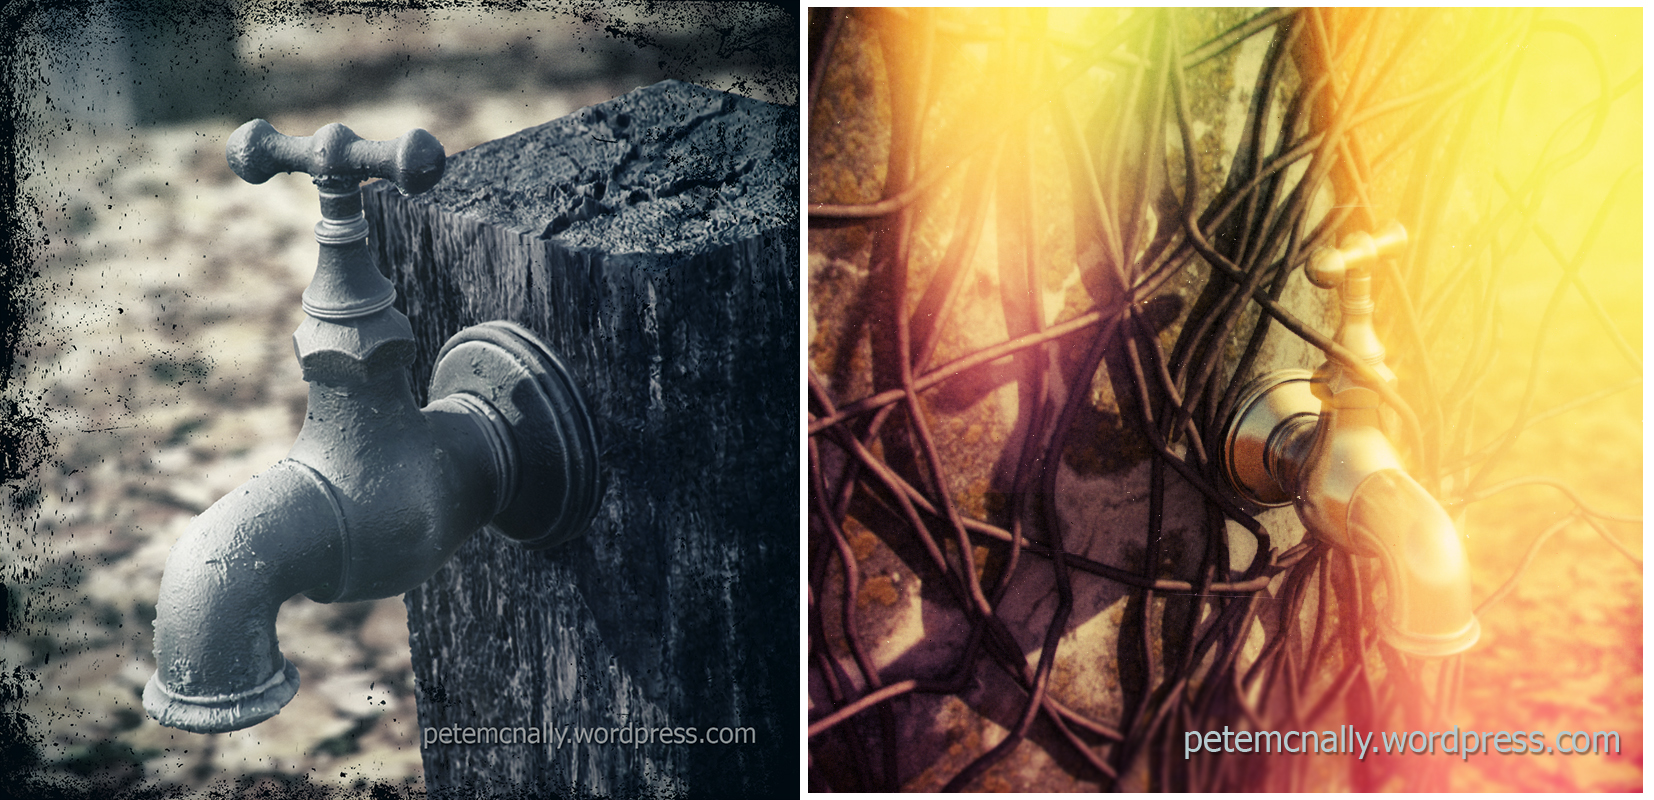
Learn something…
•August 21, 2012 • 13 CommentsSo, I’m looking at putting together a 3D art course on Saturday afternoons – this could be anything, so I want to hear from you about what you want to learn! I’ve been a 3D Generalist for about 12 years now, so I’ve been around the block a few times and worn a lot of hats! Initially I’m thinking 3DSMax, Mental Ray, Mudbox, Photoshop – workflows, theory, hands-on practical work in a very informal setup, with tips and tricks that I’ve harvested over the years. I’m completely open to teaching anything 3D related at any level within my area of knowledge so drop me a line in the comments below and I’ll contact you and do my best to put together a course that suits everyone (in so far as that’s possible). I’m thinking 2 or 3 hours a week keeping class sizes down to between four and six participants – that should allow time for group learning and one to one tuition.
Hope to see you soon!
She’s a waterfall…
•July 14, 2012 • 4 CommentsIn one of my first posts I mentioned that I had been looking at using Mudbox to sculpt some wave detail displacement maps to use on a rough ocean. I’ve been impressed by the robust performance of vector displacement maps generated in Mudbox and rendered in 3DSMax, so the idea was to take some of the guesswork out of rendering a procedurally shader displaced ocean by using a series of tiling vector displacement maps that would scroll over each other and blend in and out and whatnot. Using some Houdini style Tessendorf deformed ocean patches as reference, I was able to sculpt up some near tiling geometry, whose extracted vector displacement map could be applied to a plane.  I also generated regular 32bit displacement maps based on the same geometry. The ocean scene is on the long finger but after seeing the incredible primordial landscapes and waterfall (actually Dettifoss, filmed in Iceland) in the opening scene of Prometheus I thought I’d try to make a simple waterfall by using the greyscale displacement maps generated in Mudbox scrolling along some basic geometry. No particle systems or fluid dynamics, just some scrolling textures, this way it could potentially be recreated in realtime. For that reason I chose to use modifier based displacement in Max as I wanted quick viewport iterations that I wouldn’t see until render time with the shader based variant.
First up, I blocked out some simple geometry and unwrapped it so that the textures would scroll vertically along the UVs, a quick planar map with some UV relaxing did the job reasonably well and a pelt stretch and some further relaxing finished the UVs. I made some tweaks to the geometry to pull out areas of roughness at the edge of the falls.
 Unwrapping the UVs early meant that I could easily turbosmooth the geometry without having to wrestle with a detailed mesh of 6 or 7 iterations down the road, It looked like this after smoothing (low poly wireframe overlay)
 I wanted to suggest a change in the water as it plunged over the falls, churning into foam from raging rapids but I didn’t want to use particles (I’m always on a time budget with this stuff!) so I opted instead for a self-illumination (emissive) map that would over-brighten the textures at that point. I started with an inverted ambient occlusion map generated using the Surface Mapper tools in Max and then painted in some blobby foam areas. This map had no animation, it was completely static, I just hoped that the blown out lighting would work well with the scrolling textures. The mapped geometry looked like this
 Next was to try some displacement tests. I generated a normal map from the displacements I got out of Mudbox and used it to create smaller wavelets over the larger waves caused by displacement. I then found a choppy water texture on cgtextures.com that tiled and I could use for some diffuse shading. These were the textures used, combined with some Fresnel shading

Next, I blocked in a camera move, being careful not to show the geometry extents, which were very close and didn’t leave much to work with, mental note for next time. After a few tests I decided to add some rock models to the foreground and one right in the middle of the waterfall. They gave a point of reference or anchor in a scene where there is a lot of movement. Here is a video showing progression towards a final render
The camera move was a little too smooth and mechanical for my liking, so I went ahead and overdid the shaky handheld movement in After Effects, also adding droplets build-up on the camera lens, vignette, colour grading and some bad camcorder sound. If you have any questions about any part of this process please add to the comments below and I’ll be happy to elaborate. Here’s the end result

Prometheus inspired…
•July 2, 2012 • 6 Comments
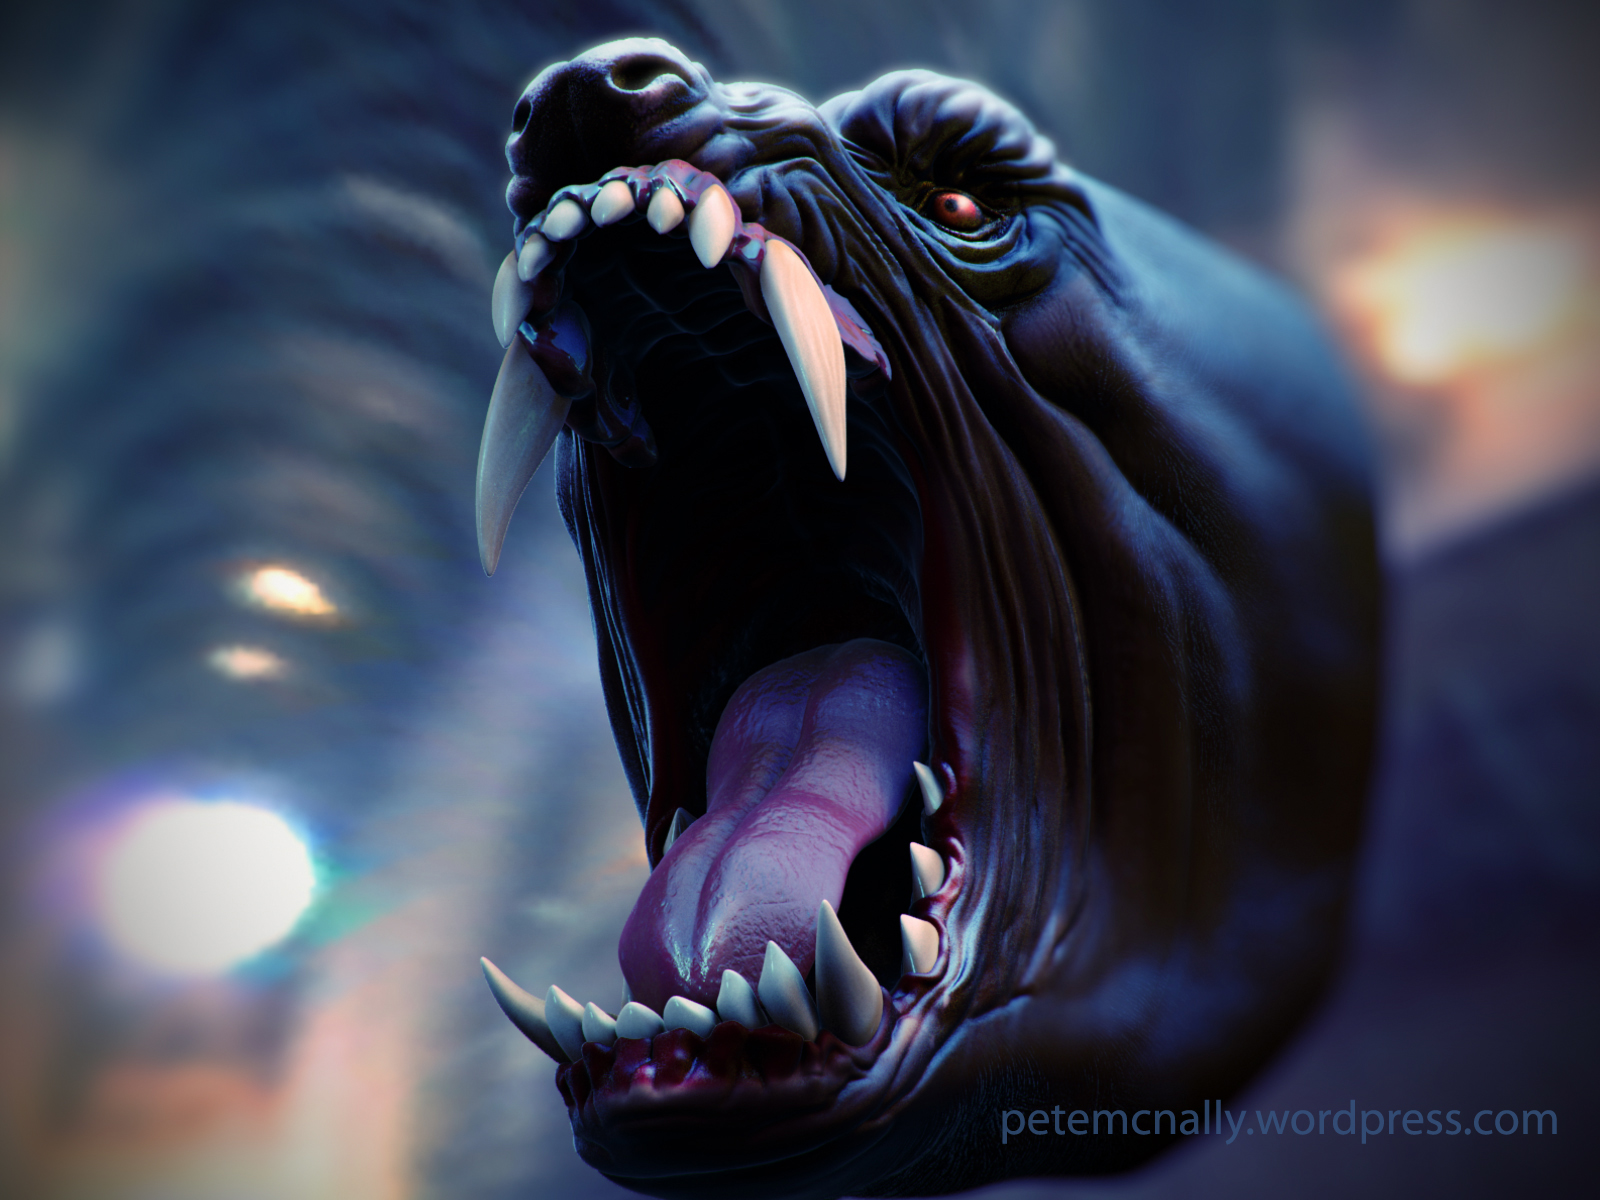
If you are a visual artist of any description you should go and see Prometheus, it is a stunning looking film. I’ve been struck by the world of Ridley Scott’s Alien, especially the “Space Jockey” or “Engineer” characters and I have been messing around with a Mudbox sculpt for a tutorial I’m working on. I was testing some texture work and turned the early results into a piece of fan art.
Lay of the land…
•May 15, 2012 • 8 CommentsI’ve been doing quite a bit of research lately at home and in work on a pipeline for realistic real-time terrain for games and have been evaluating a few applications for the workflow. That involves a bunch of test renders, import/export, bit depths, height maps and boring texture formats so I’ve had some fun putting together some renders of environments from my research. Created in GeoControl and Mudbox and rendered in 3dsmax using Mental Ray.
Full moon, class dismissed…
•April 24, 2012 • 3 CommentsThis Wednesday evening is the last class in the Mudbox course I’ve been teaching, and we’re looking at some lighting, compositing and presentation techniques. Hopefully my students should at this point have a nicely sculpted and textured werewolf head based on the provided base mesh. I’ve been doing some HDRI lighting tests in Mental Ray and Vray with the occasional pass from the Scanline (fresnel, volume light) and comping/post production in Photoshop.


There is still some further texture work to do and I’d like to add some proper hair in the weeks ahead, I’d also like to extend the model adding neck and shoulders – all depends on that elusive free time!
