A quickie environment material, shot at a bus stop in a leafy area. The camera was on burst mode, so it took a load of photos every time I clicked, I wasn’t sure what was up with it when it took so long to respond! The pictures weren’t super sharp, but weren’t as blurry as I suspected they might be from the handheld movement. All rendering is real-time in Toolbag 3, here’s a sphere with the end result:
Applied to a ground plane for context:
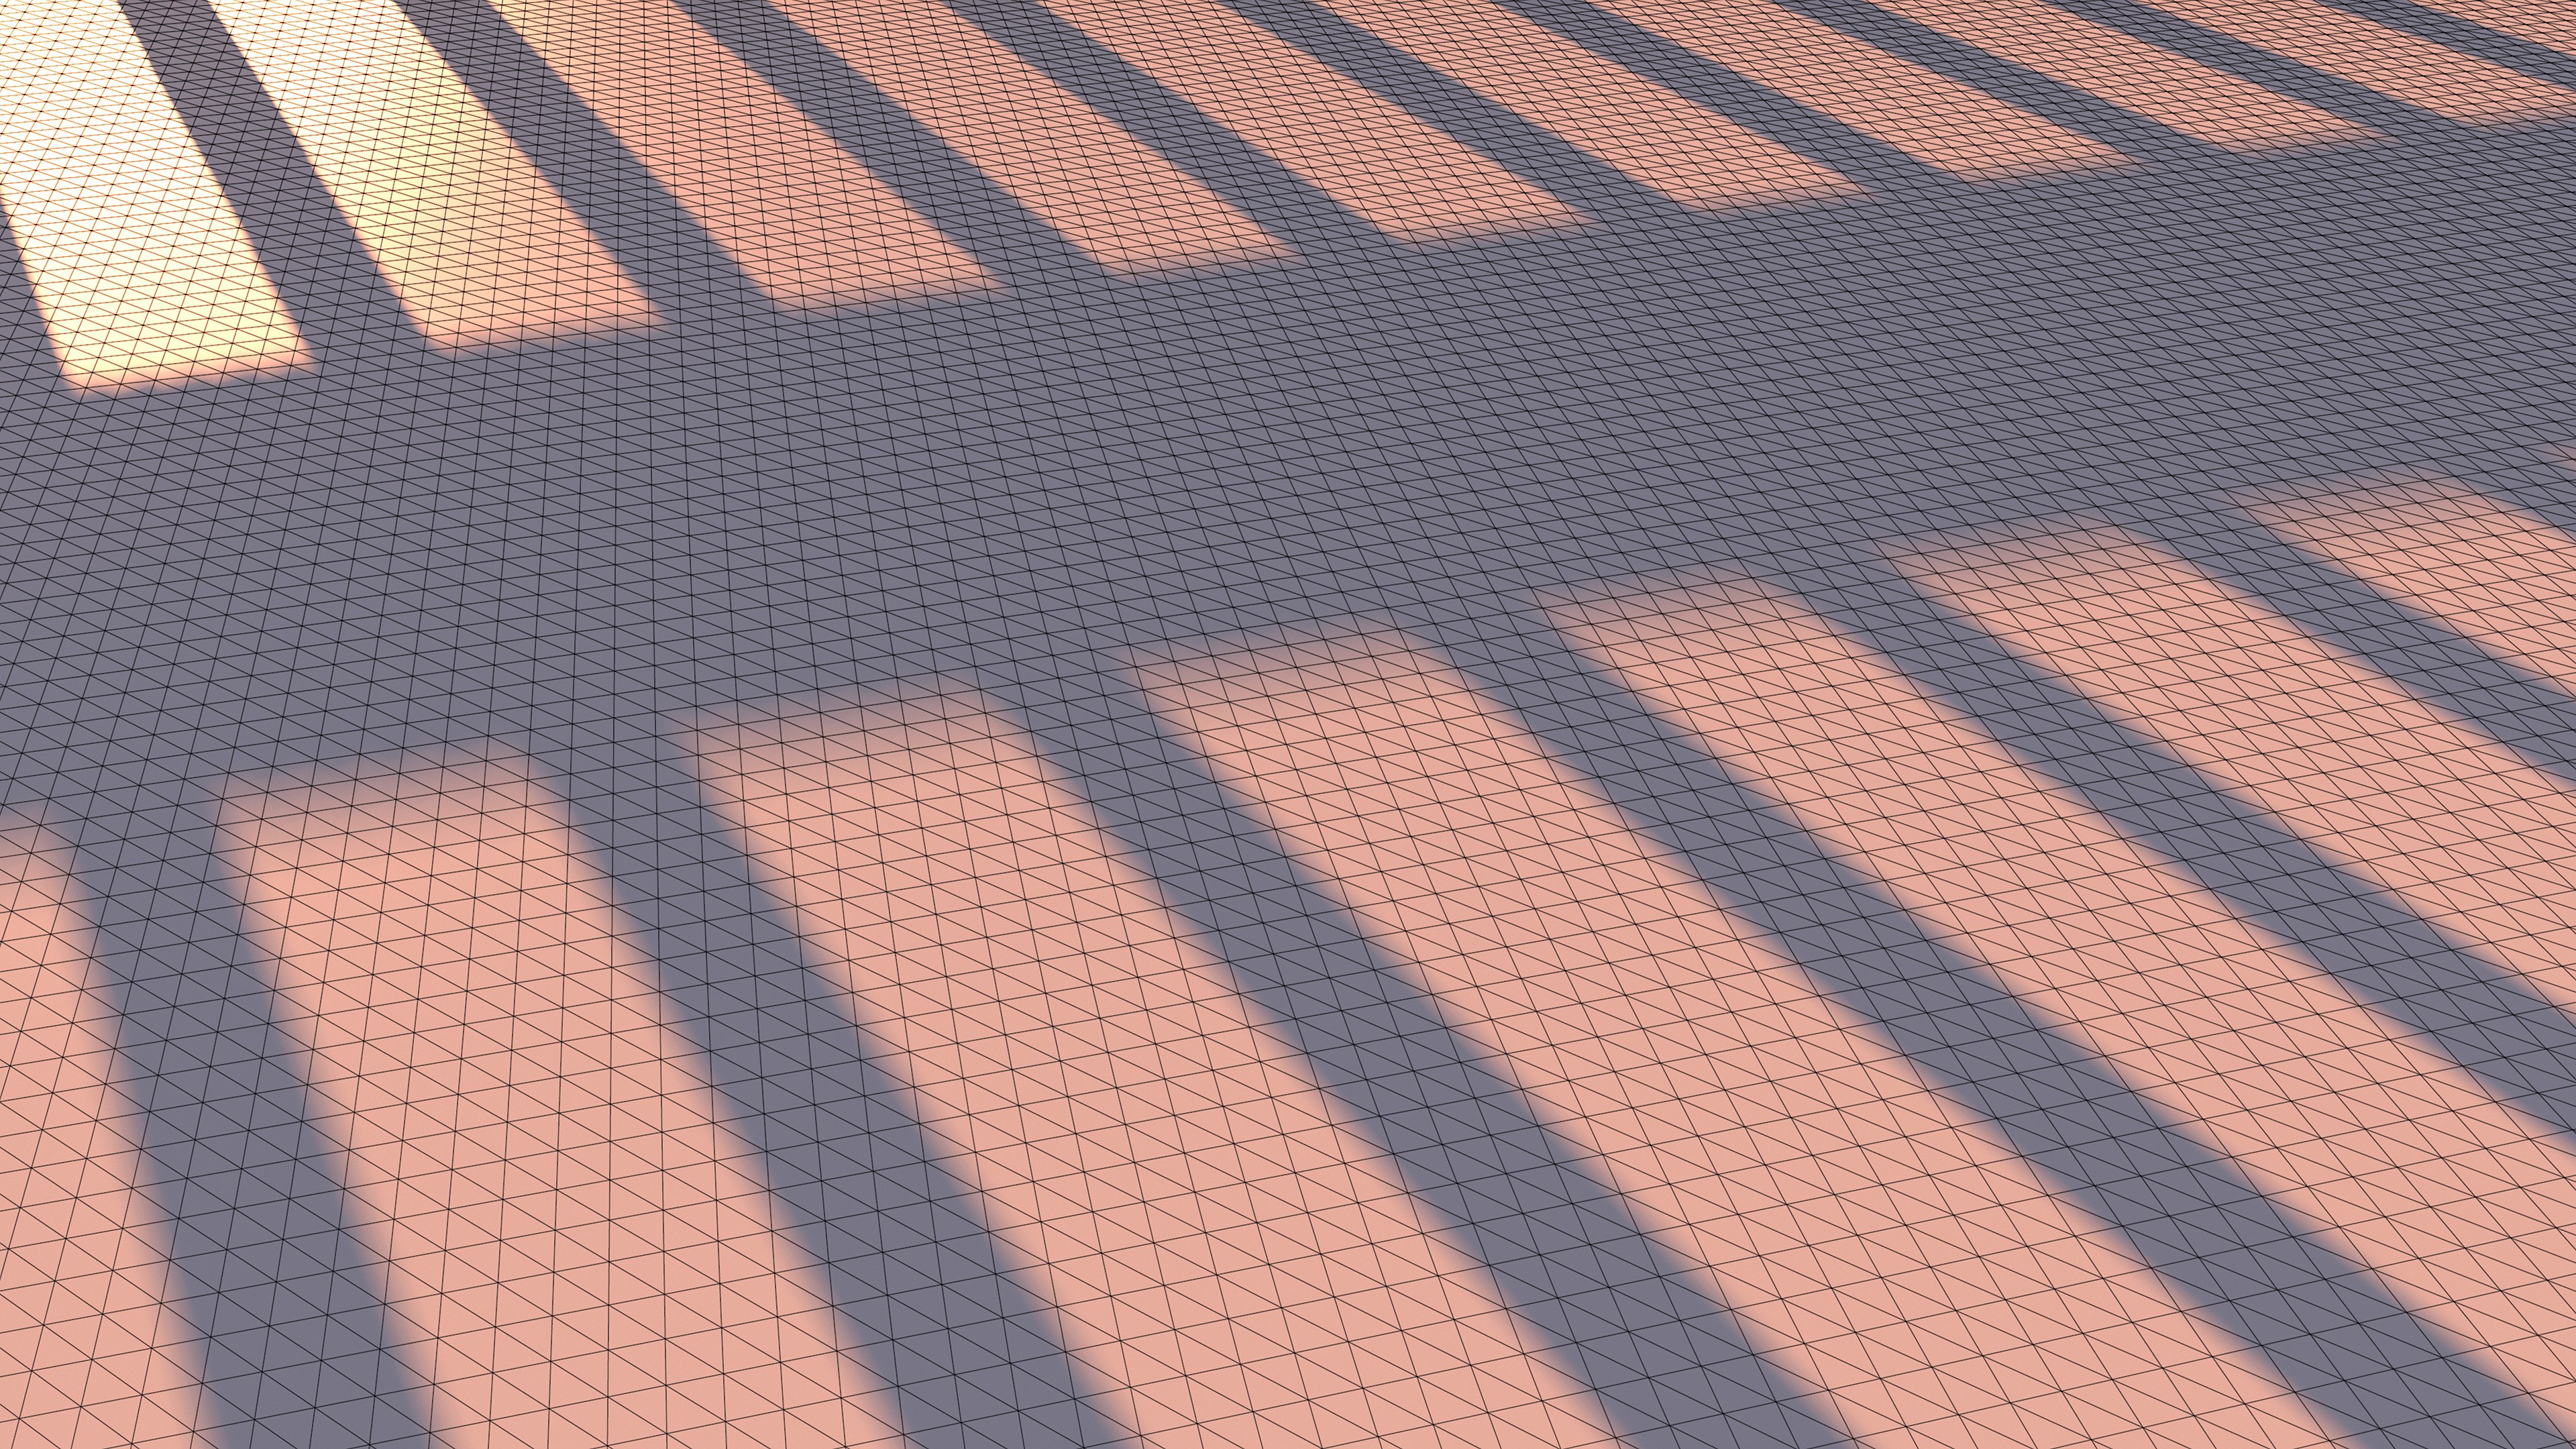
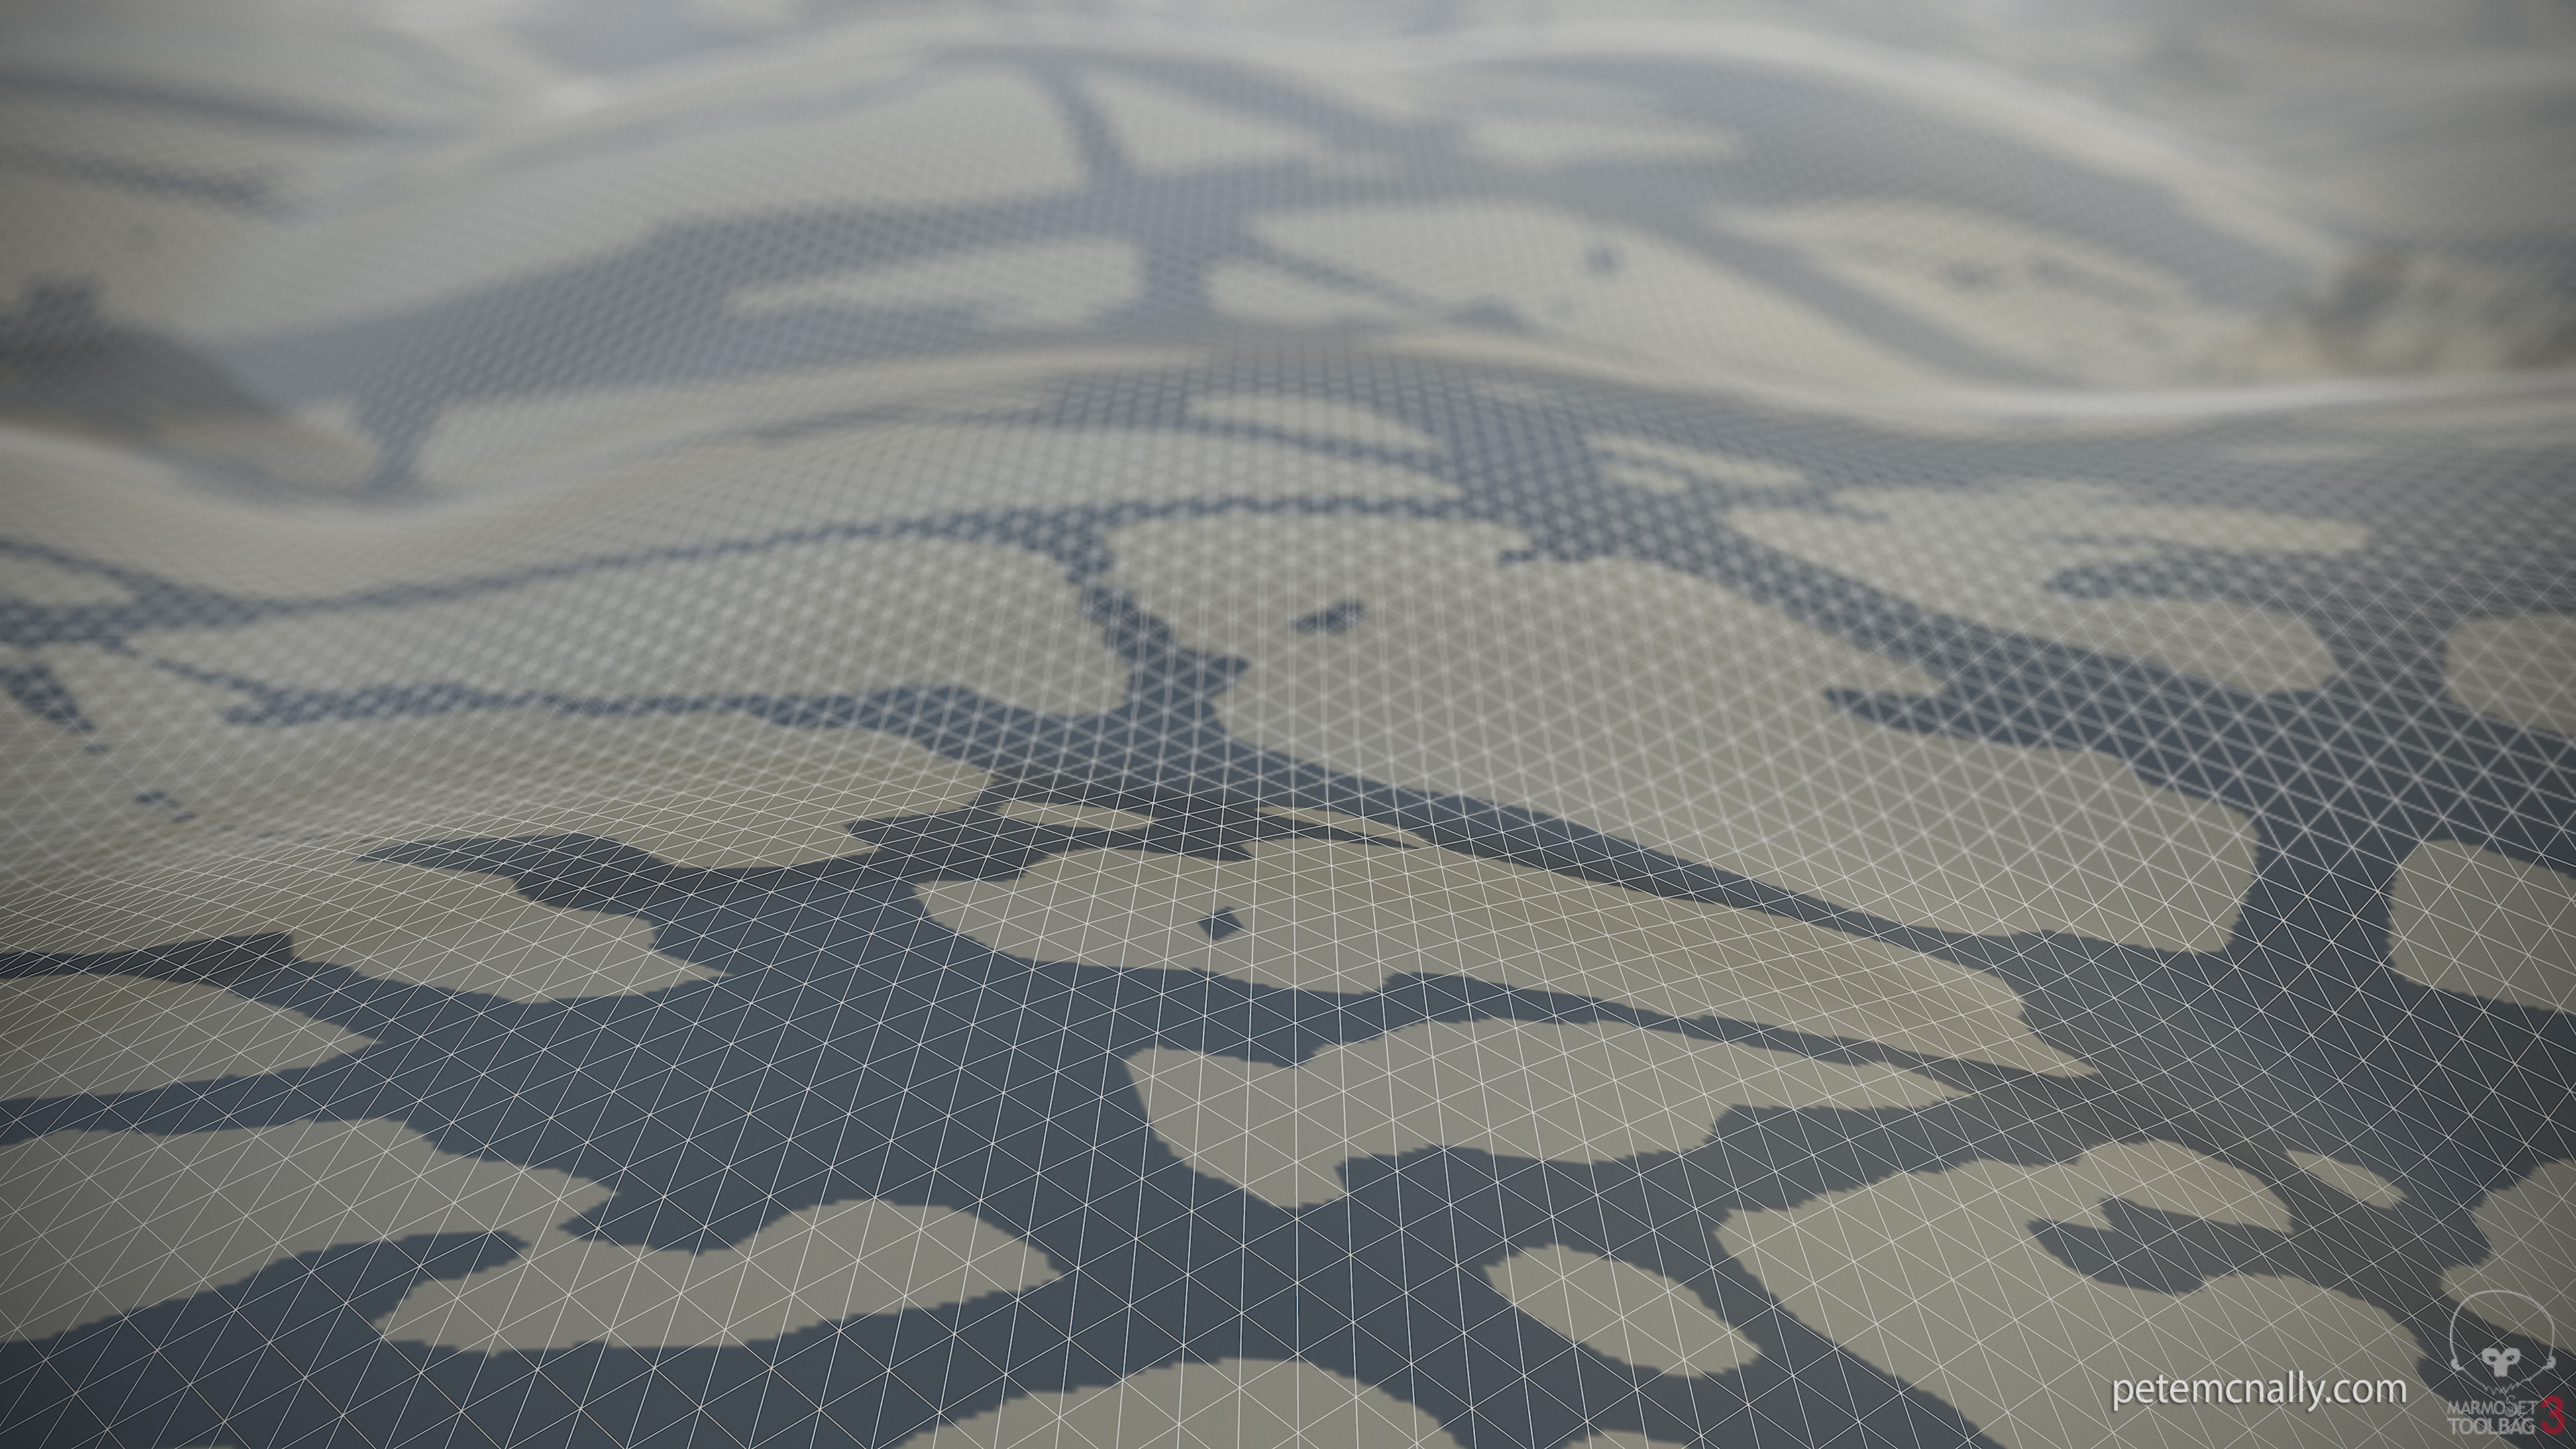
Here’s the initial tessellation of the ground plane, I kept it flat as there are pools of standing water among the leaves, and adding noise into the ground plane curved the water surface and looked bad. I used the useful “water level” node in Substance Designer to add the water puddles and have all maps updated automatically. There was a slight slope to the ground I shot, and this was reflected in the height map, so I went back into Knald to generate a “flatter” height map from normals. This worked better with the puddles. Designer was also used for AO cancellation in the albedo and to correct texture values for PBR.
Further tessellation of the ground with Toolbag’s PN triangles.
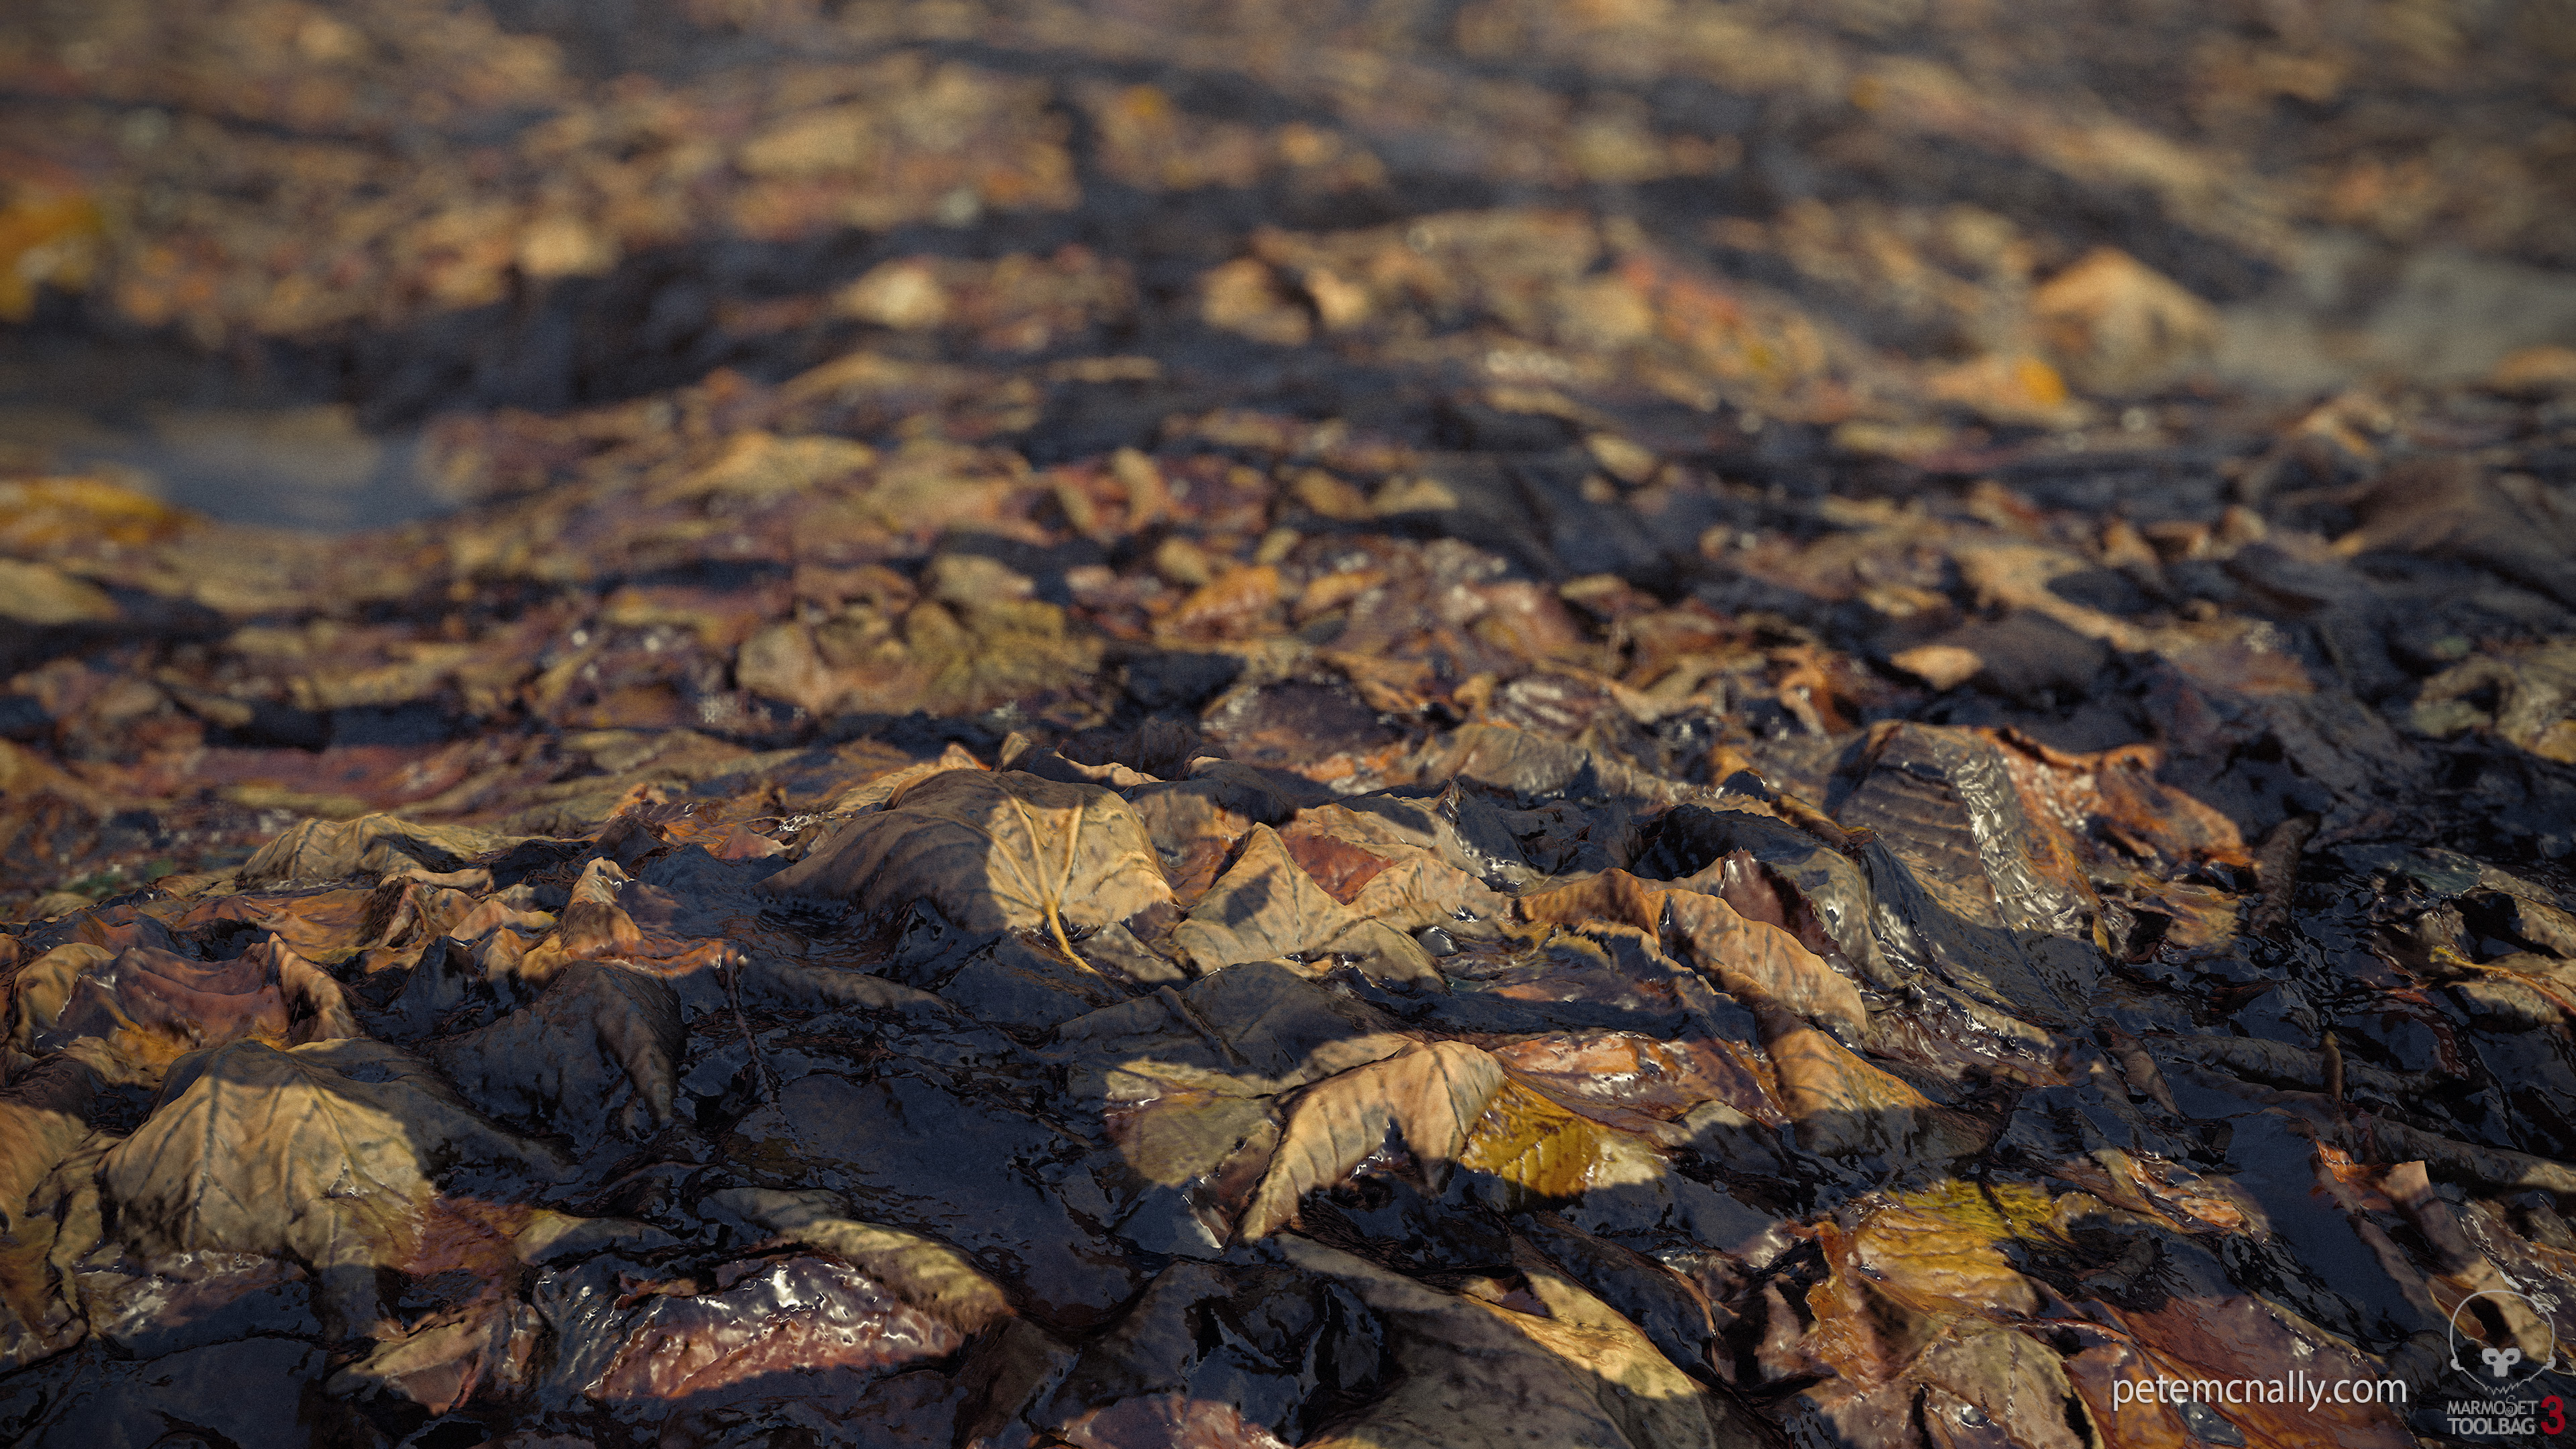
Added sub surface scattering to catch the seasonal low sun light:
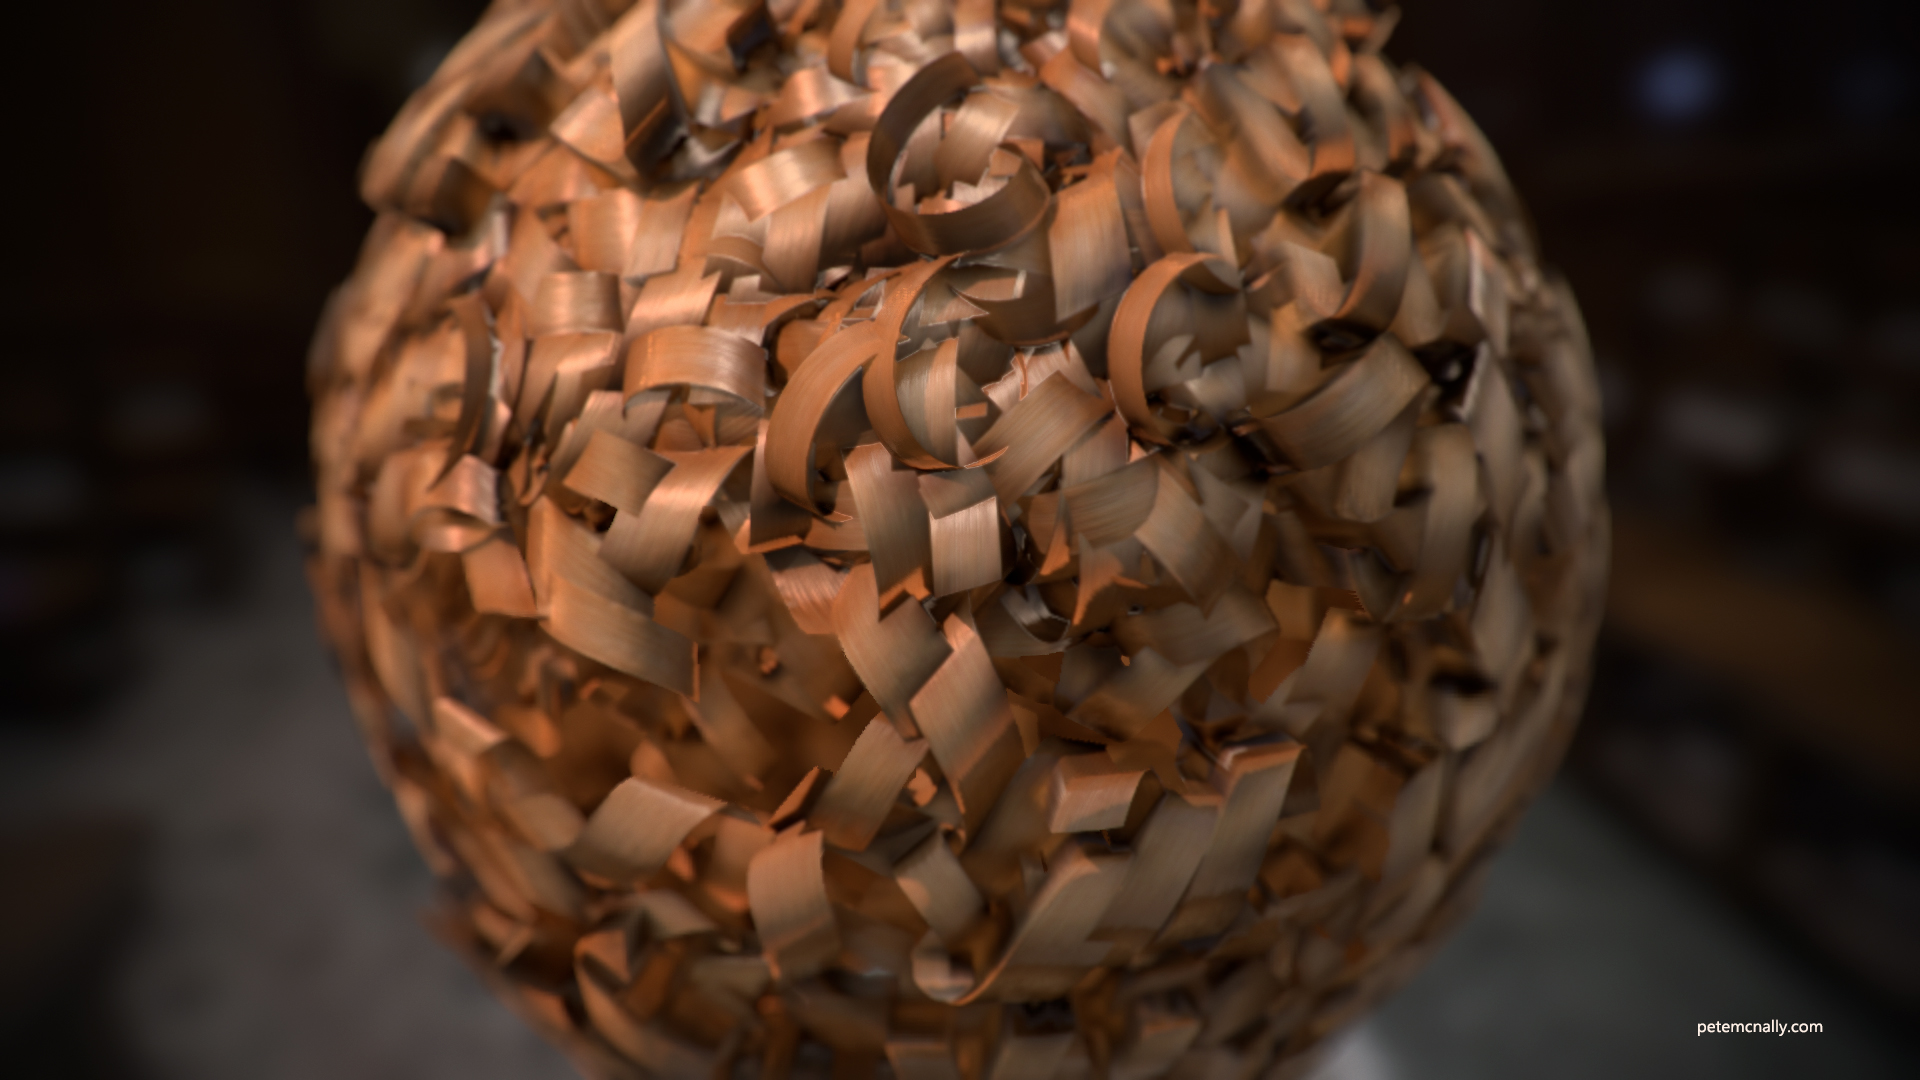
Not much to this material exercise, it’s a spin off from something I needed for another personal project. It’s based off extruded helix splines in 3DSMax, with added rigid body dynamics and a simple stacking simulation to settle the coils. Missing detail was filled in with Artomatix, on top of seam removal. This has limited usage but was decent background filler for what I needed, I’ll be posting more about that soon.
I missed blogging last month, despite having worked on a bunch of stuff since my last post. I’m actually posting over on Artstation more often than here, but it’s mainly images, I’m trying to ensure that my posts here have more meat on the bones, if you’ll pardon the pun, so here we go!
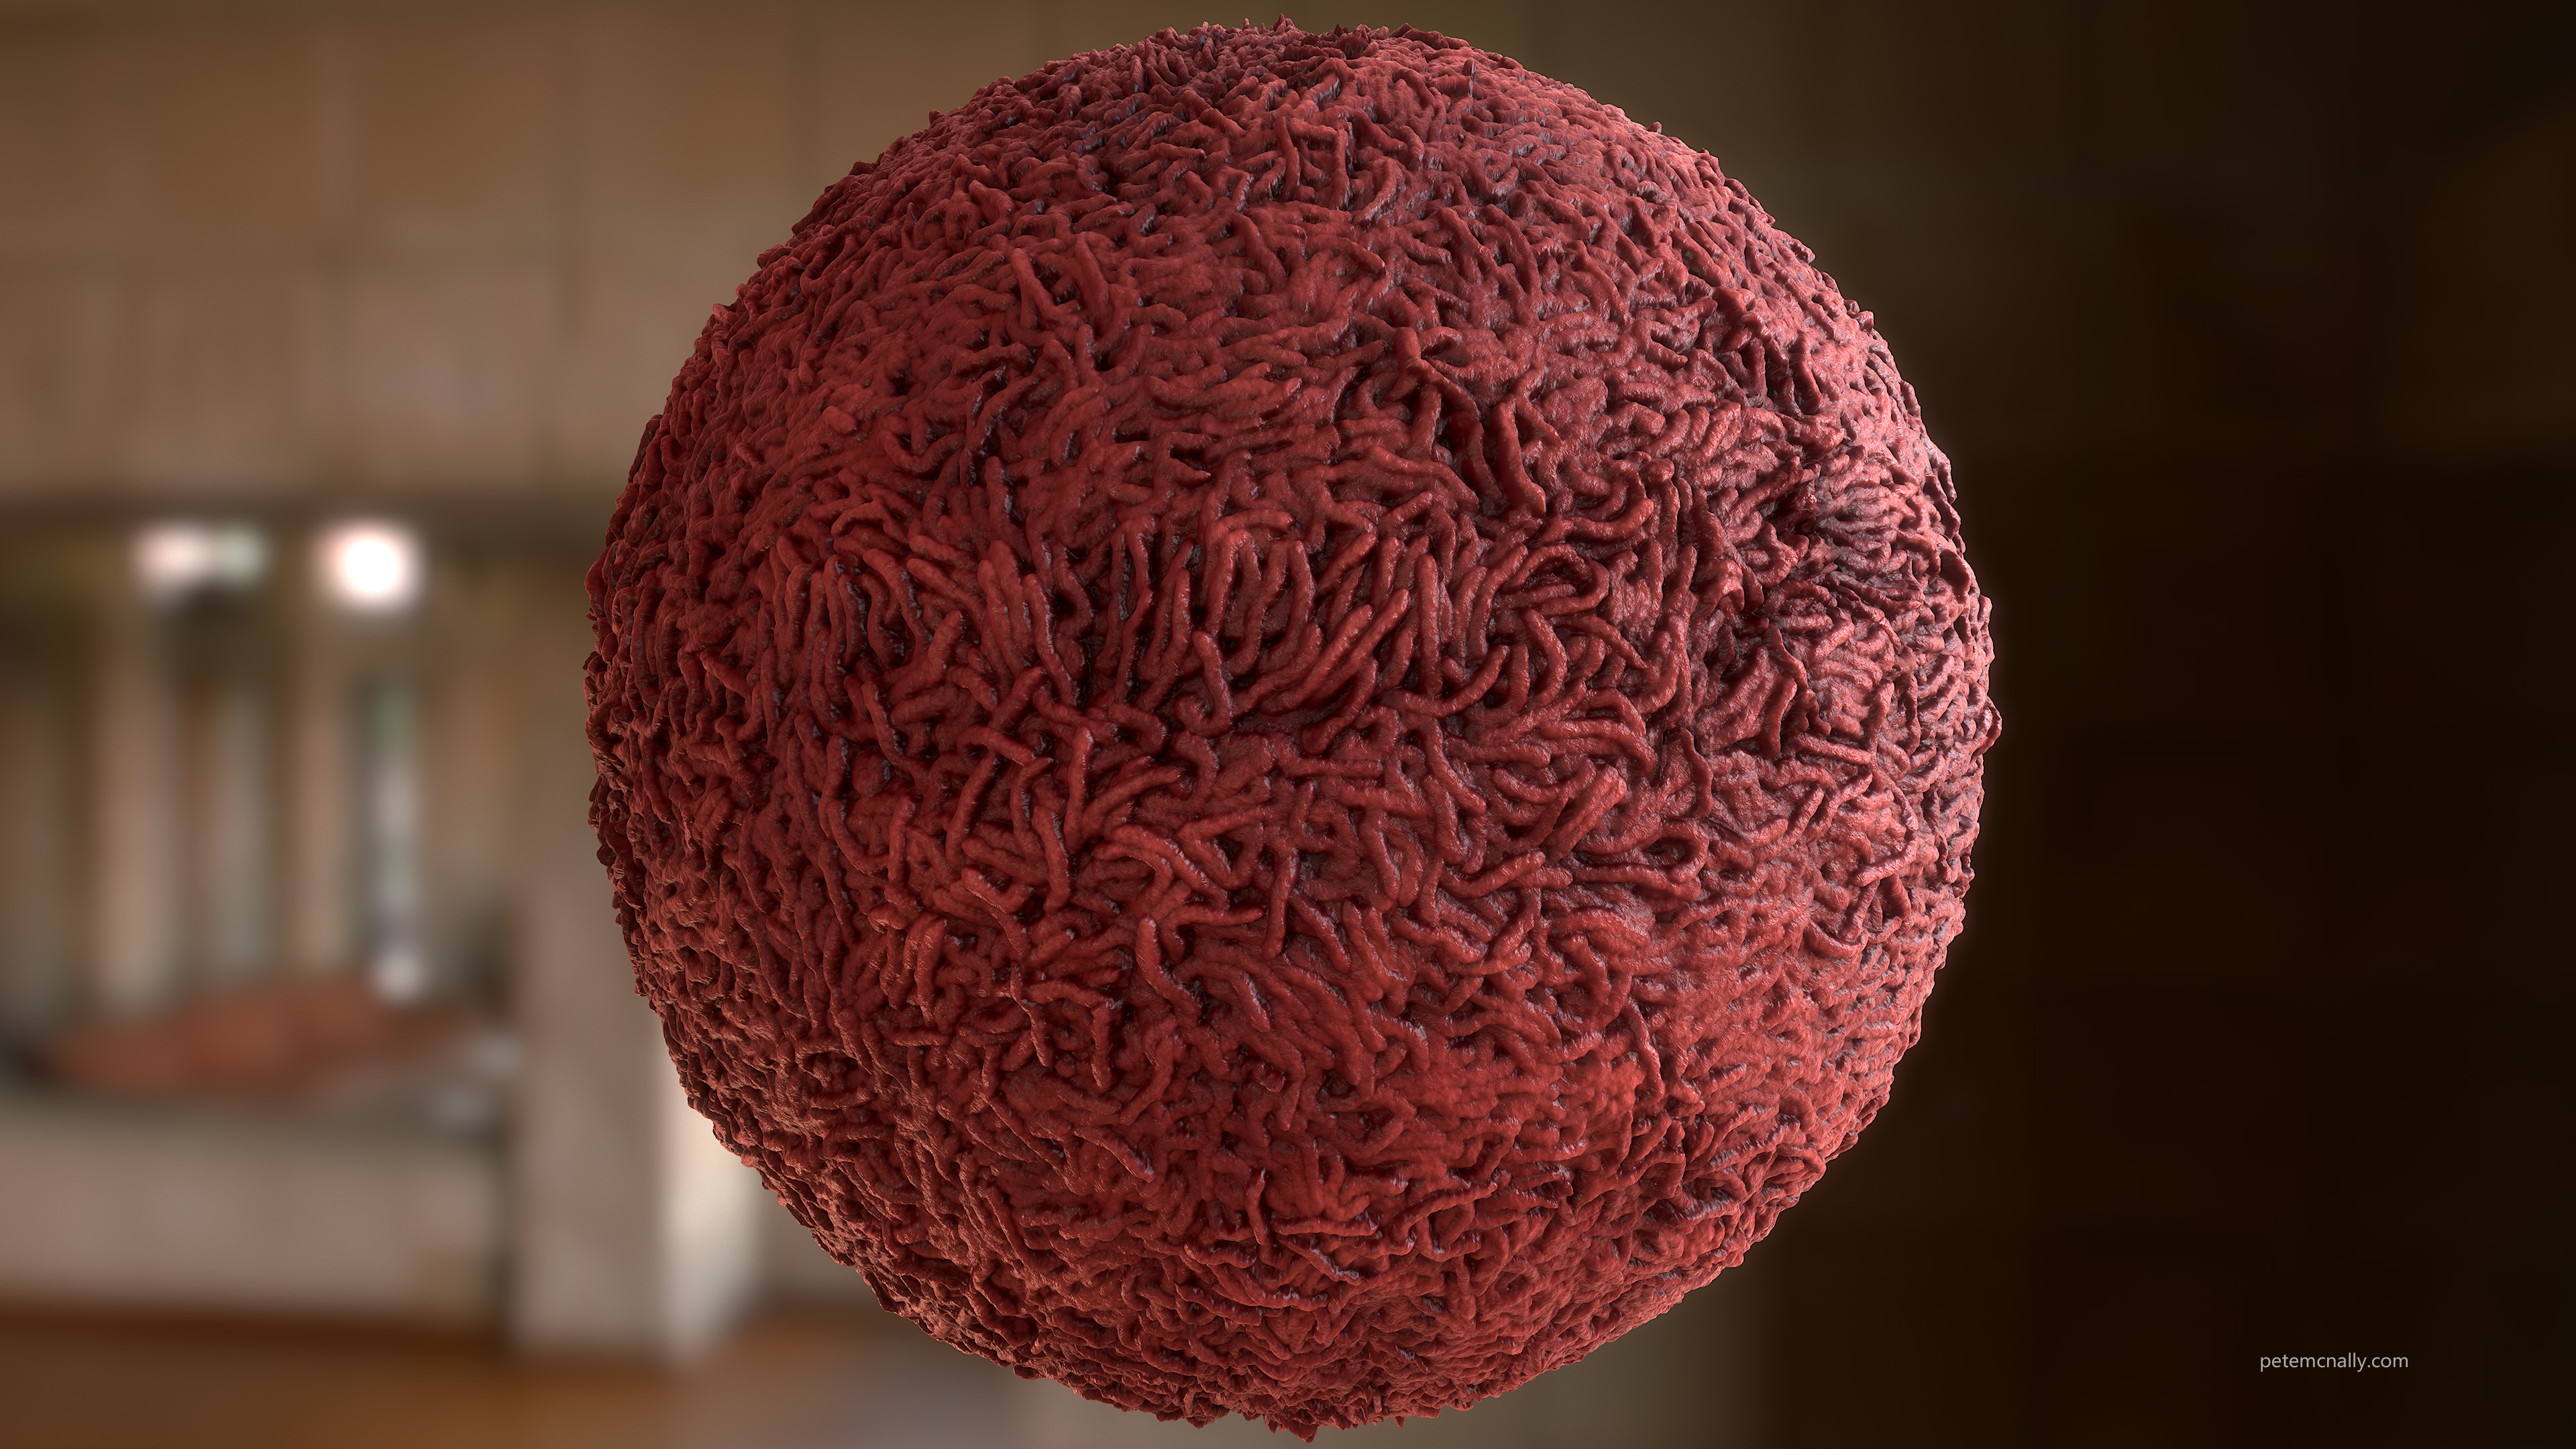
There’s a mat in the bathroom at home that sits under the sink, it’s a sort of towelly material, with fluffy tendrils. I’ve looked at it many times and wondered if it would be possible to scan with photogrammetry, although subjects with tendrils are usually very difficult to work with due to occlusion, this particular mat had been washed and dried and trampled on many times, and by now the tendrils were limp and compacted. I was pleased with the attempt, from about 40 photos taken on my phone and Reality Capture. Everything below was rendered in real-time in Toolbag 3:
The AO worked out well, as the mat was basically a uniform hue, all that was really captured in the input images was the pinkish colour and ambient shadows, so I desaturated this and blended it over AO generated from the high res scan geometry. Upon inspecting the normal and height maps generated, they looked like they could serve well as a basis for some sort of gooey entrails or noodles, so after removing texture seams in Artomatix, I set about playing with roughness values to suggest a moistness to the surface.
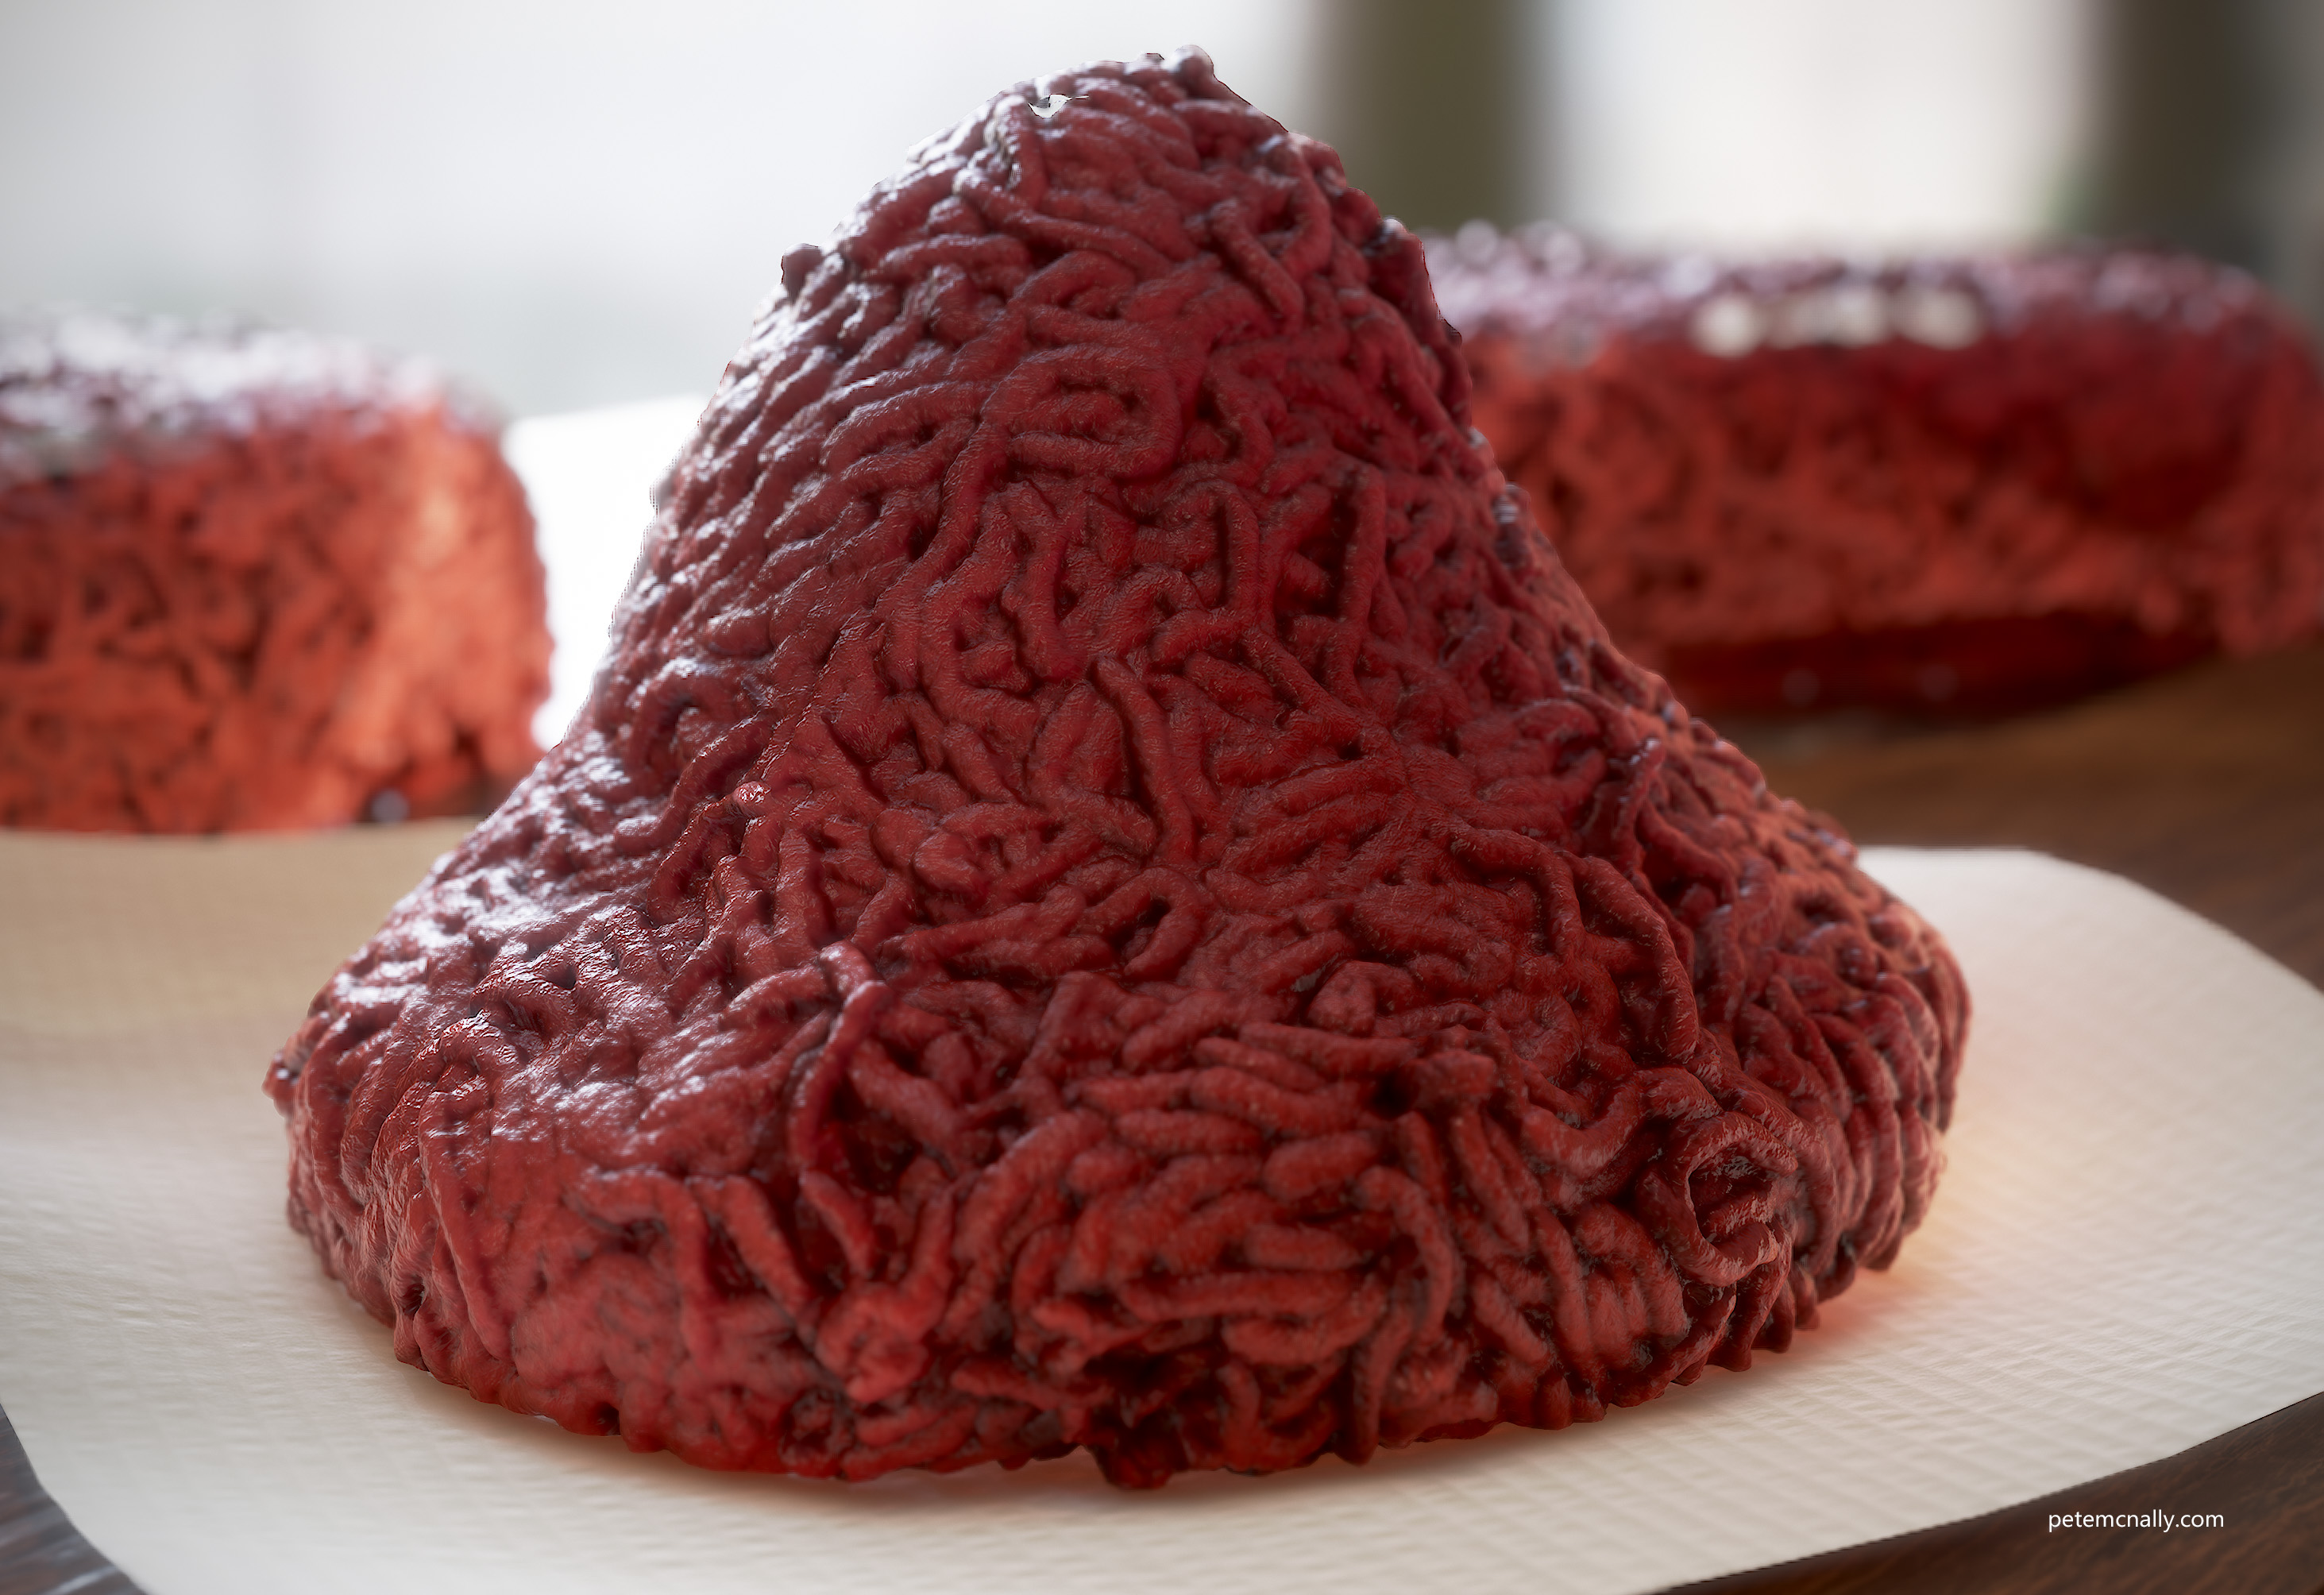
This is where it started to get interesting 😀 By shifting albedo hues around and pulling away the roughness I started to get something that resembled raw minced meat, Vegans look away now!
The great thing about tiling textures is that you can use it across different models arbitrarily, once the UV’s are well laid out or tri-planar mapping is used. I modelled a basic cone shape and used an FFD in 3dsmax to pull it into something that looked like it had been kneaded by hand. I then unwrapped the model so that the UVs warped nicely around the top of the cone and applied the material. Some sub surface scattering also helped bring realism to the material. I’m also trying some new secret sauce with lighting that I think is bringing something more to my renders.
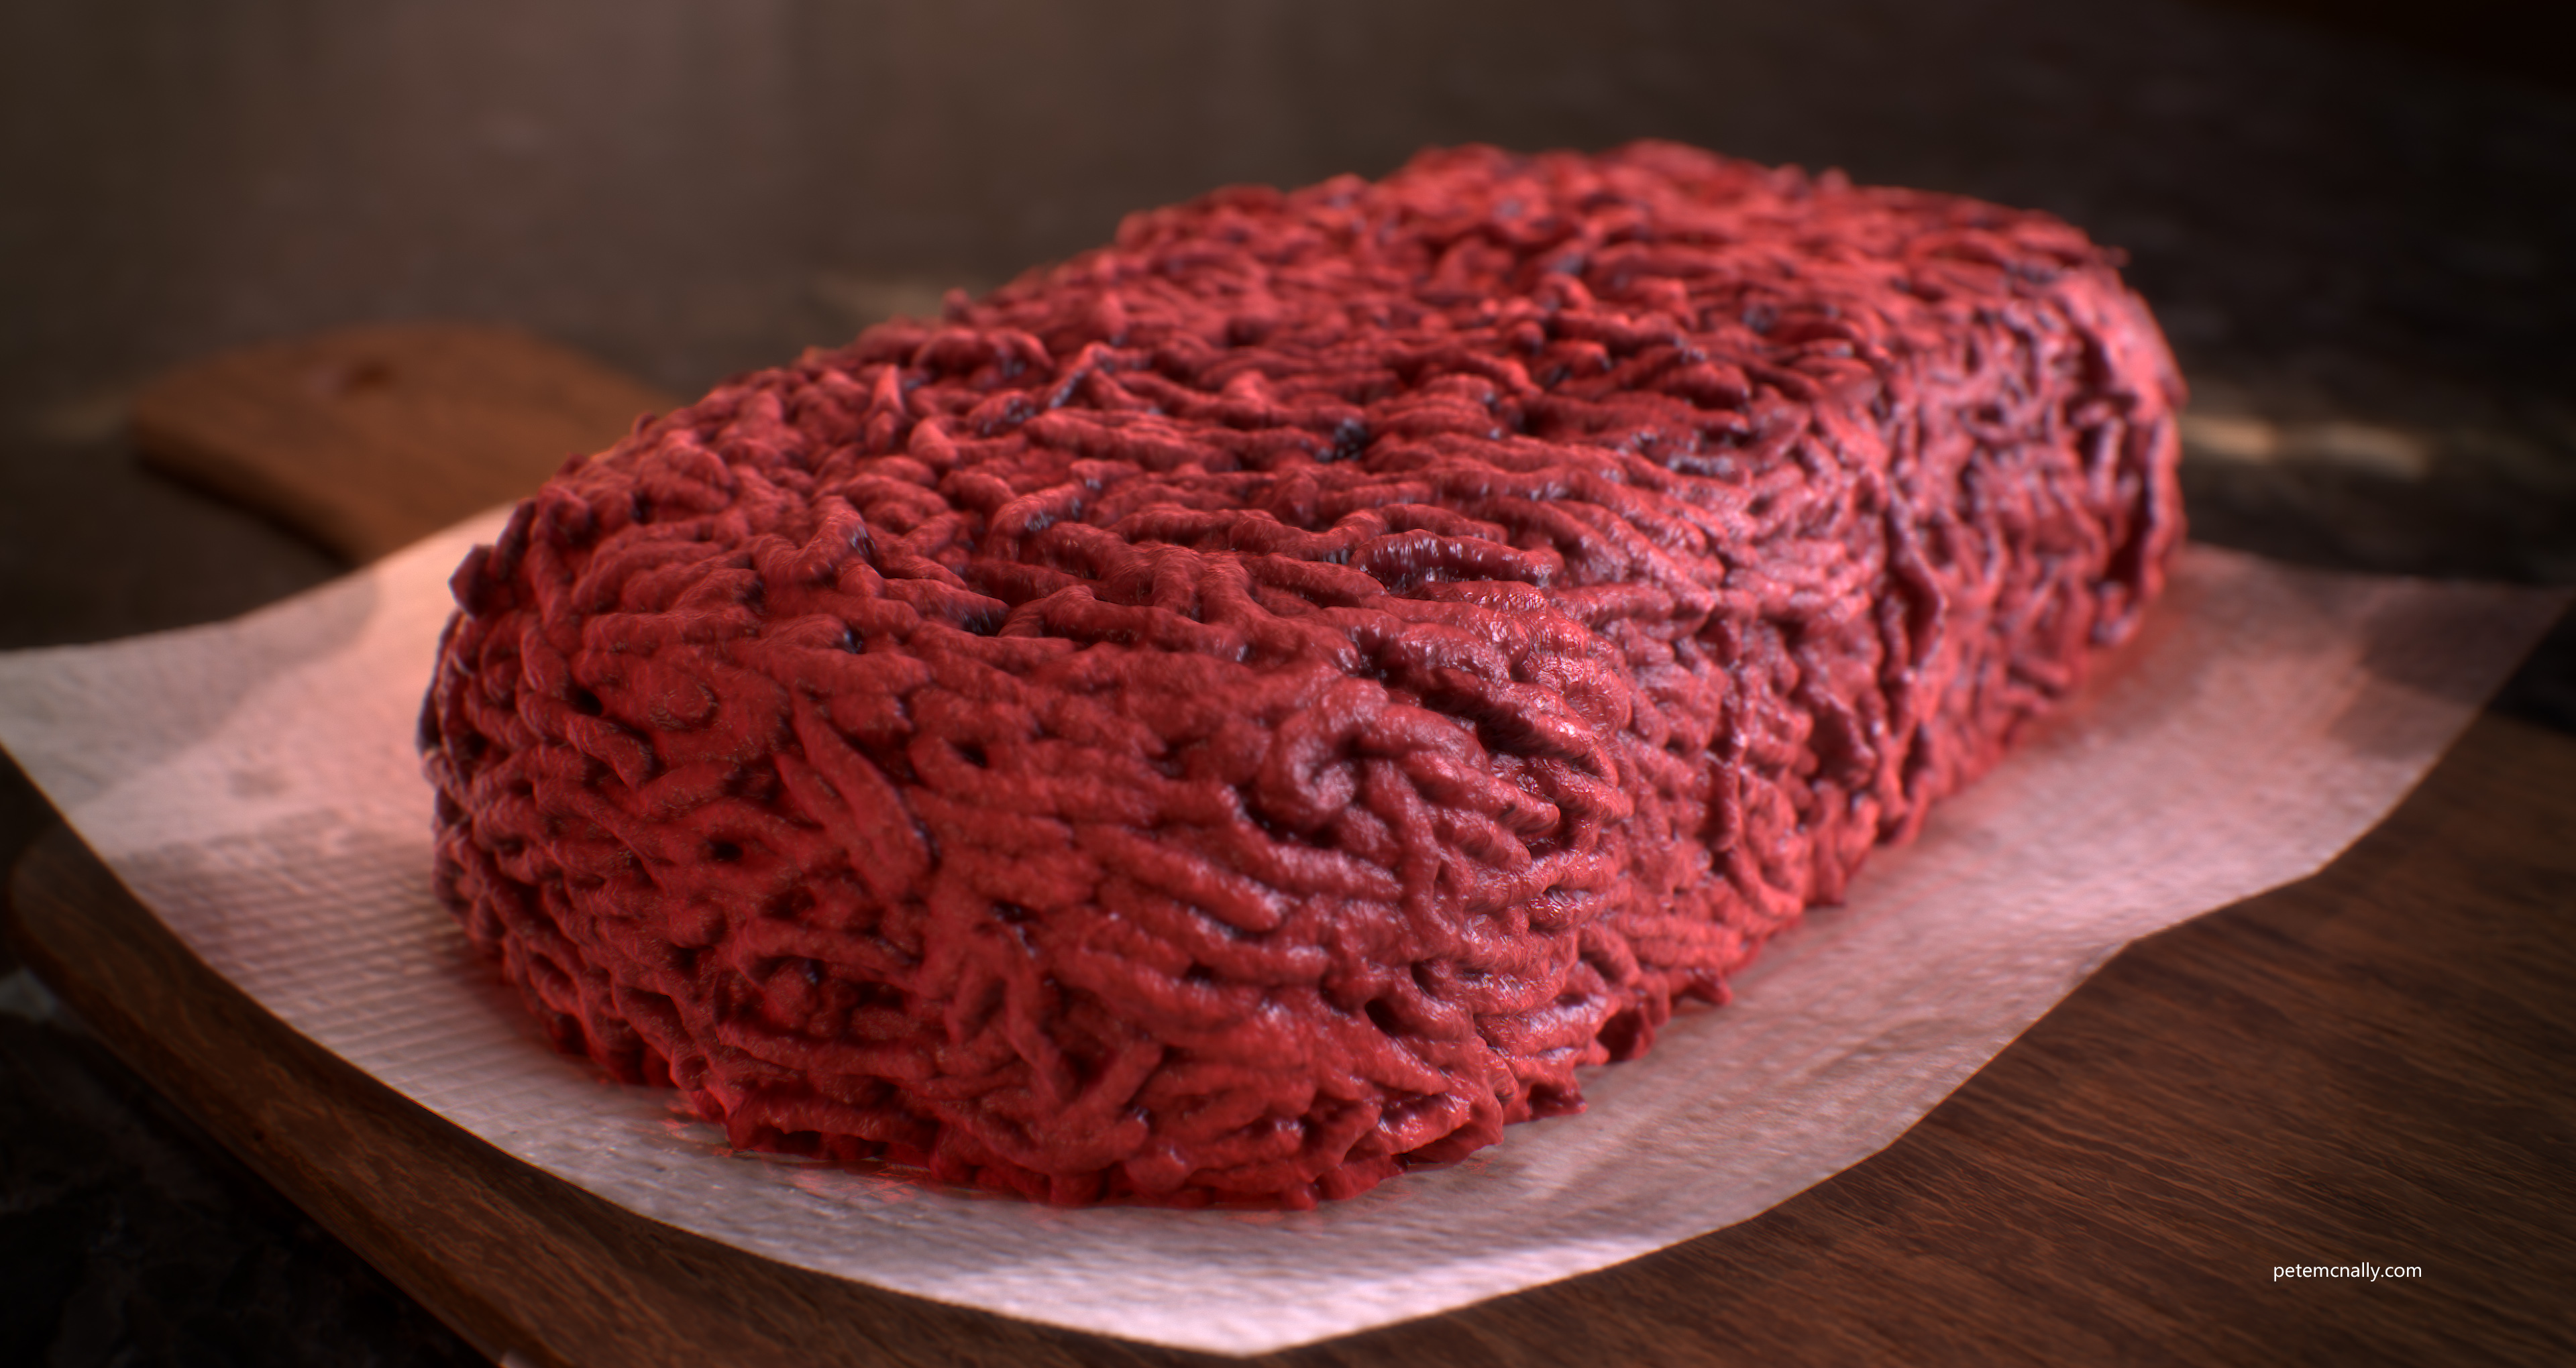
I worked into the albedo and roughness textures to bring it closer to the feel I was looking for, and although this was supposed to be a material creation exercise I modelled up a chopping board and some paper to place it on, along with a granite style worktop, which was just a plane with some stock textures from Textures.com. Adding some grease and seepage onto the paper really helped with ickiness!
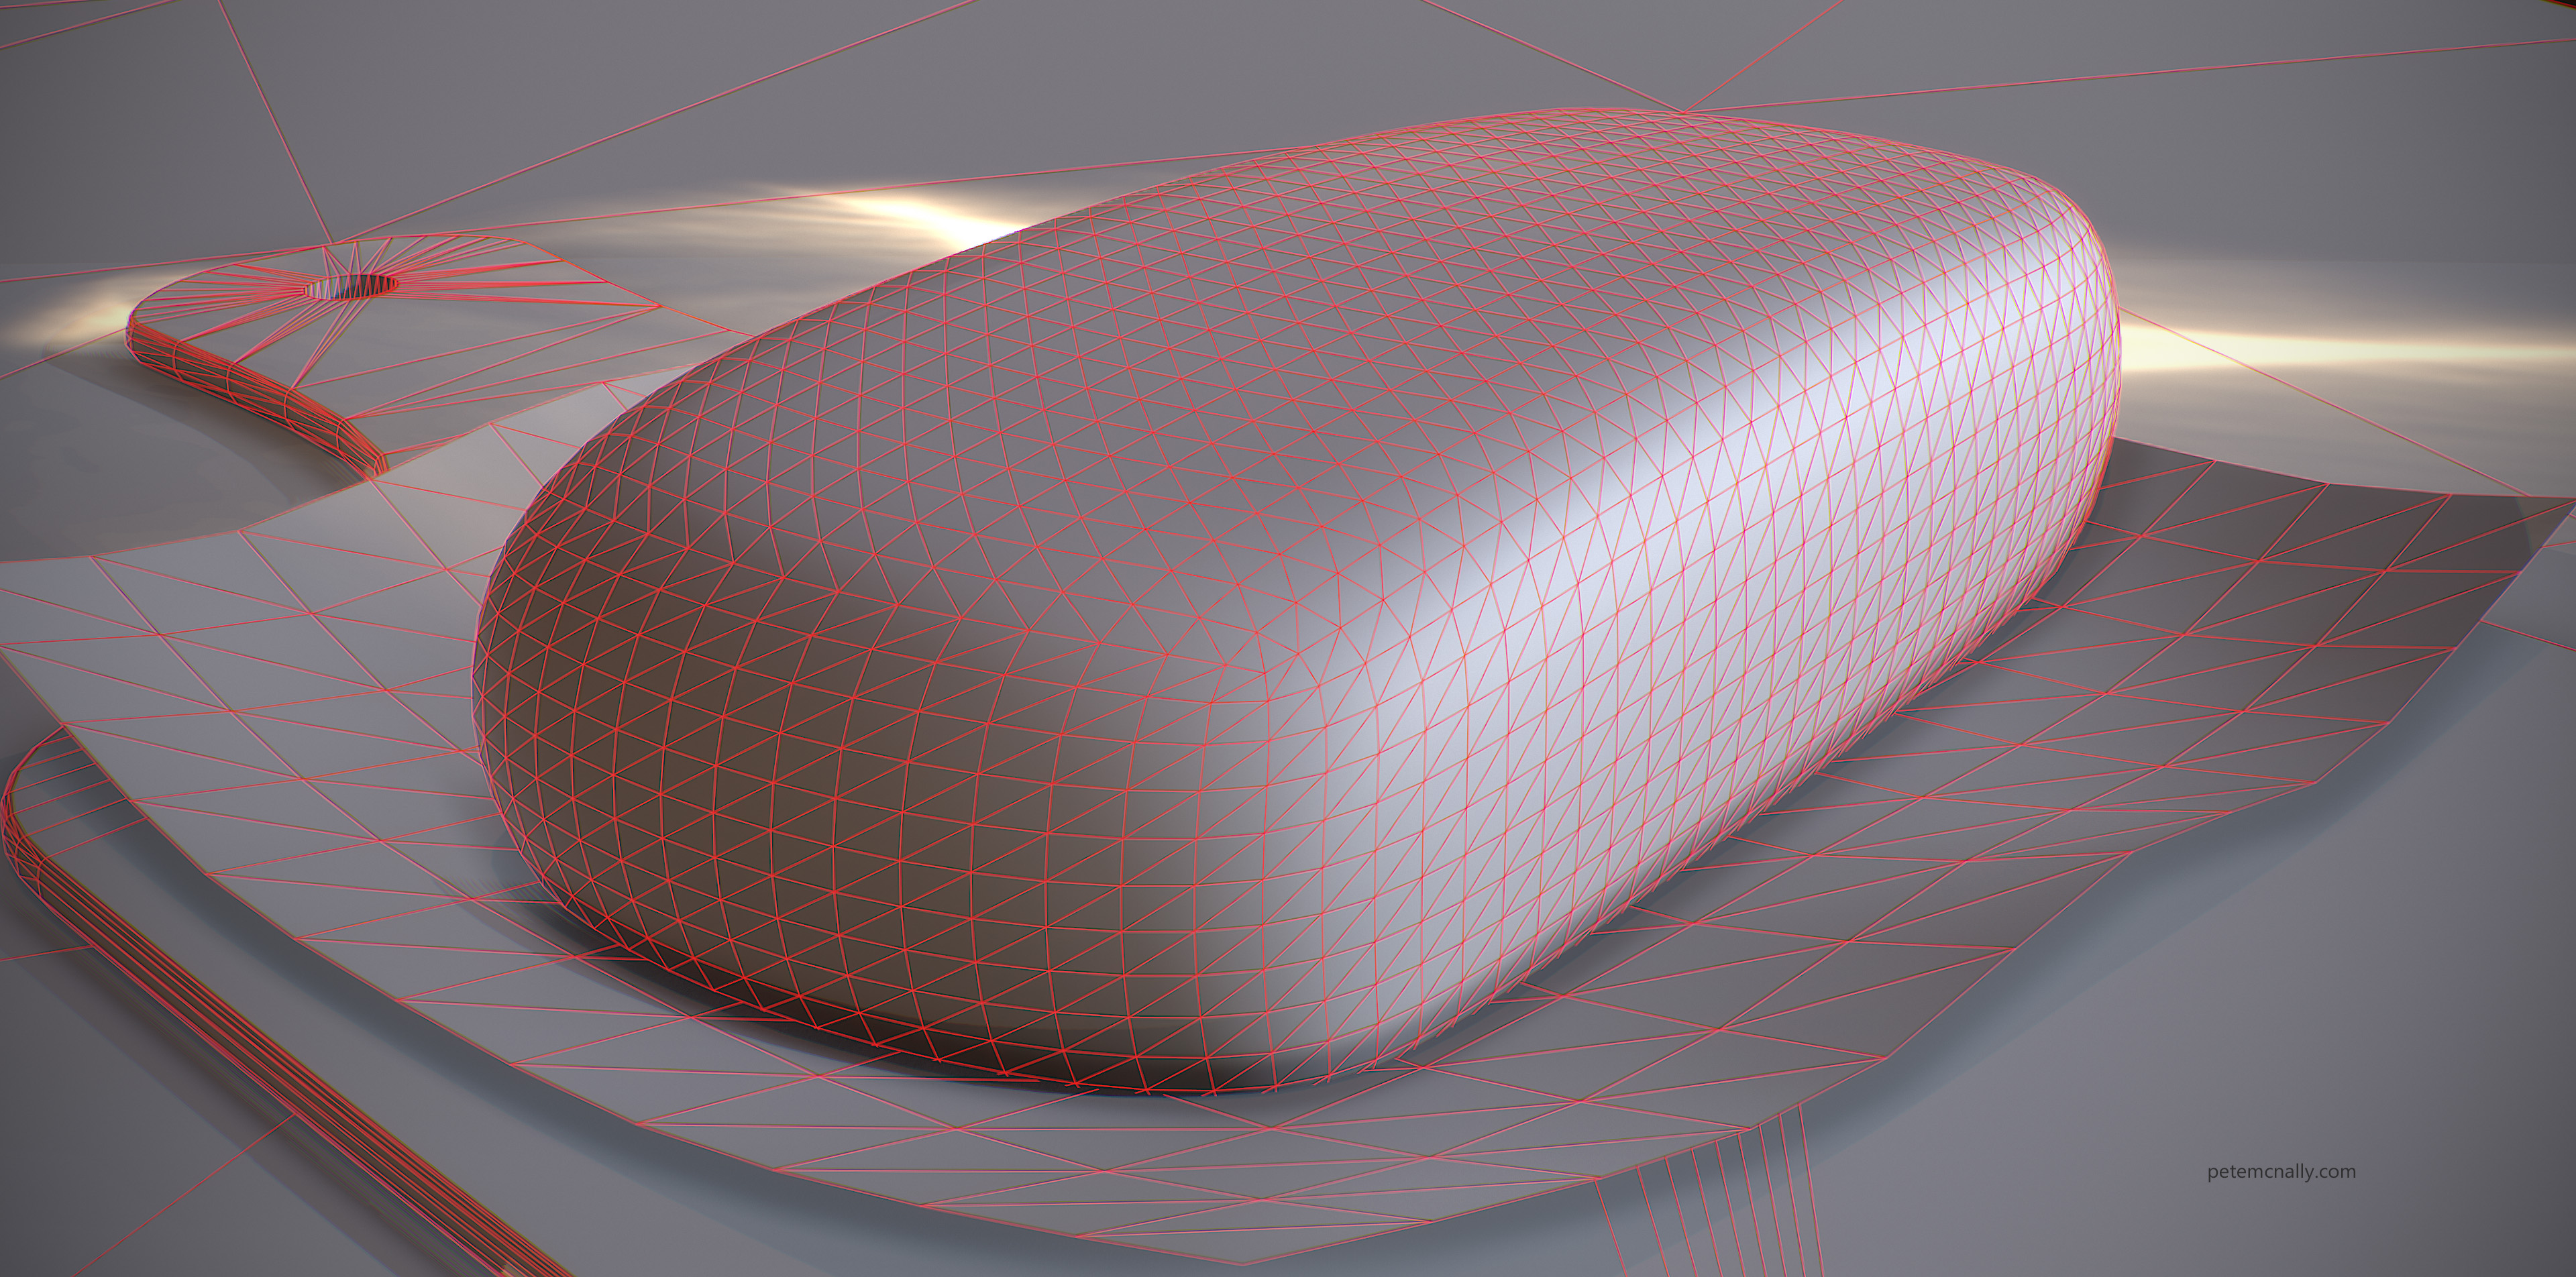
Here’s the material again on what is basically a chamfer box primitive with some slight cellular displacement.
The base geometry:
Here’s the texture breakdown:
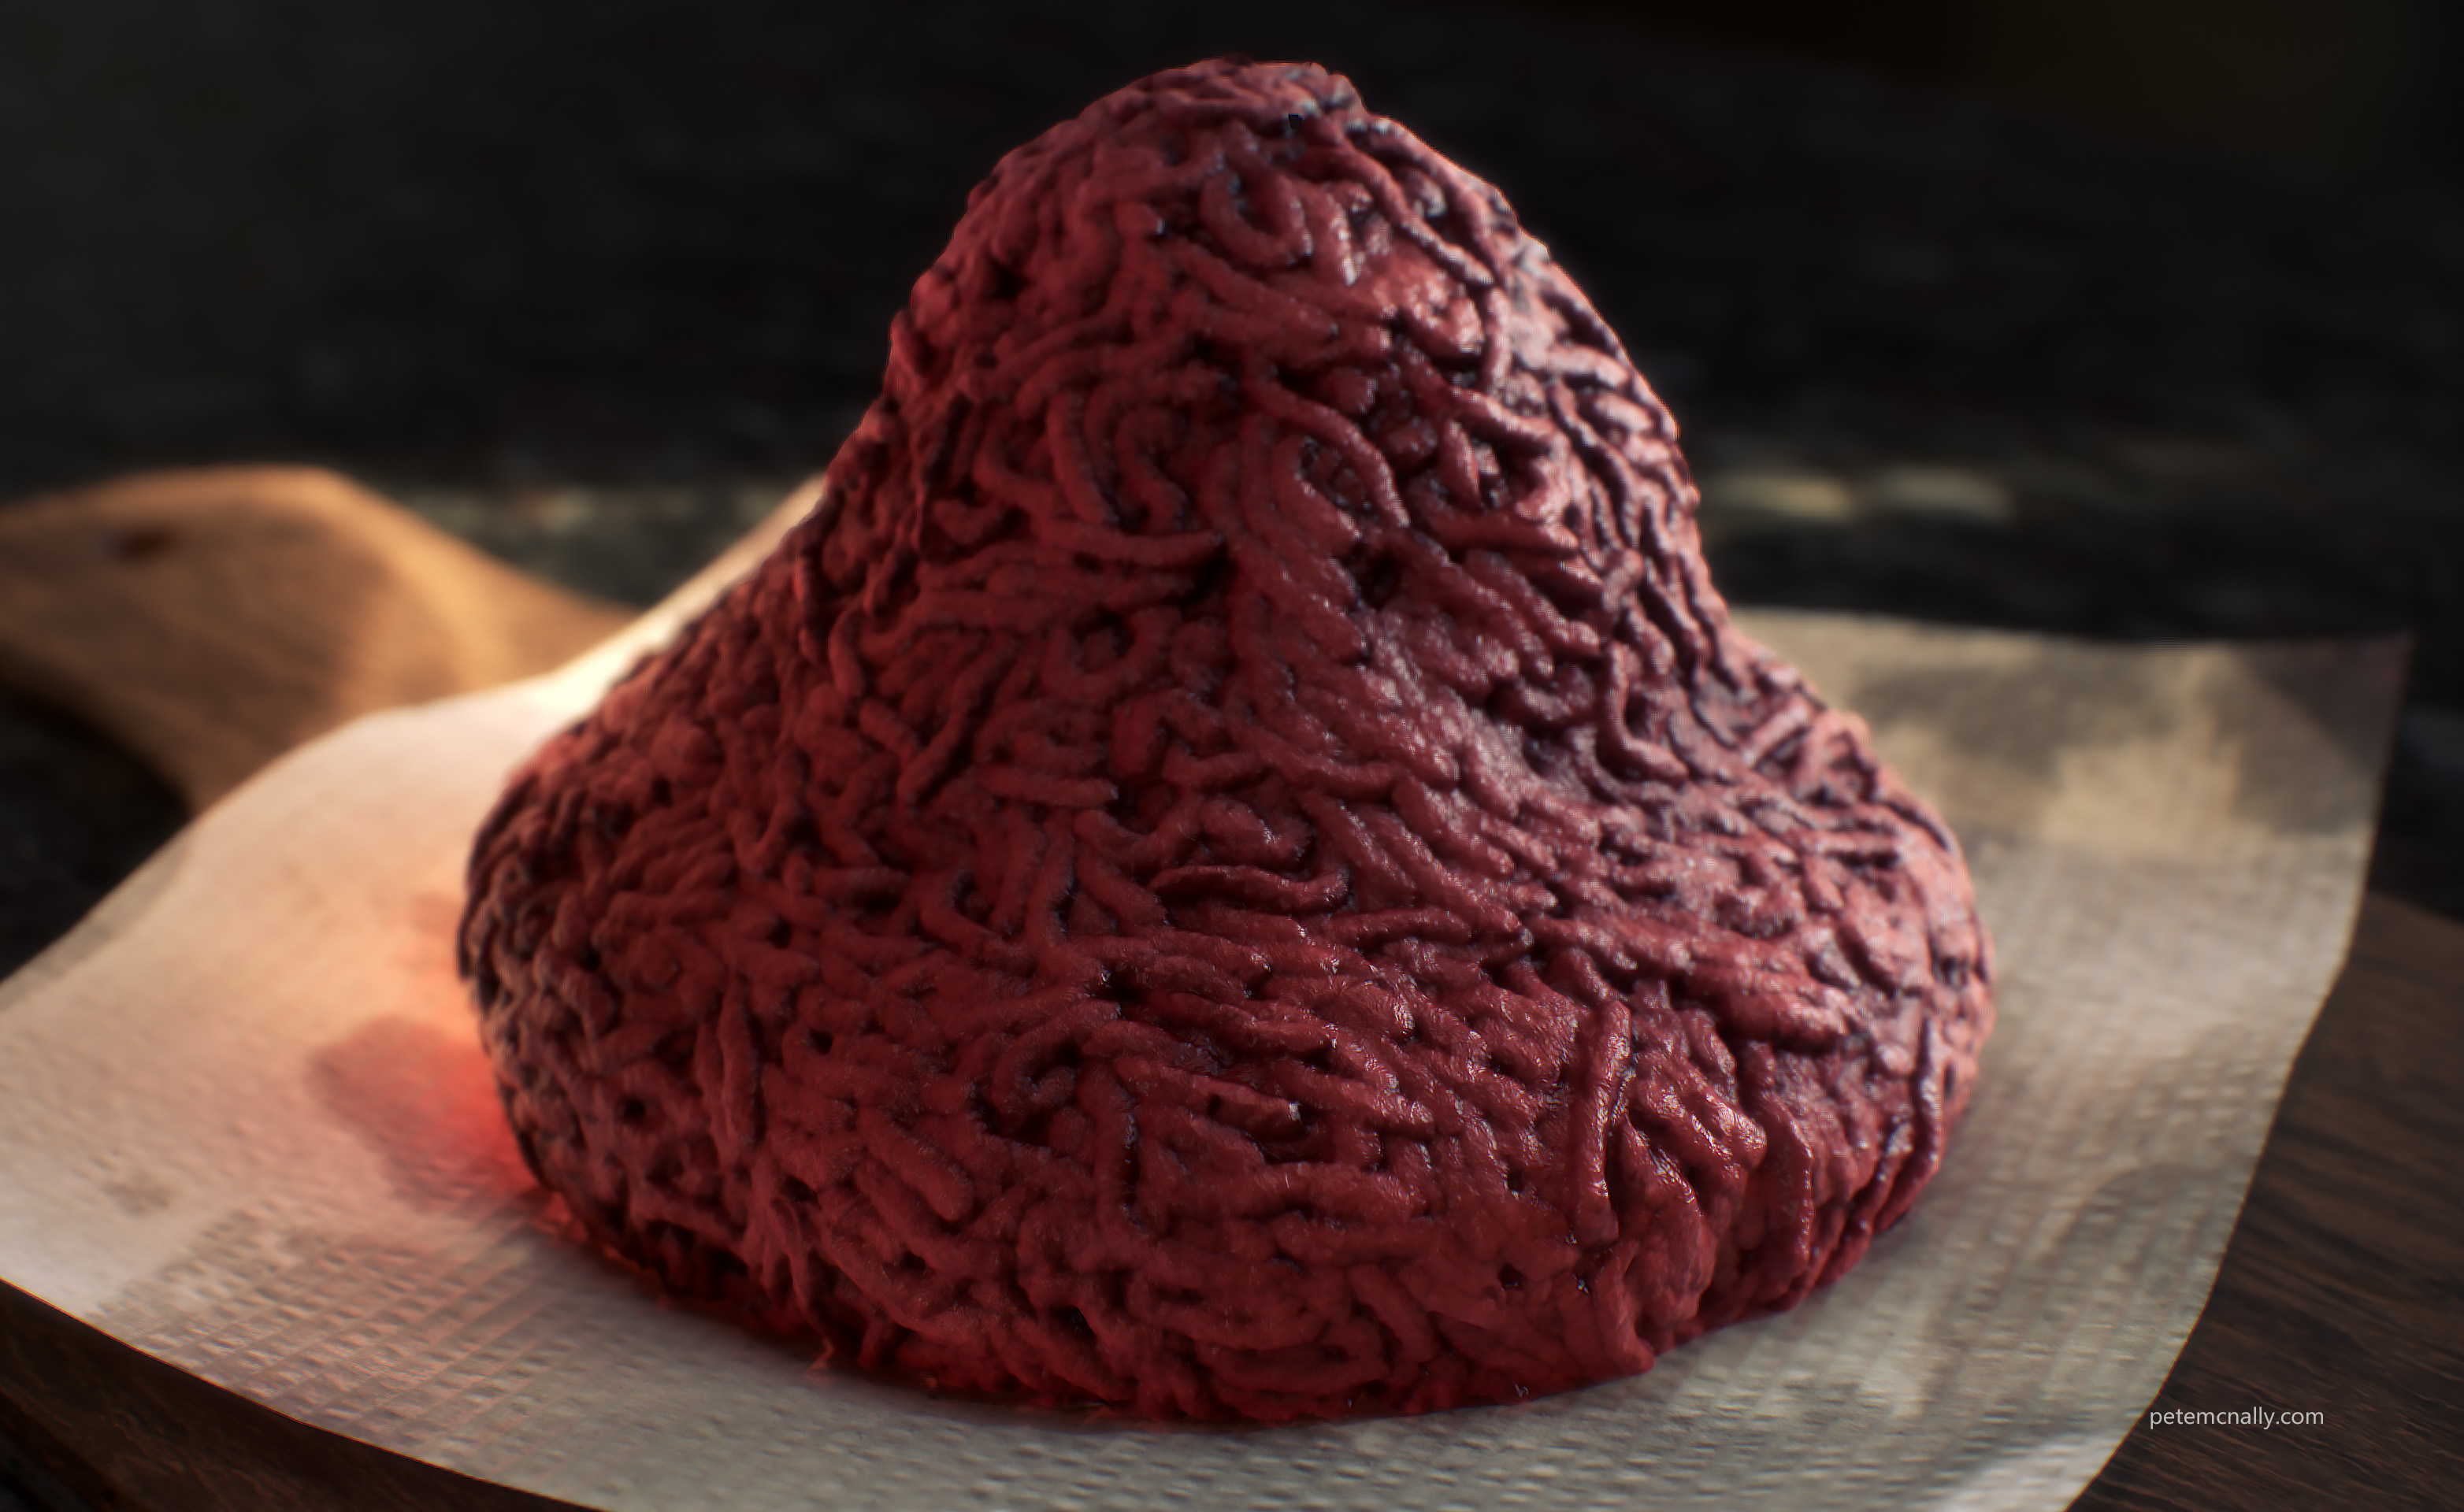
After looking at this for a few hours, I actually started feeling a little sick, so I thought I’d have some fun with the material, like what if it wasn’t quite ready to be cooked up?
Maybe take a look with a phone camera?
Or, what if it was like some sort of slowly oozing mince volcano? (Needs sound!)
What if it was some sort of monstrous shape, like a fresh zombie human head? :O
Rendered to a 32bit EXR and tweaked in Photoshop:
If you’re not grossed out by now, I’ll have to work harder next time! Interesting experiment though, taking textures created from one 3D scan and using them to create a completely different look on another.
A year or two back, I visited the hillside ruins of a 6th century monastery in Cooley, on the Inishowen peninsula in Donegal, Ireland. It’s an overgrown graveyard now, and among the ruins there is a well-preserved 10 foot high cross and a few free-standing church walls. Perhaps most notable is a “Skull House”, fashioned after the Beehive huts of Ireland’s early monks, reported to contain the remains of saints, and up until recently human bones could be seen through a small aperture in the wall. I respectfully set about making a scan of the Skull House, but my fully charged phone mysteriously died and wouldn’t turn back on. Back to the car to charge it and I manged to switch it back on, but the battery level had dropped by half, weird! There was enough charge left to take the photos I needed, hampered only by height and foliage on the sloped roof. Here’s how it looked:
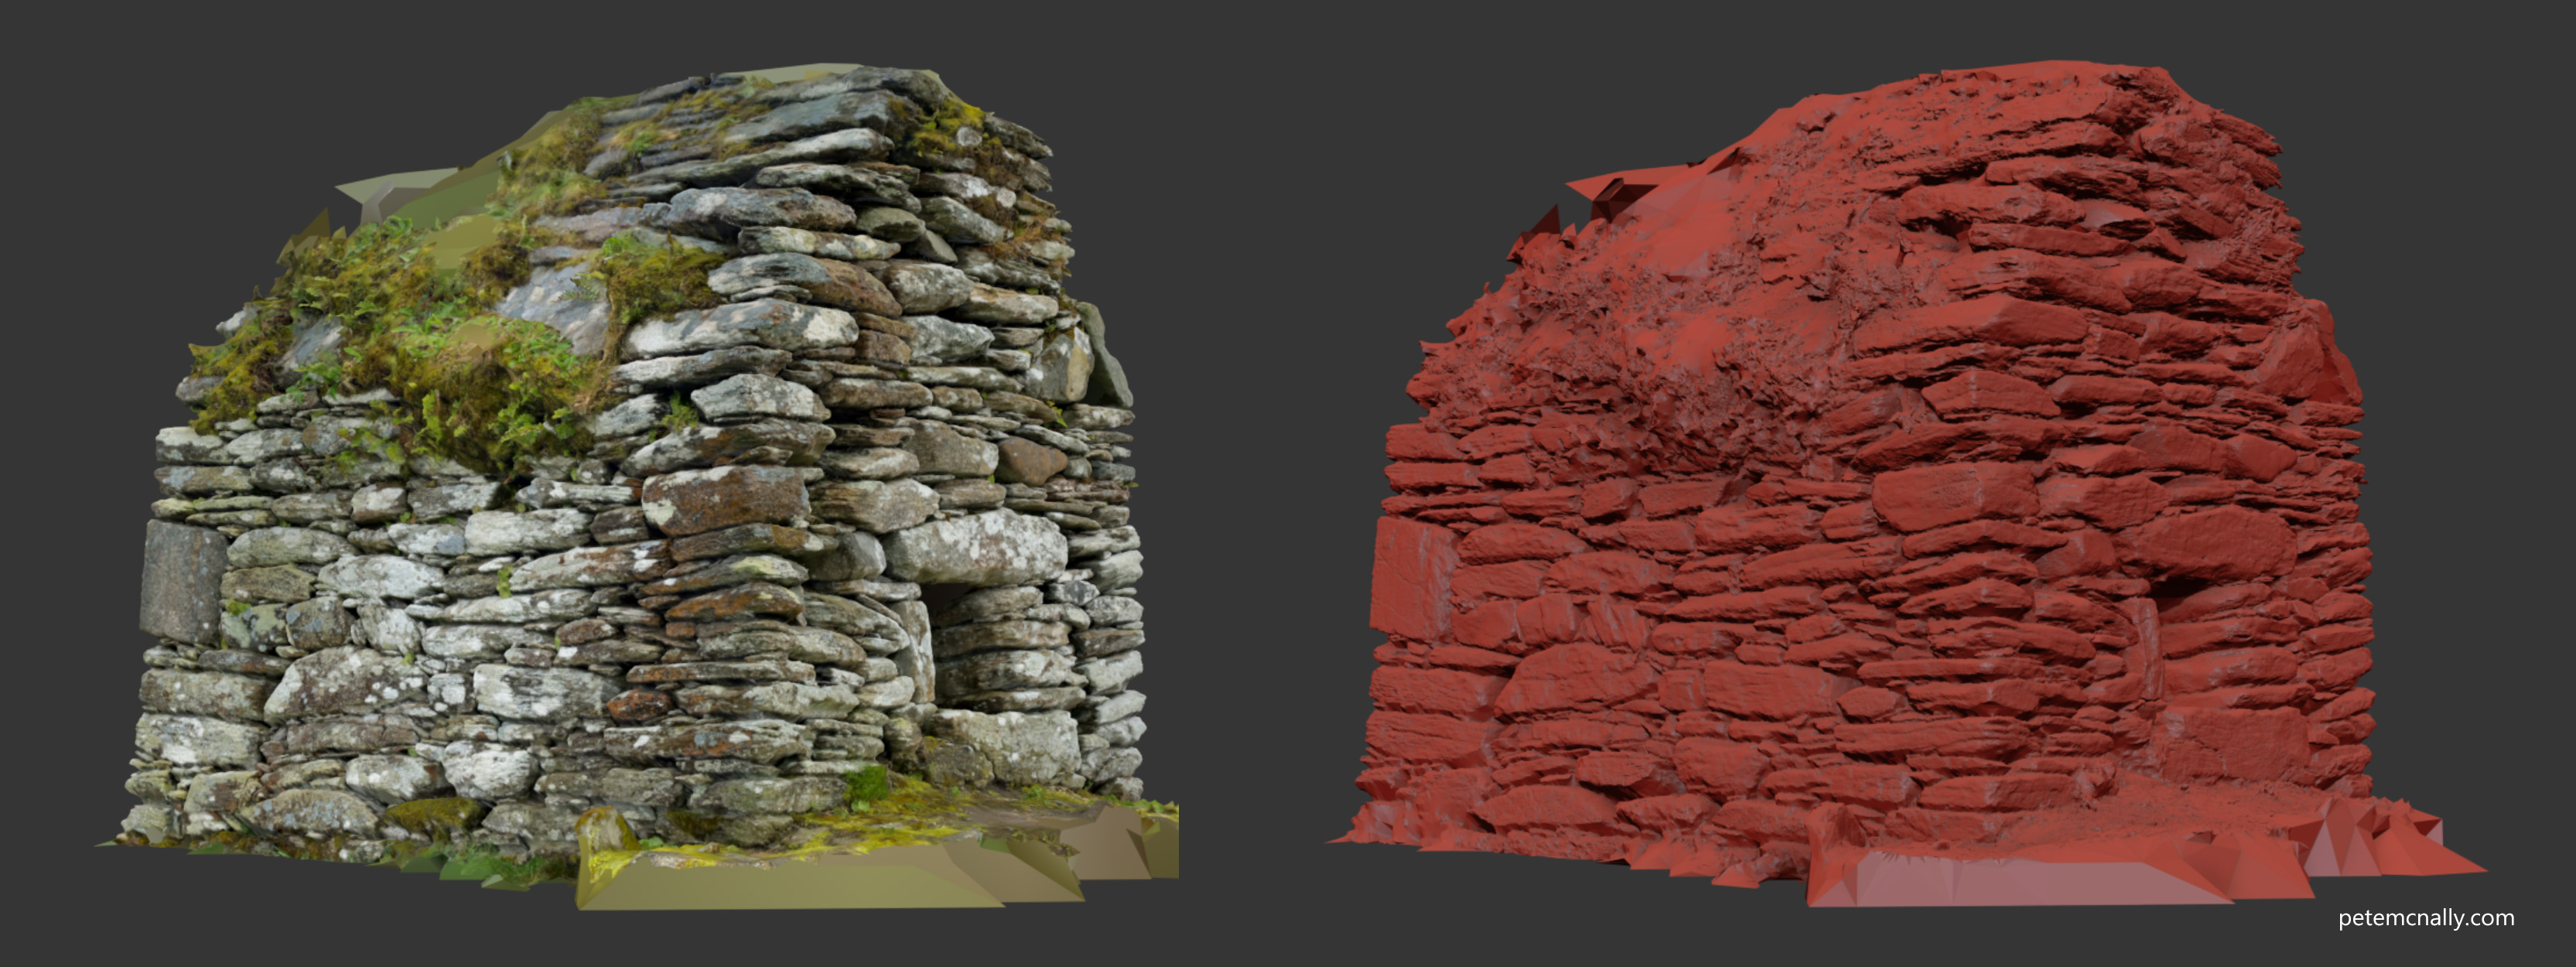
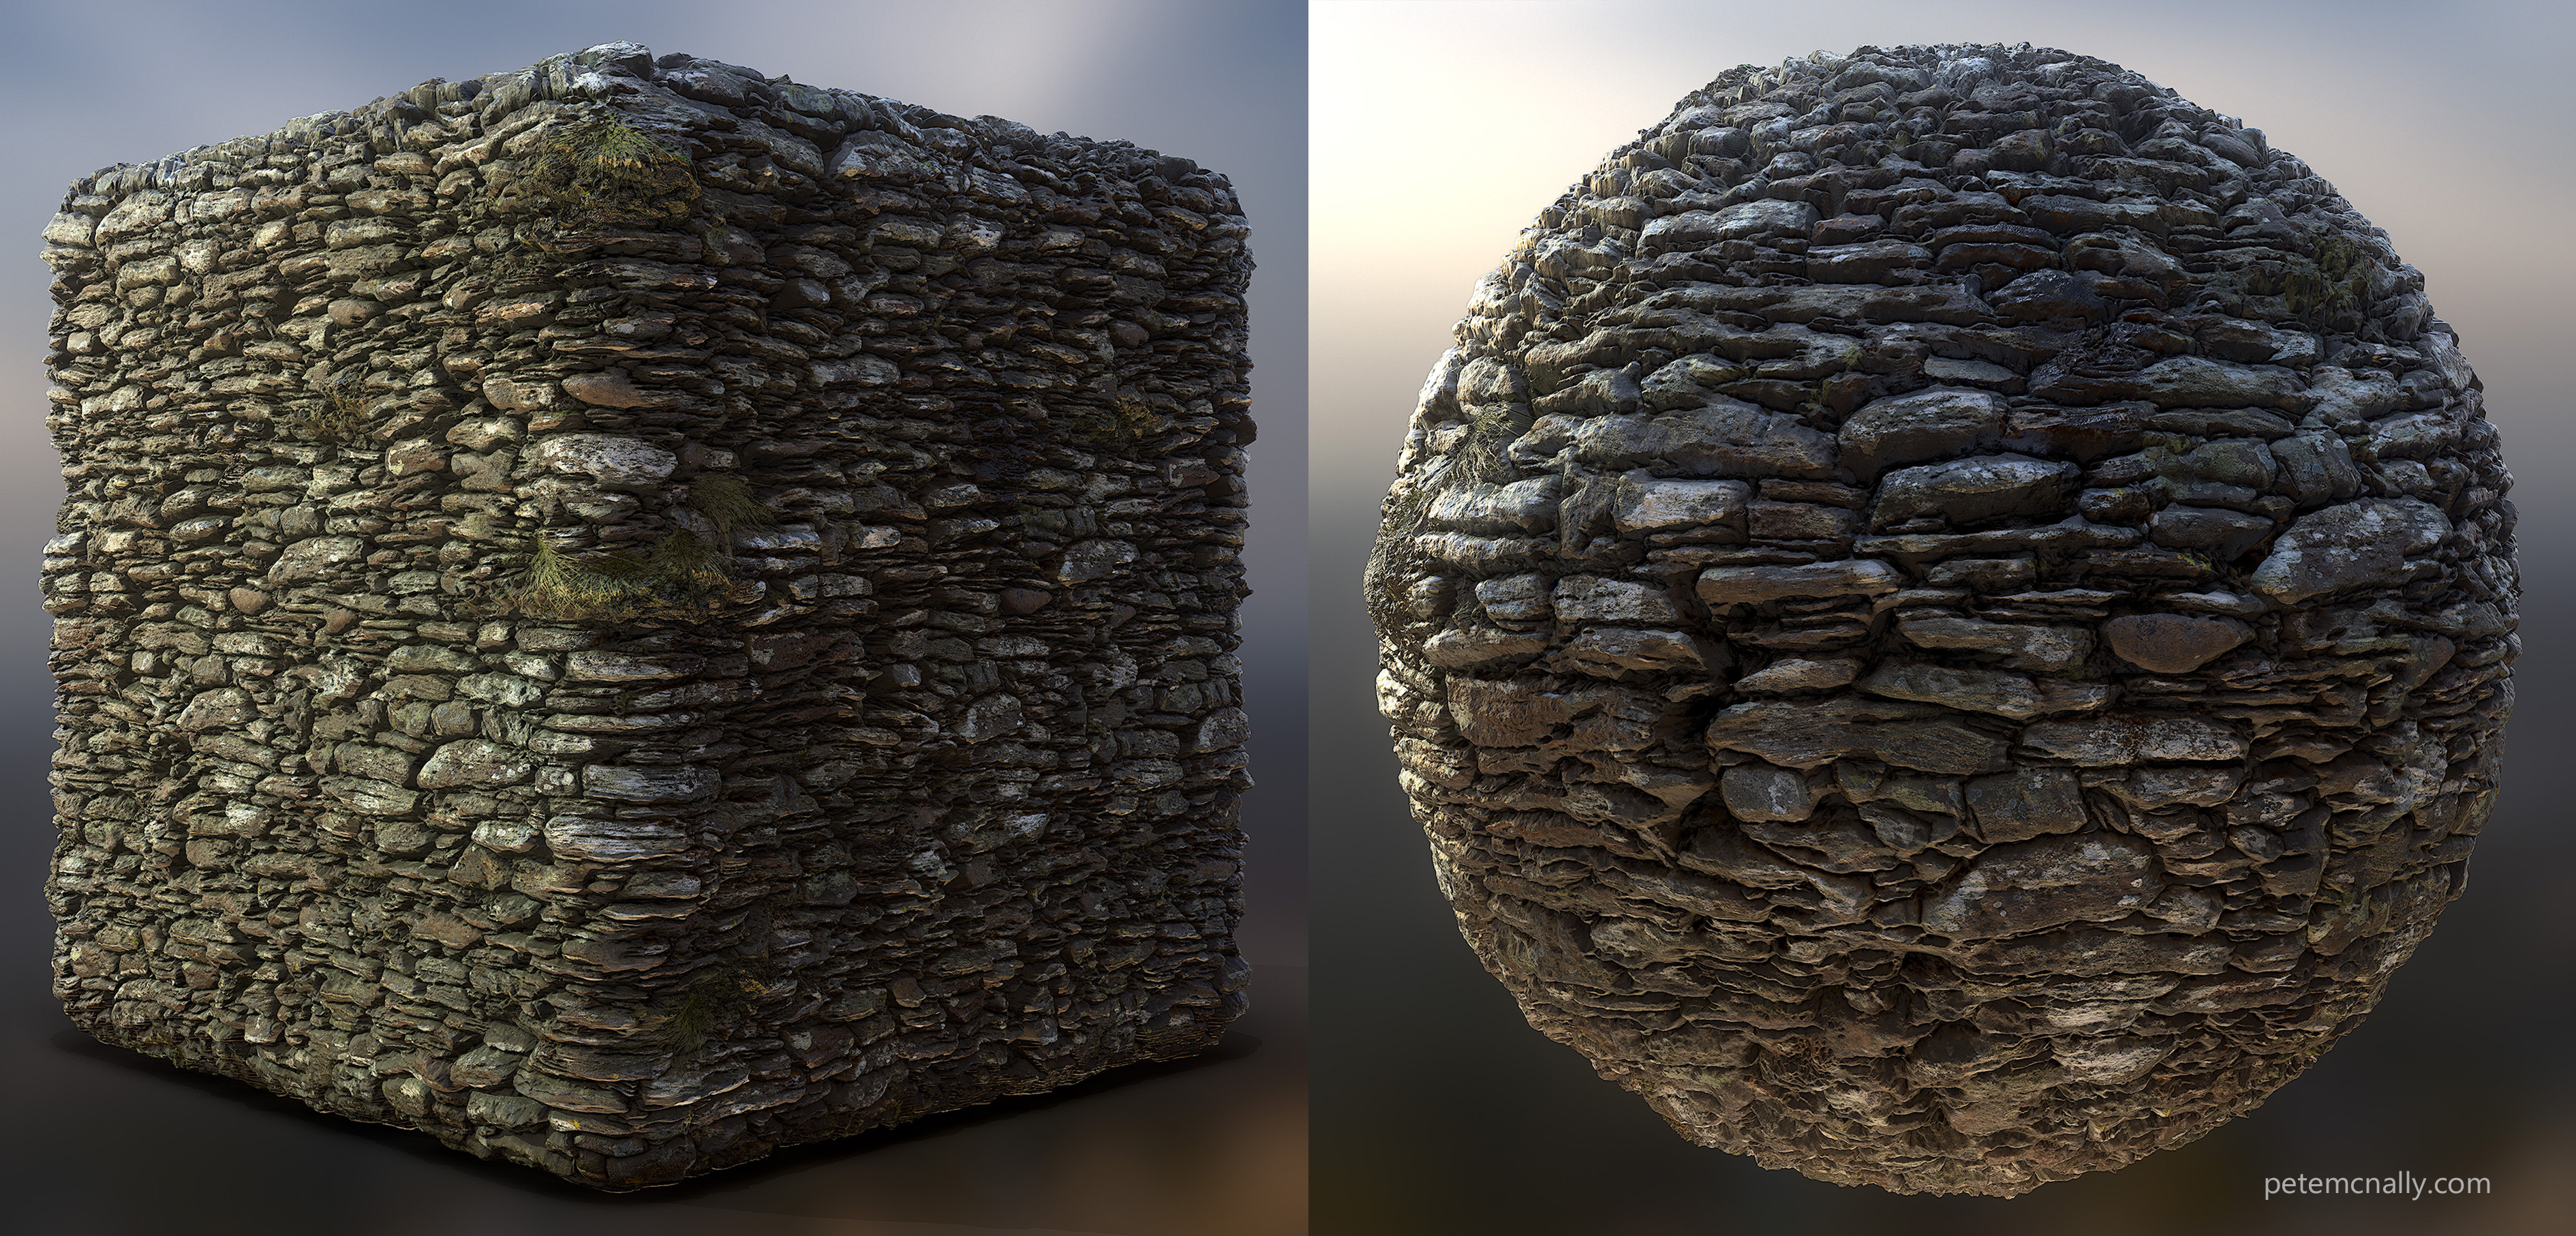
As with every 3D scan like this, the textures are bound to the geometry created, but I wanted to create a material from the Skull House that I could use on any model, so to be practical it would need to tile and I’d also have to repair the occluded areas, mainly the grass and mossy clumps. As a starting point, I rendered off the raw geometry in 3DSMax as diffuse, normals, AO and z-depth (for height) for each side and combined each wall into a single texture, then ran it through Artomatix to mutate the missing areas. It became clear that I’d have to paint a structure guide to help the mutation process, as it seemed to produce weird melded stones rather than fully separated stones. A structure guide basically means painting an outline for each brick, which in this case was time-consuming and problematic due to the variation in stone size and years of moss growth. To fix this, I displaced a plane with the seamless height map from Artomatix in Mudbox and sculpted into the gaps while sharpening up stone edges. This broke the tiling from Artomatix but I was otherwise happy with the look. I also worked over the grassy clumps and overhangs in 3DSMax using both Max’s hair and fur modifier and some hand modelled grass blades. Some shadow removal and adjustments to the albedo and an eyeballed roughness map in Photoshop and here’s what I came up with:
The next part, was to test against some proper geometry, which would have be low poly but with even topology, as I would be using displacement and tessellation and with as few sharp corners as possible to avoid self-penetration when vertices were displaced. UVs are important too, orientation and continuity ensure that the grass and moss are properly placed. This is some quick low poly geometry I created that approximates the shape of the original Skull House
Here is the same scene with the tiling material applied, click on the image for higher res. The ground material in these shots was created with Quixel Mixer, based on Megascans
With daytime lighting
So even though the texturing is now less specific, with far less moss and grass to see, it works around chamfered corners and on different models as long as the UVs are carefully laid out, every break in continuity can cause a model to crack along seams.
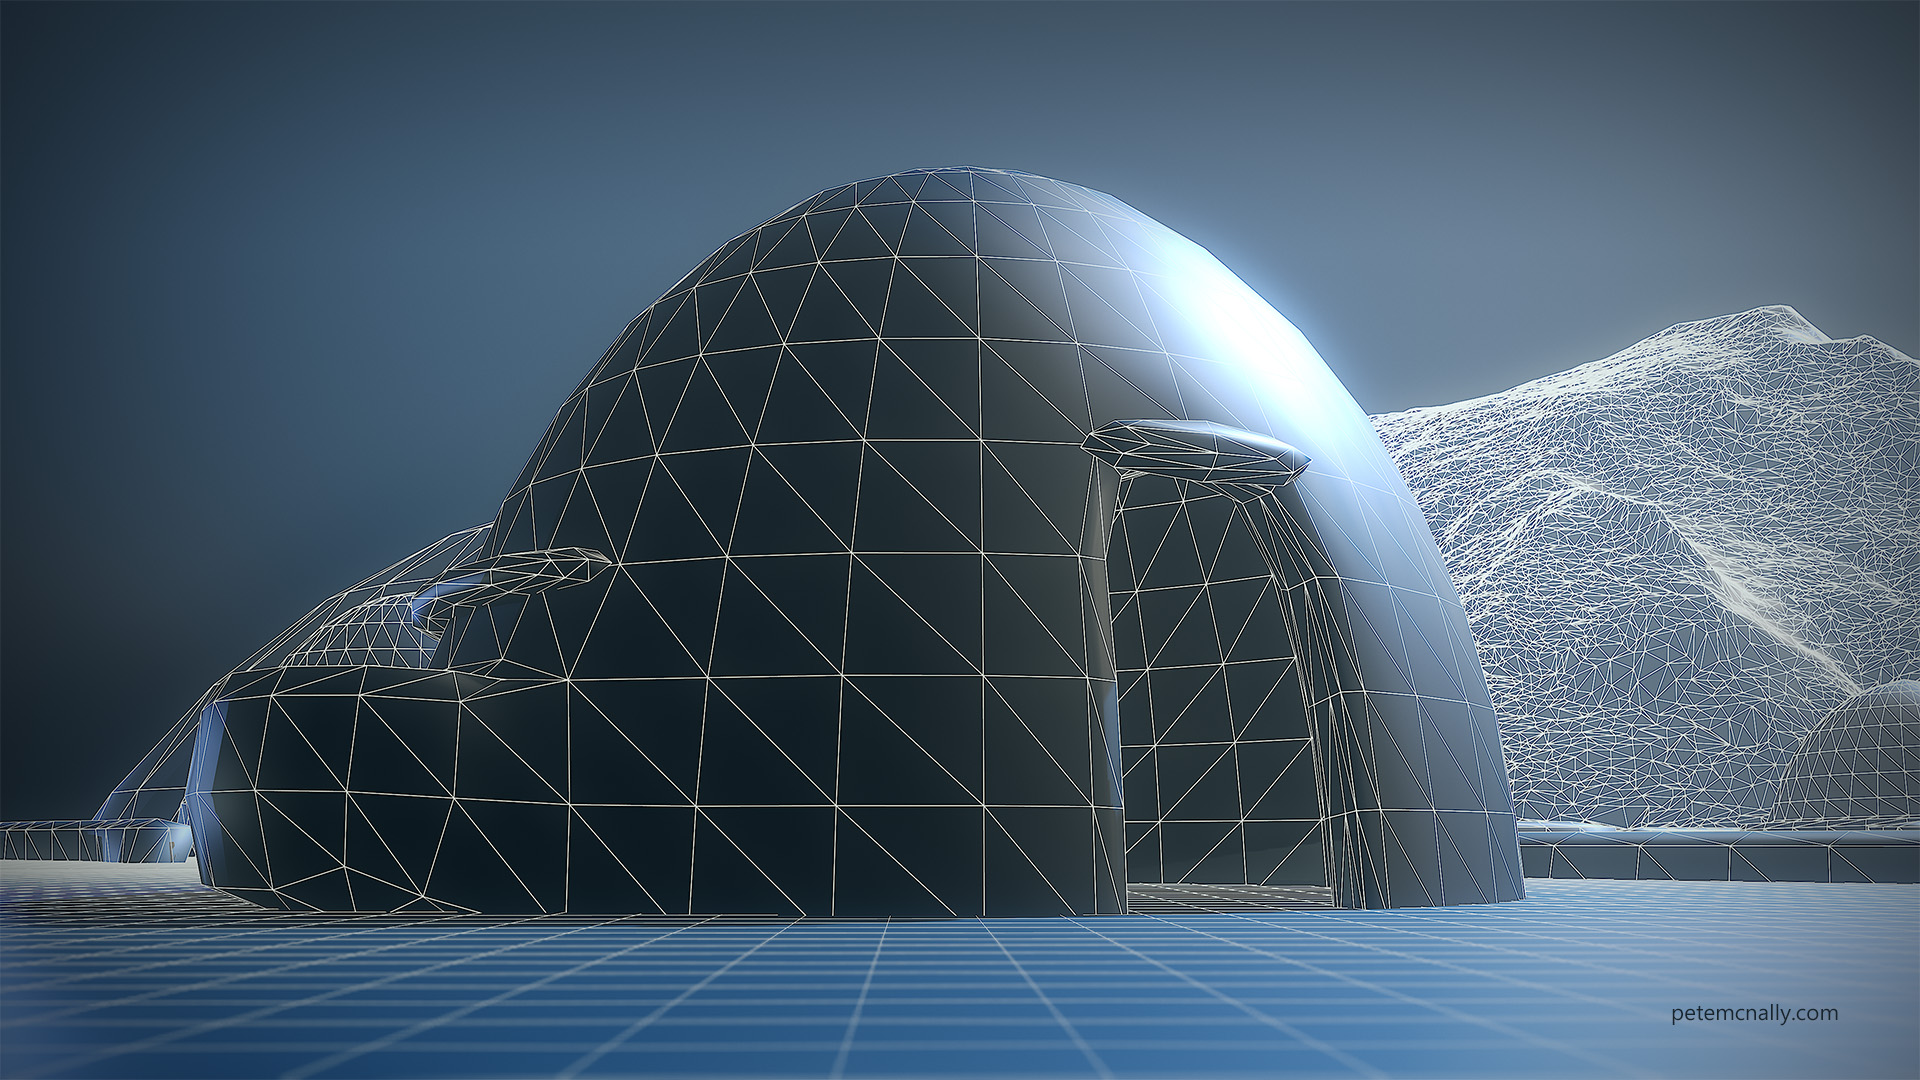
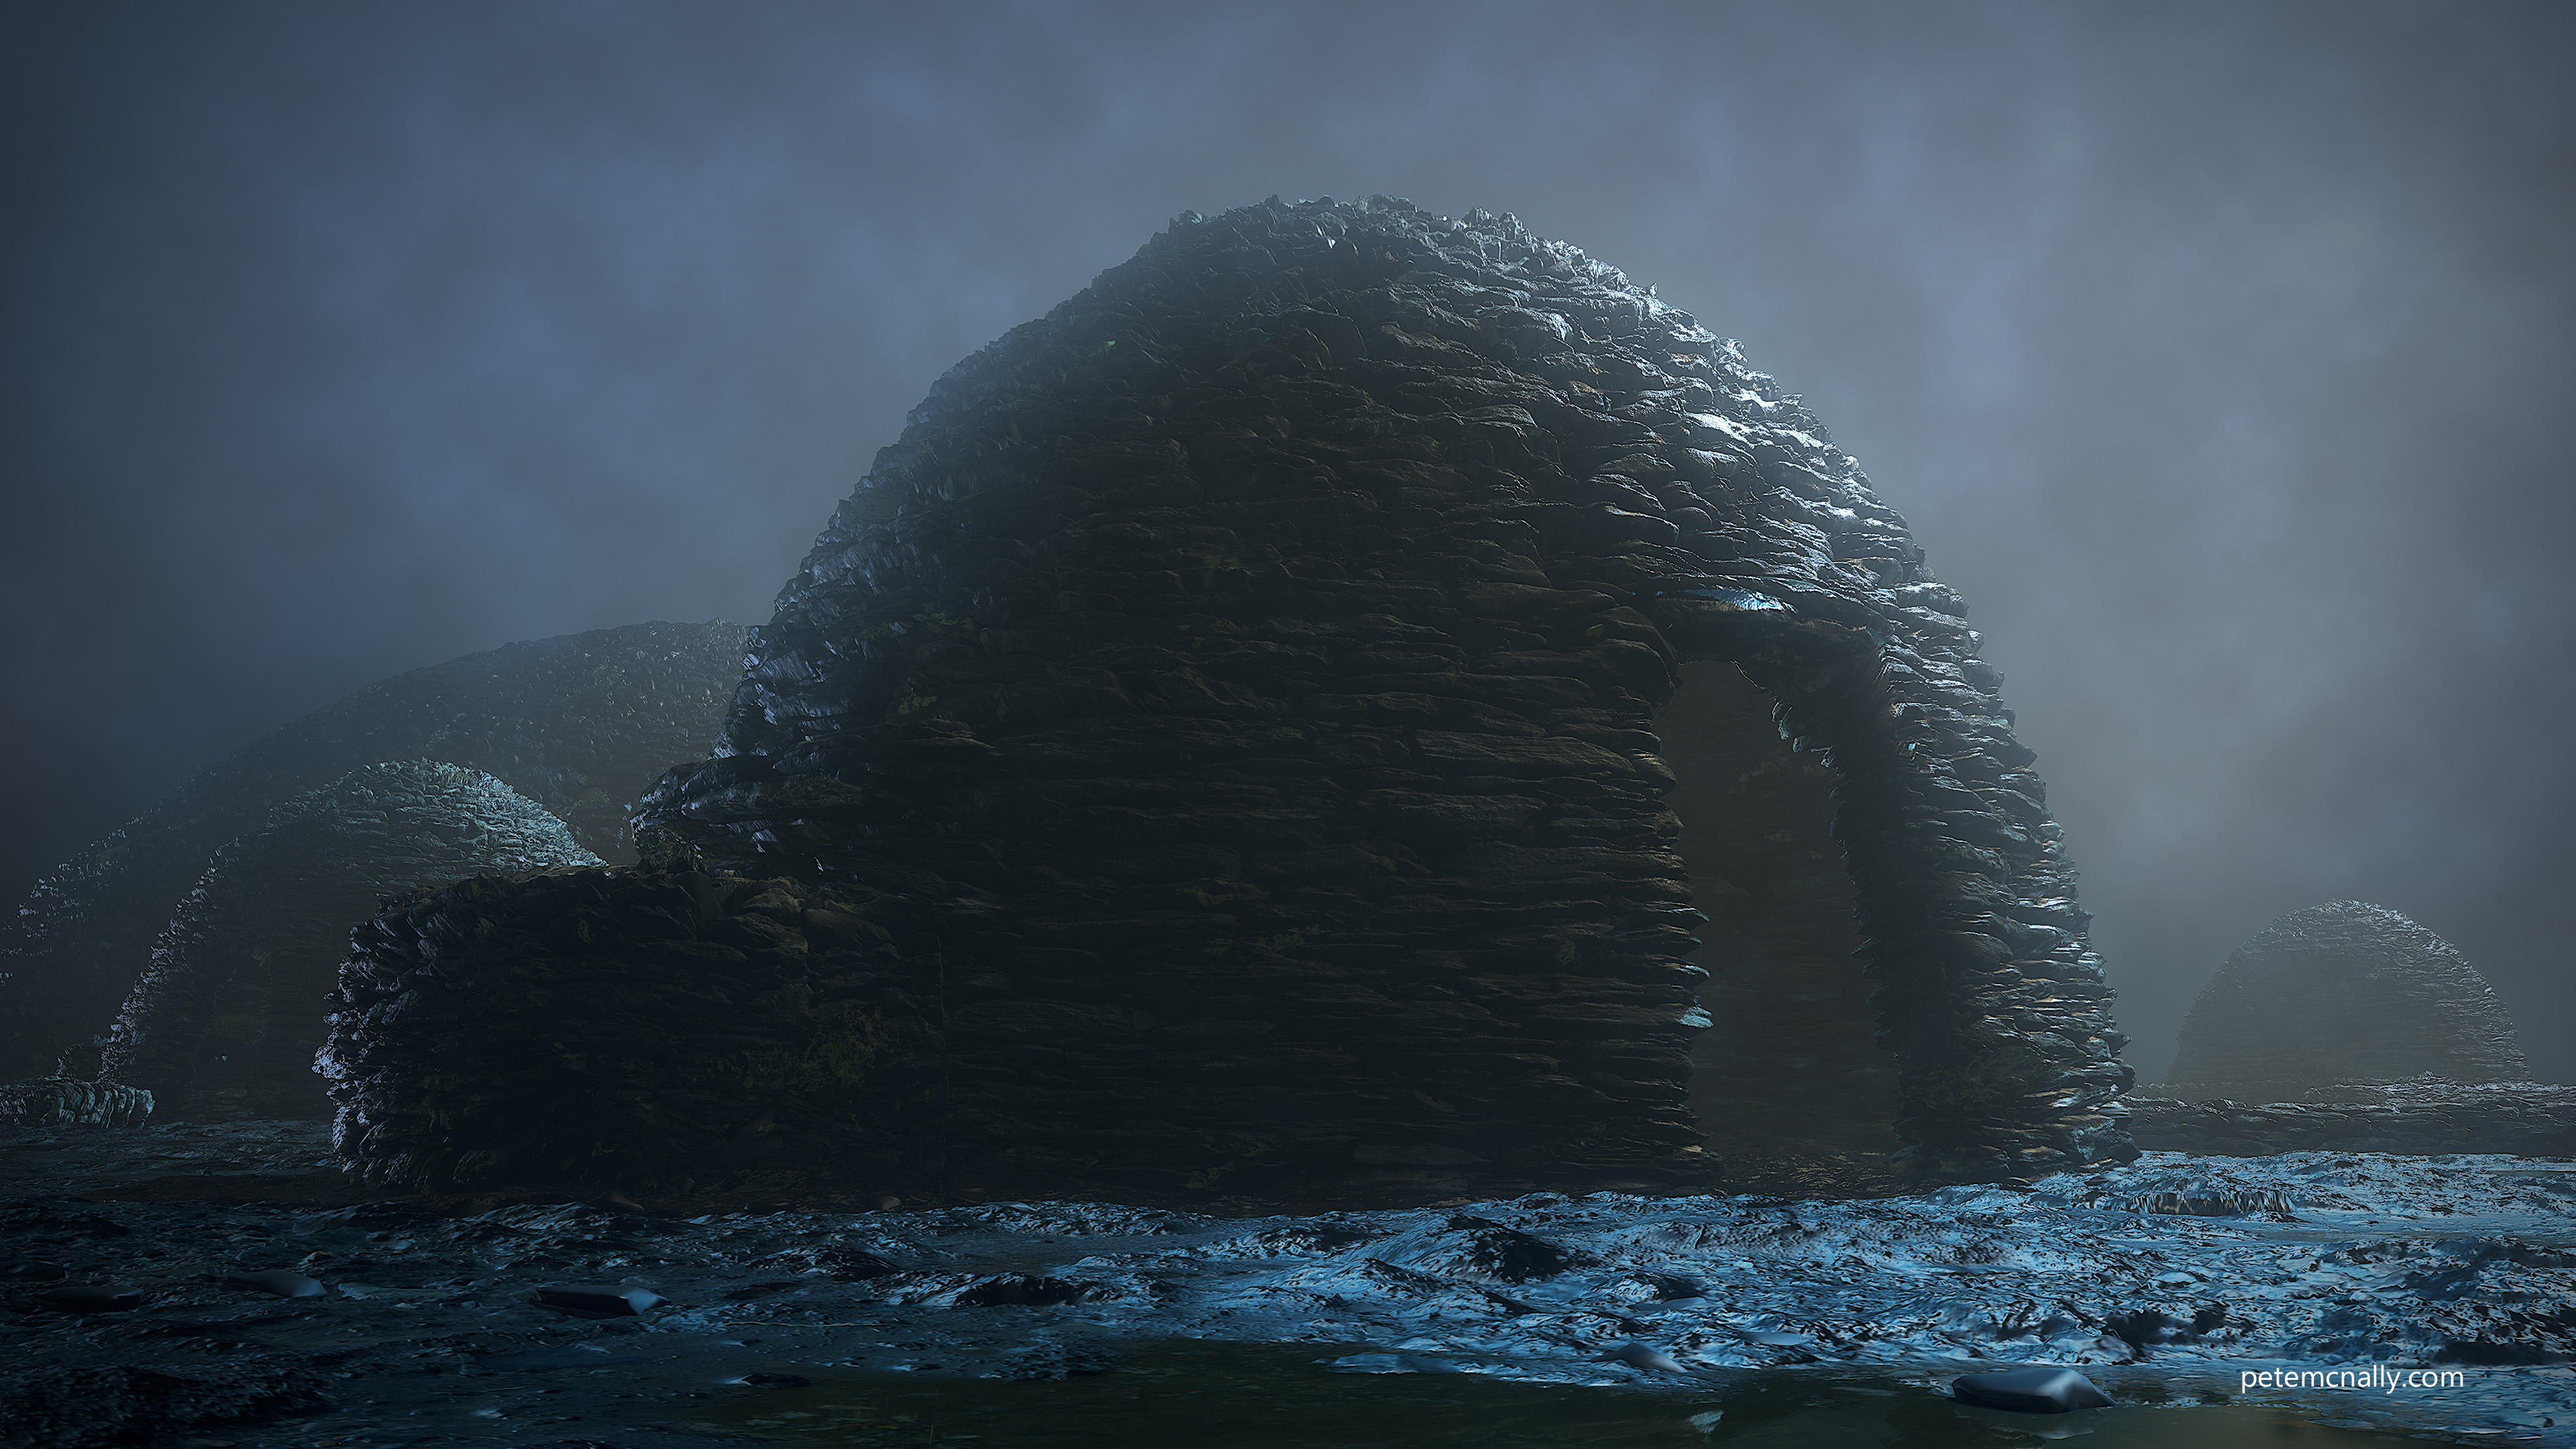
I couldn’t help but be reminded of the stonework of the “Beehive hut” monastery on the Skelligs, also from the 6th century and location for Luke’s home on Ahch-To in the new Star Wars movies. For a further test I used a hemisphere primitive, cut a shape for the door and lintel and extruded a small piece at the side, again avoiding splits in the UV islands where possible. The more detailed geometry in the background below is just for decoration. Here is the scene without textures:
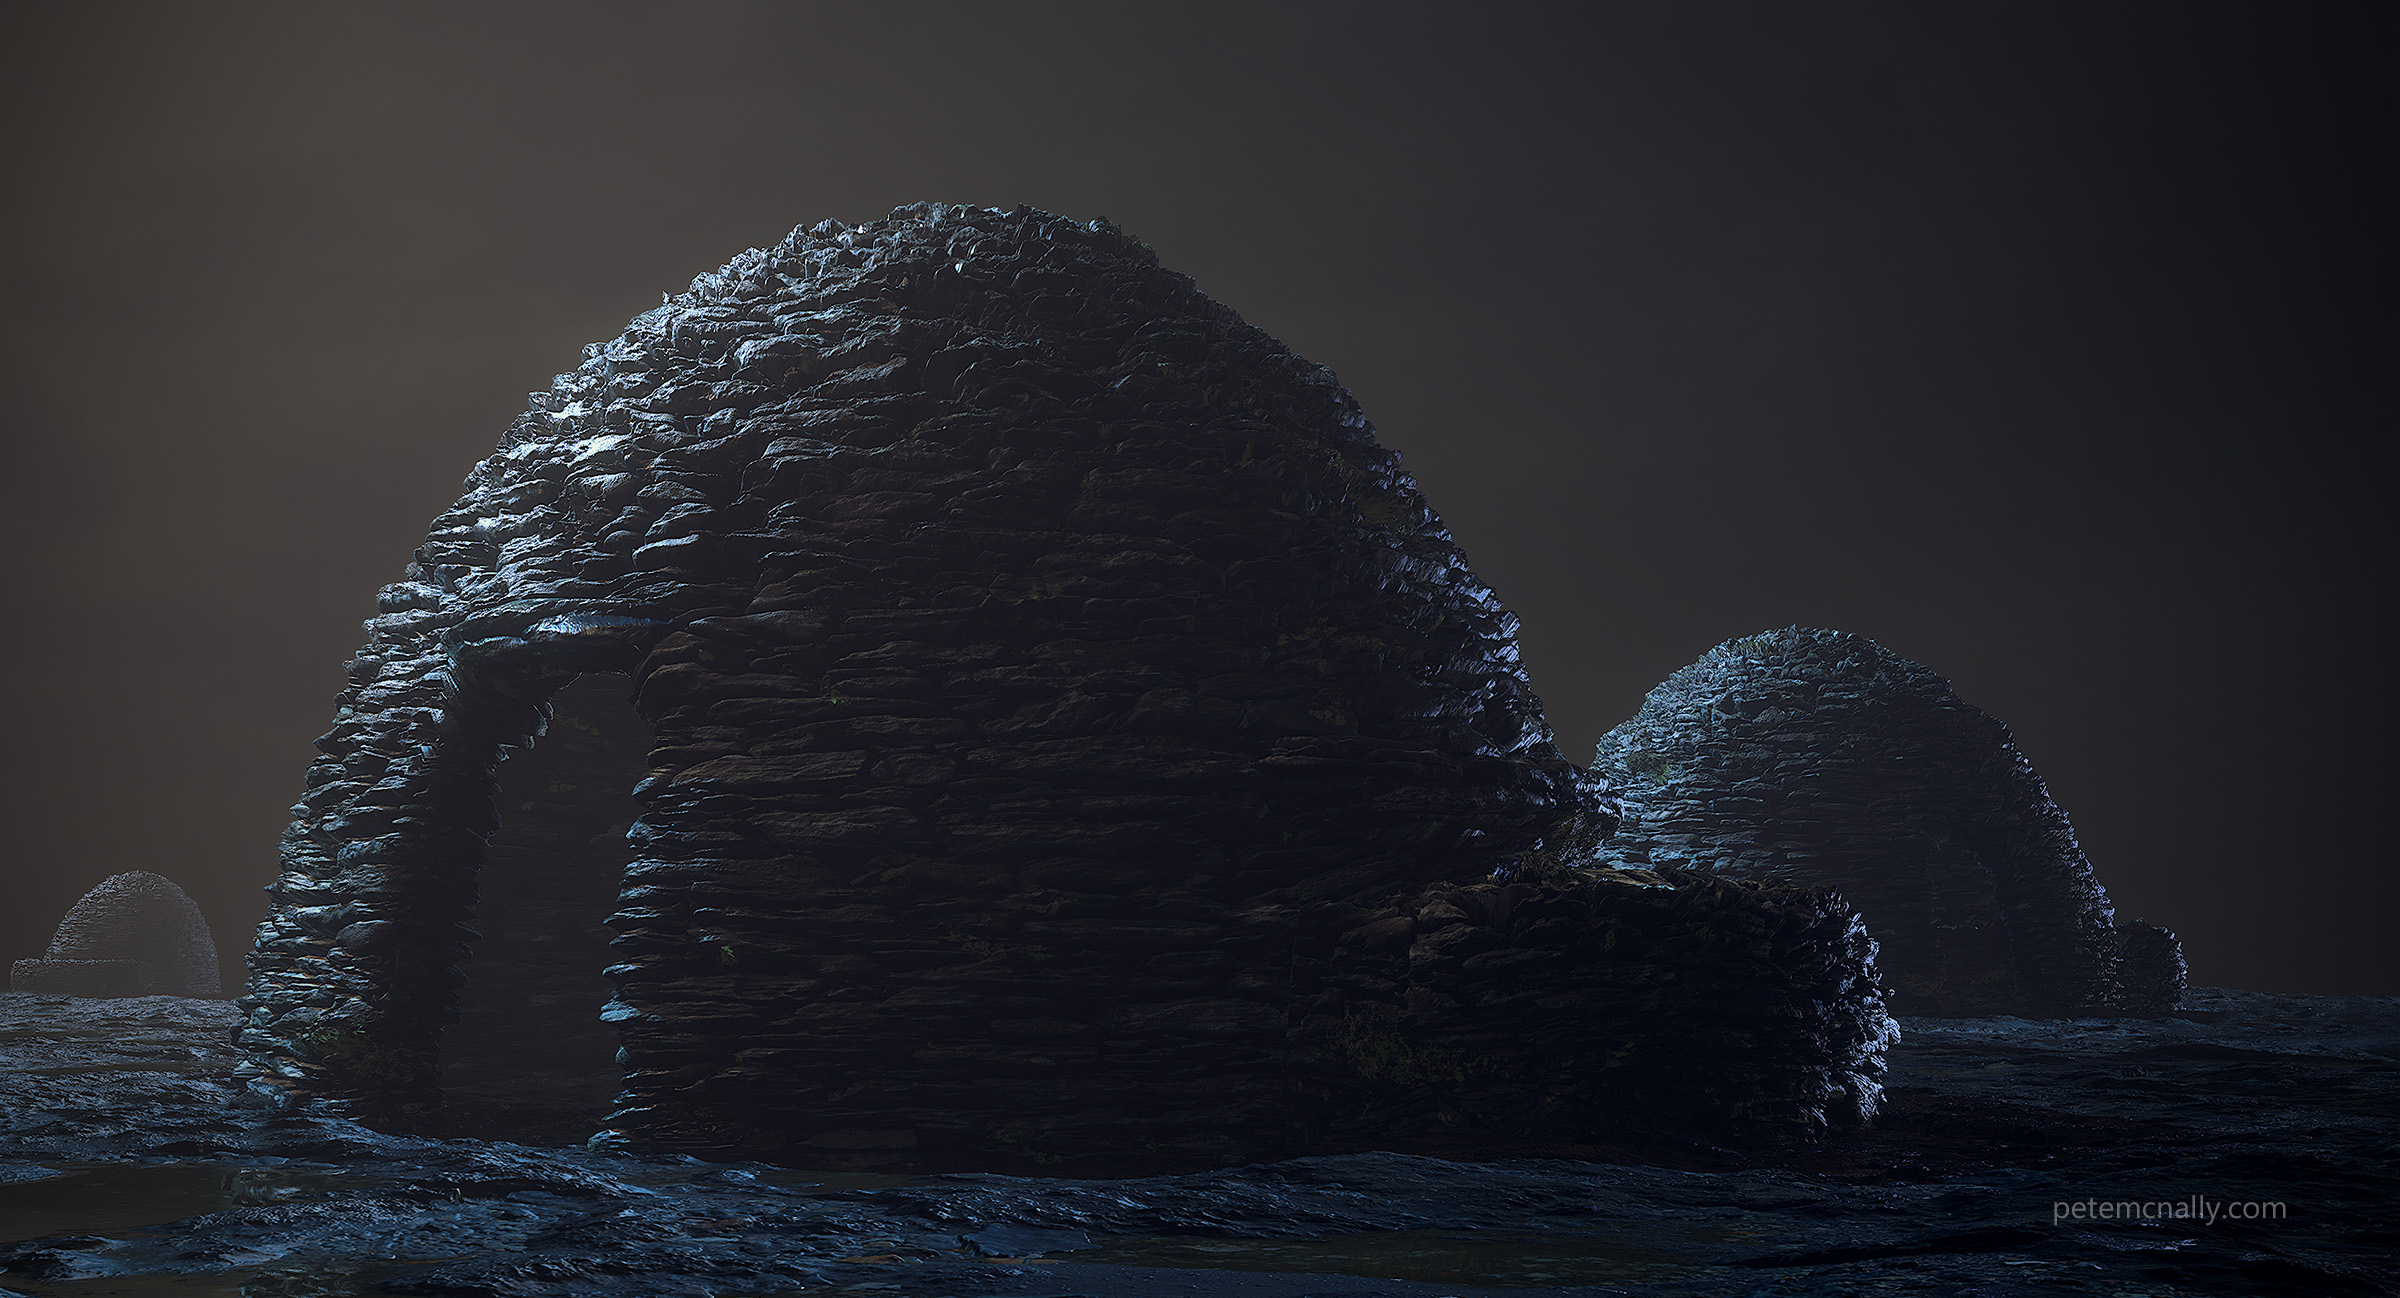
Here it is with the material applied:
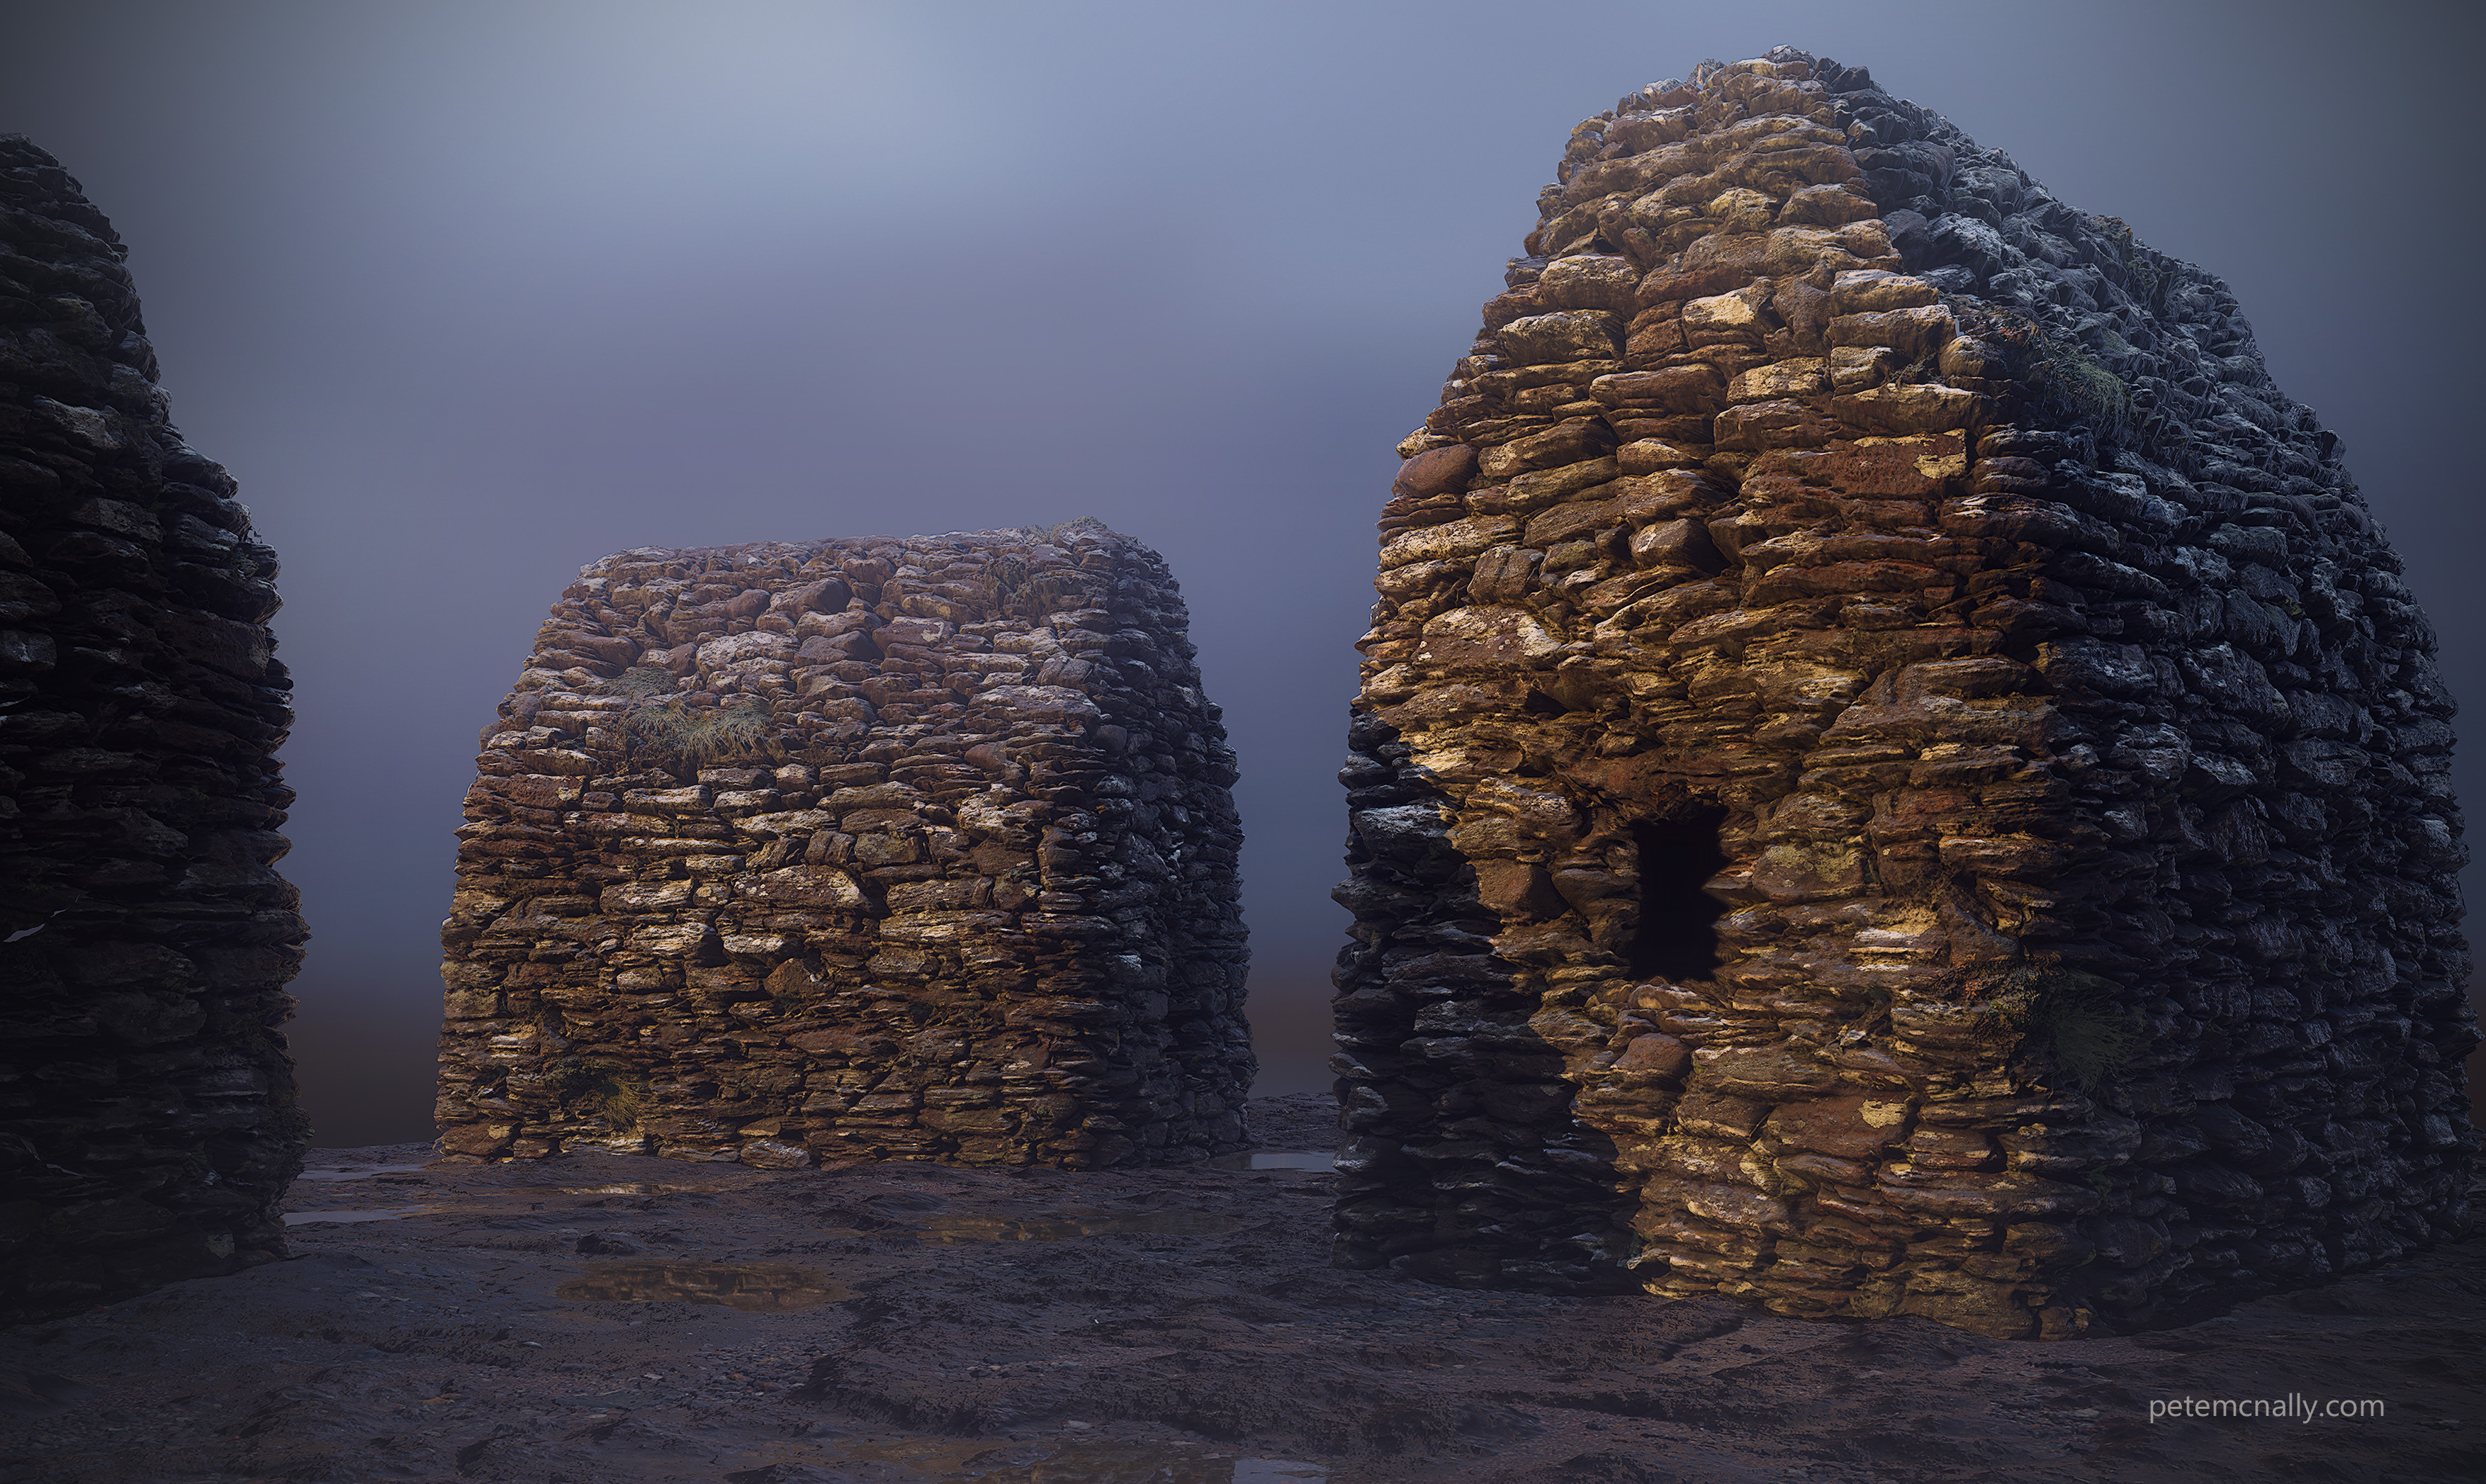
And with a little more atmosphere, inspired by the movie Prometheus:
In motion with some rain effects added in After Effects:
Bonus content: I also scanned this at Cooley Graveyard:
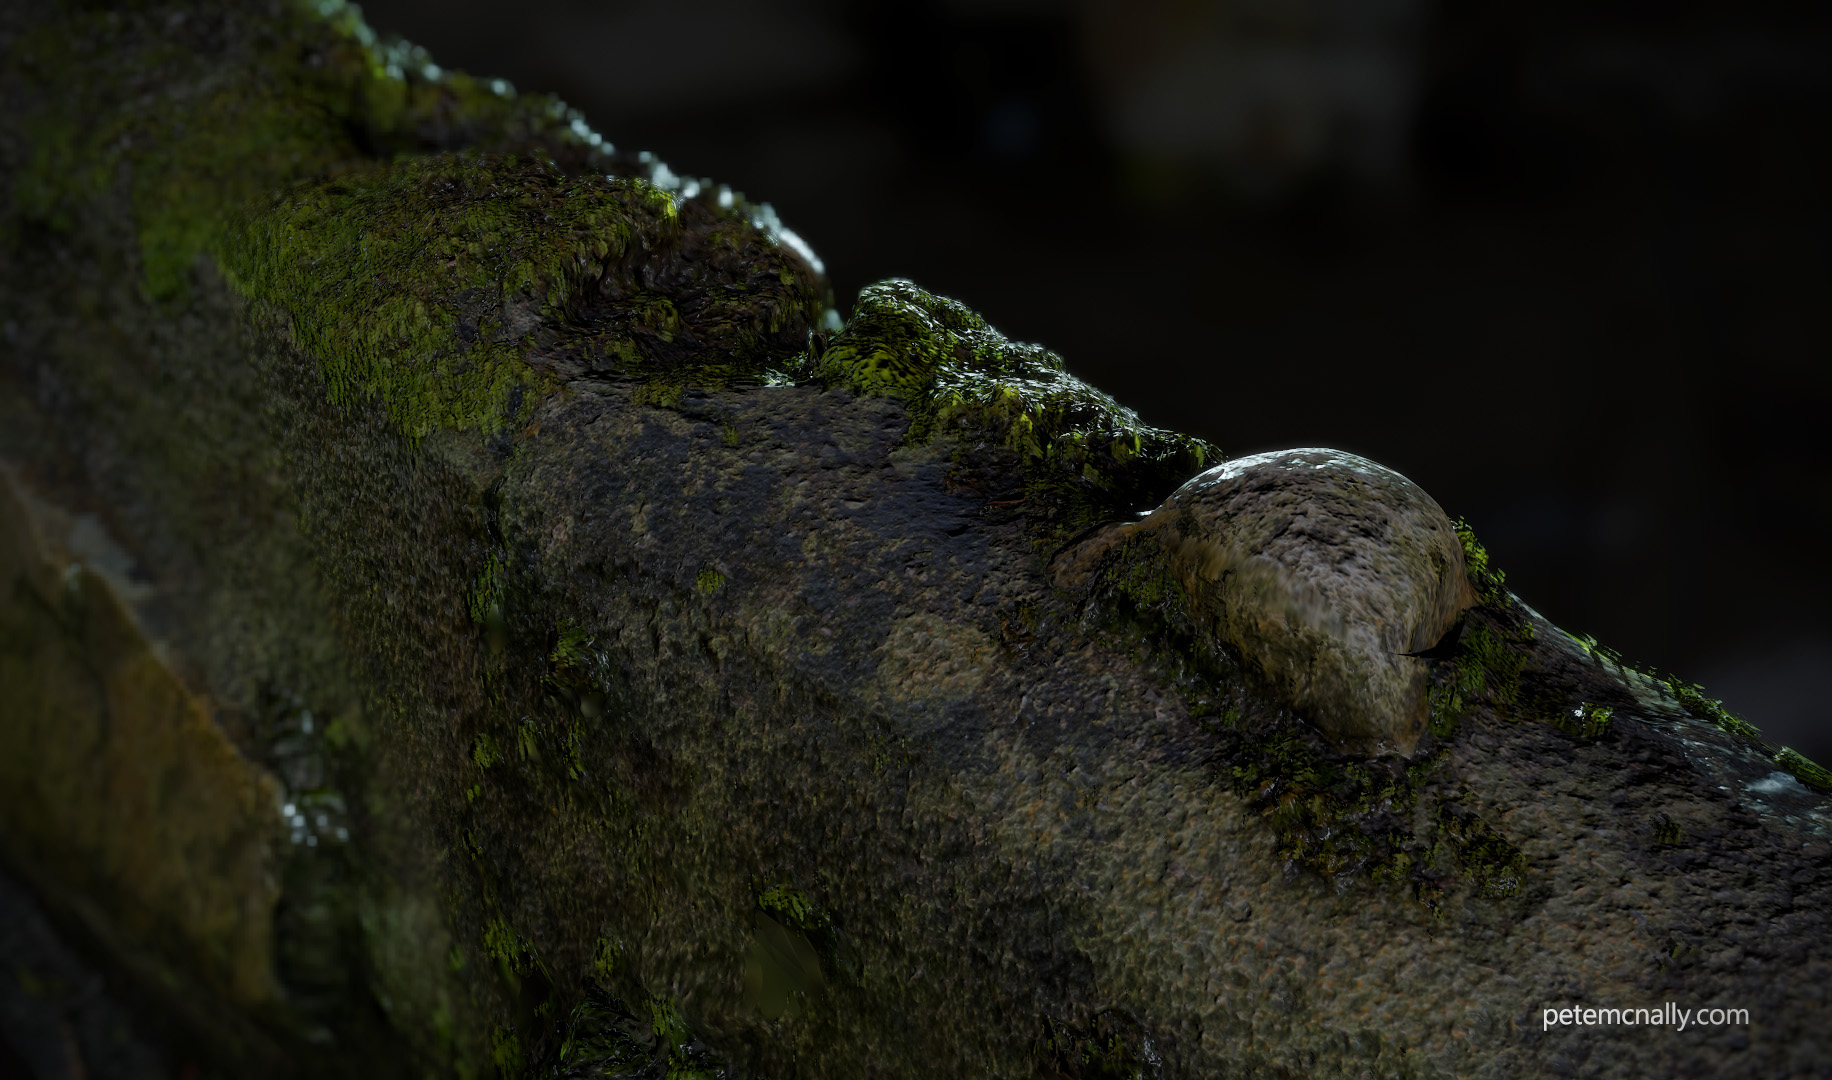
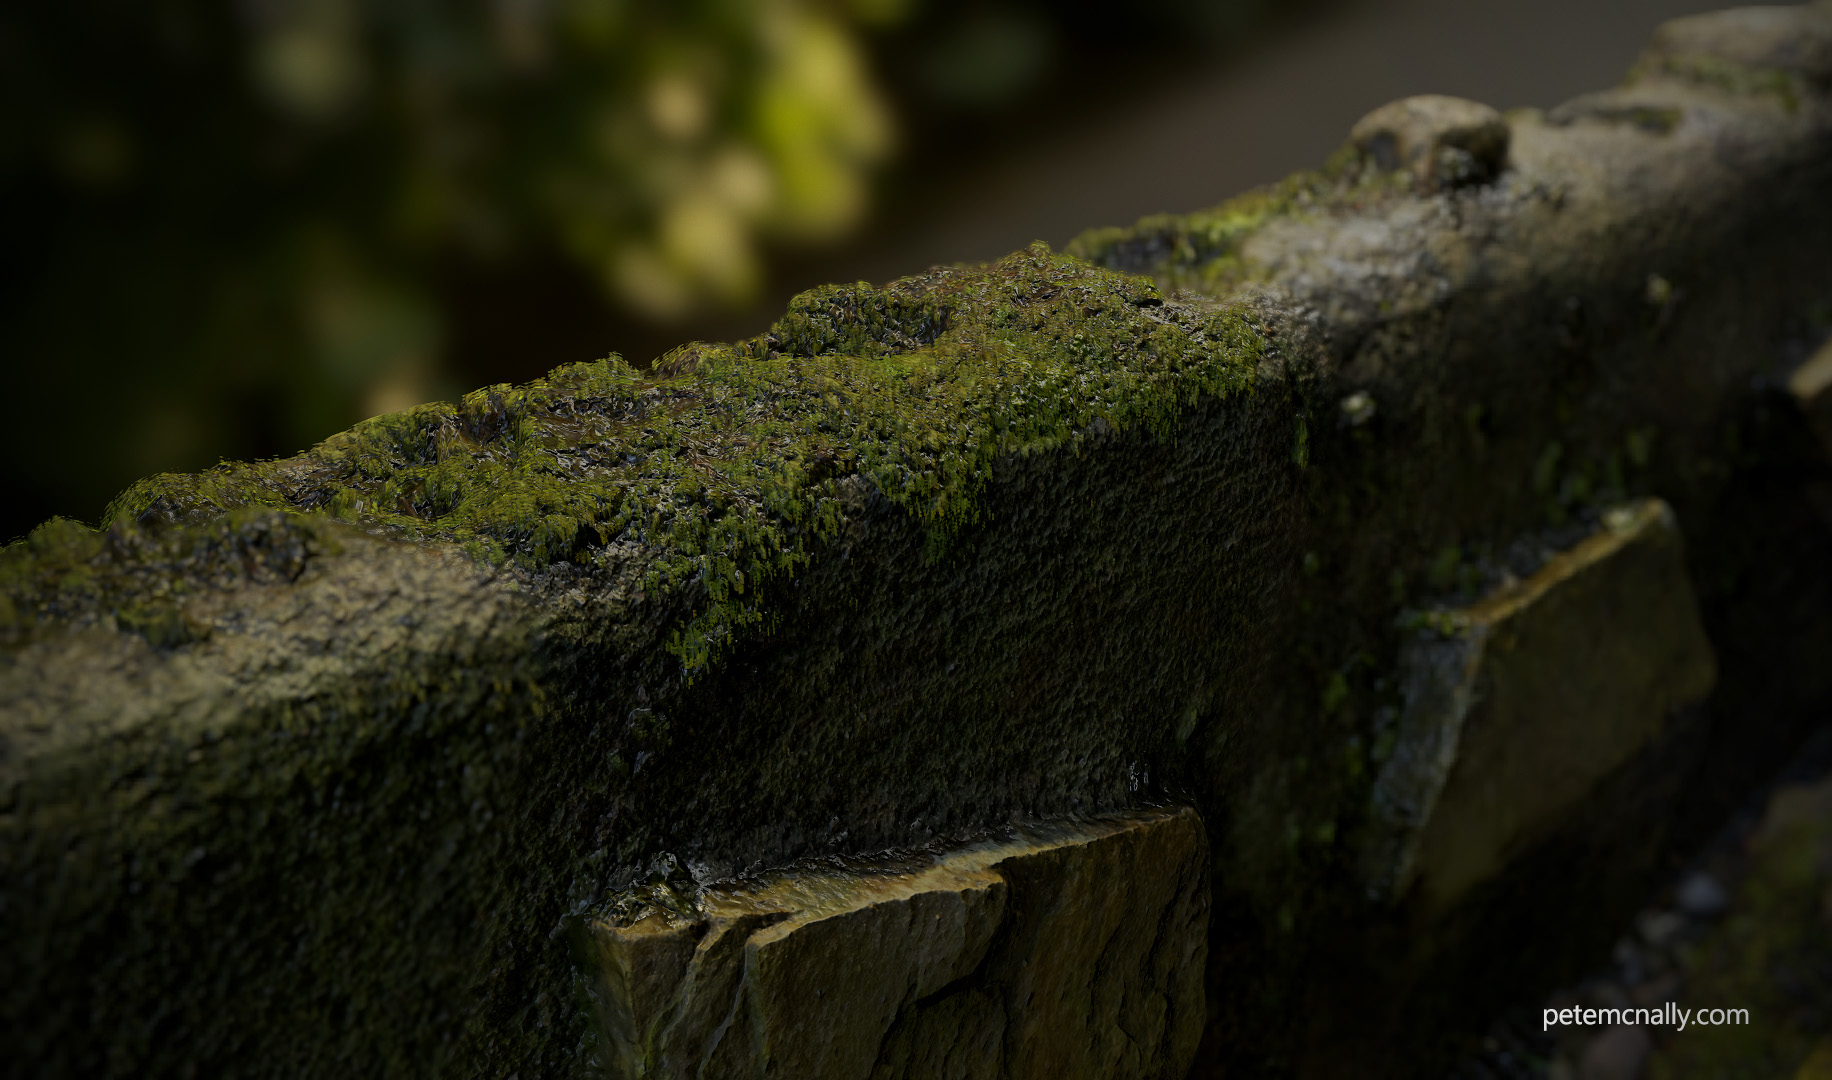
Looks like I missed a blog post last month! Here’s a quick one as a tide over, not worthy of a breakdown really, it’s a 3D scan of some damp moss on a low stone wall. It was tricky enough to split out the moss shading from the paved stone, but was an interesting exercise nonetheless. Rendered in Toolbag 3 with Photoshop for textures.
… Maybe! 😀 I recently did an interview with 80 Level about my latest art experiments and my thoughts on the future of game art content creation, you can read about it here if you fancy it!
In my last post I said I’d have to stop posting rock materials up here, but this is an old post that I’d forgotten to publish 🙂 I started this blog post on Thursday 1st March 2018, the evening when “Storm Emma” and “The Beast from the East” clashed over Ireland causing blizzard like conditions and Wintry landscapes not seen in this country since 1982. Public transport was suspended, many people were off or working remotely and the public were advised to stay indoors until the Red Weather Alert lifted later that week. So, with extra time indoors I had some time to process scans and create materials, and put Artomatix through it’s paces. As you may have seen on this blog, I’ve run a few scans through the software already, mainly for “texture mutation” which creates variations of a texture, or multiple textures simultaneously as part of a material and also for seam removal, making textures tile. These can be controlled somewhat by moving jitter sliders and painting ignore masks, which is very handy for getting rid of blurry areas or scan artifacts.
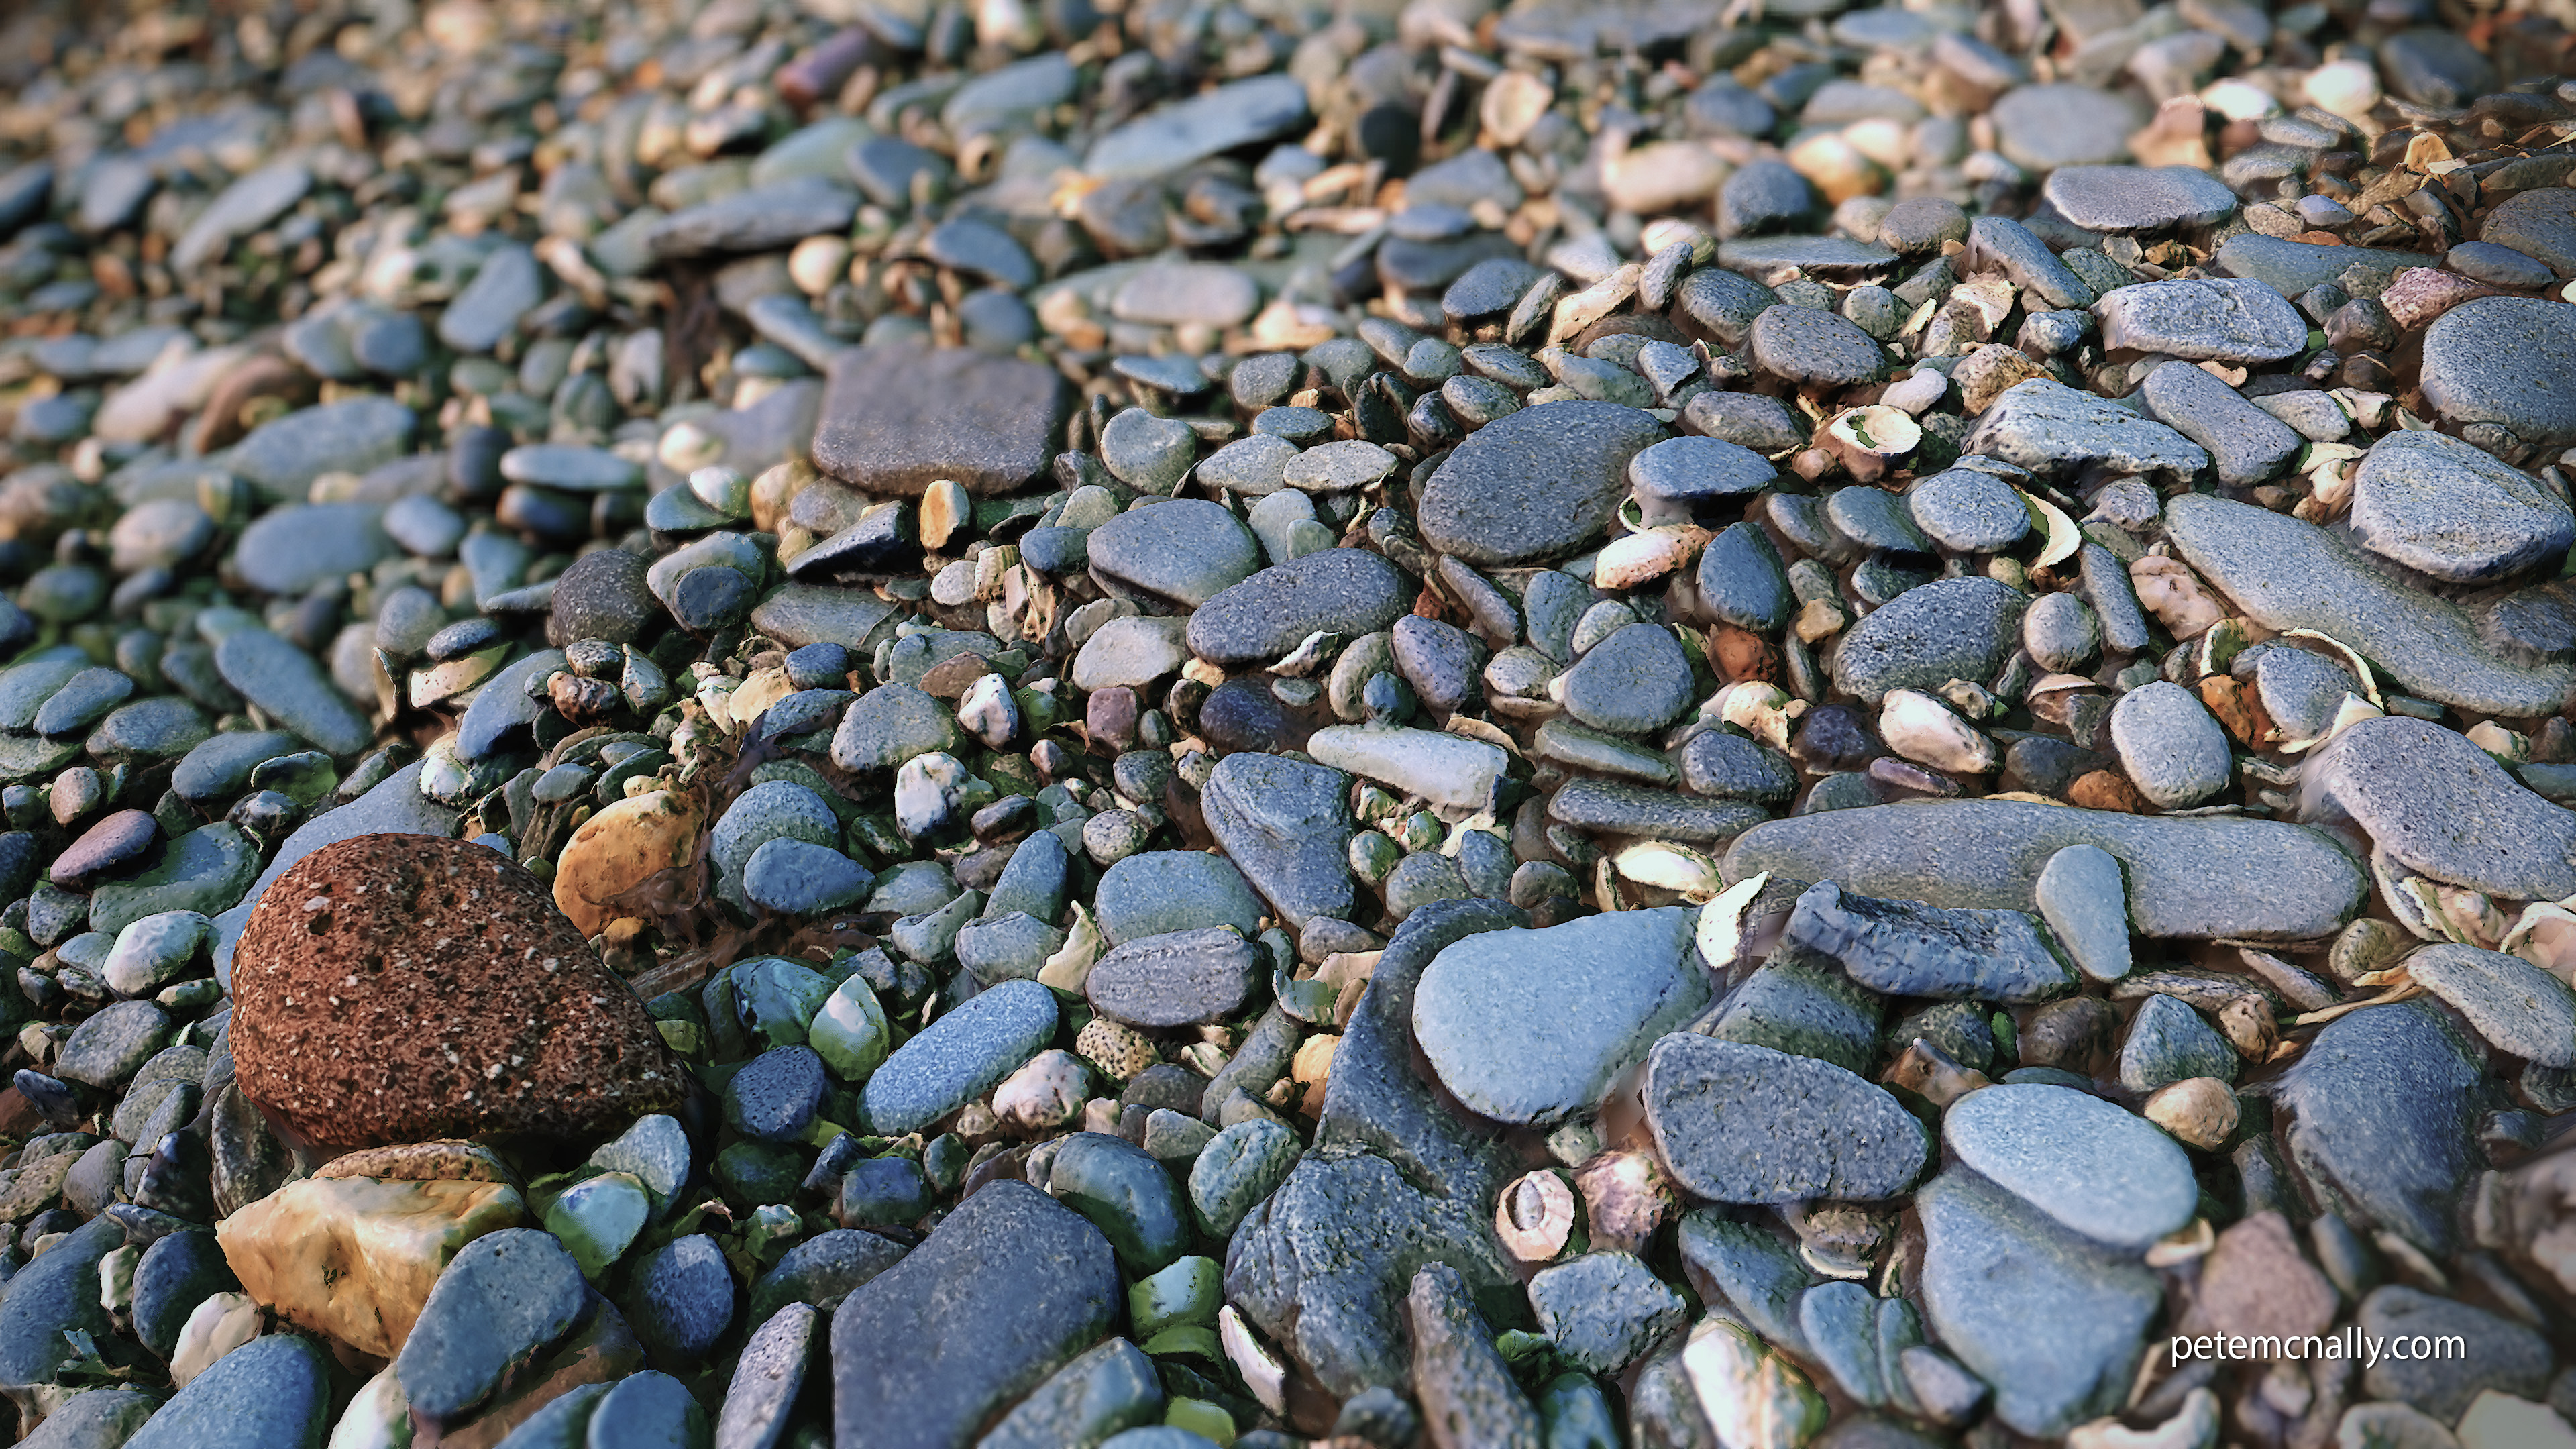
The first of these seamless materials from scans was some beach pebbles I shot on my phone in the shade of a cliff a few weeks back. The scan itself worked in places but is noisy throughout and needed a lot of filling in, which would usually have to be done manually in Photoshop or Substance Painter. I used 3dsmax to bake diffuse, normals, height and AO and hand painted roughness in Photoshop. Artomatix was used for seam removal and cleaning bits of seaweed and areas that hadn’t been captured well enough to use. Here is the result applied to a plane primitive in Toolbag 3:
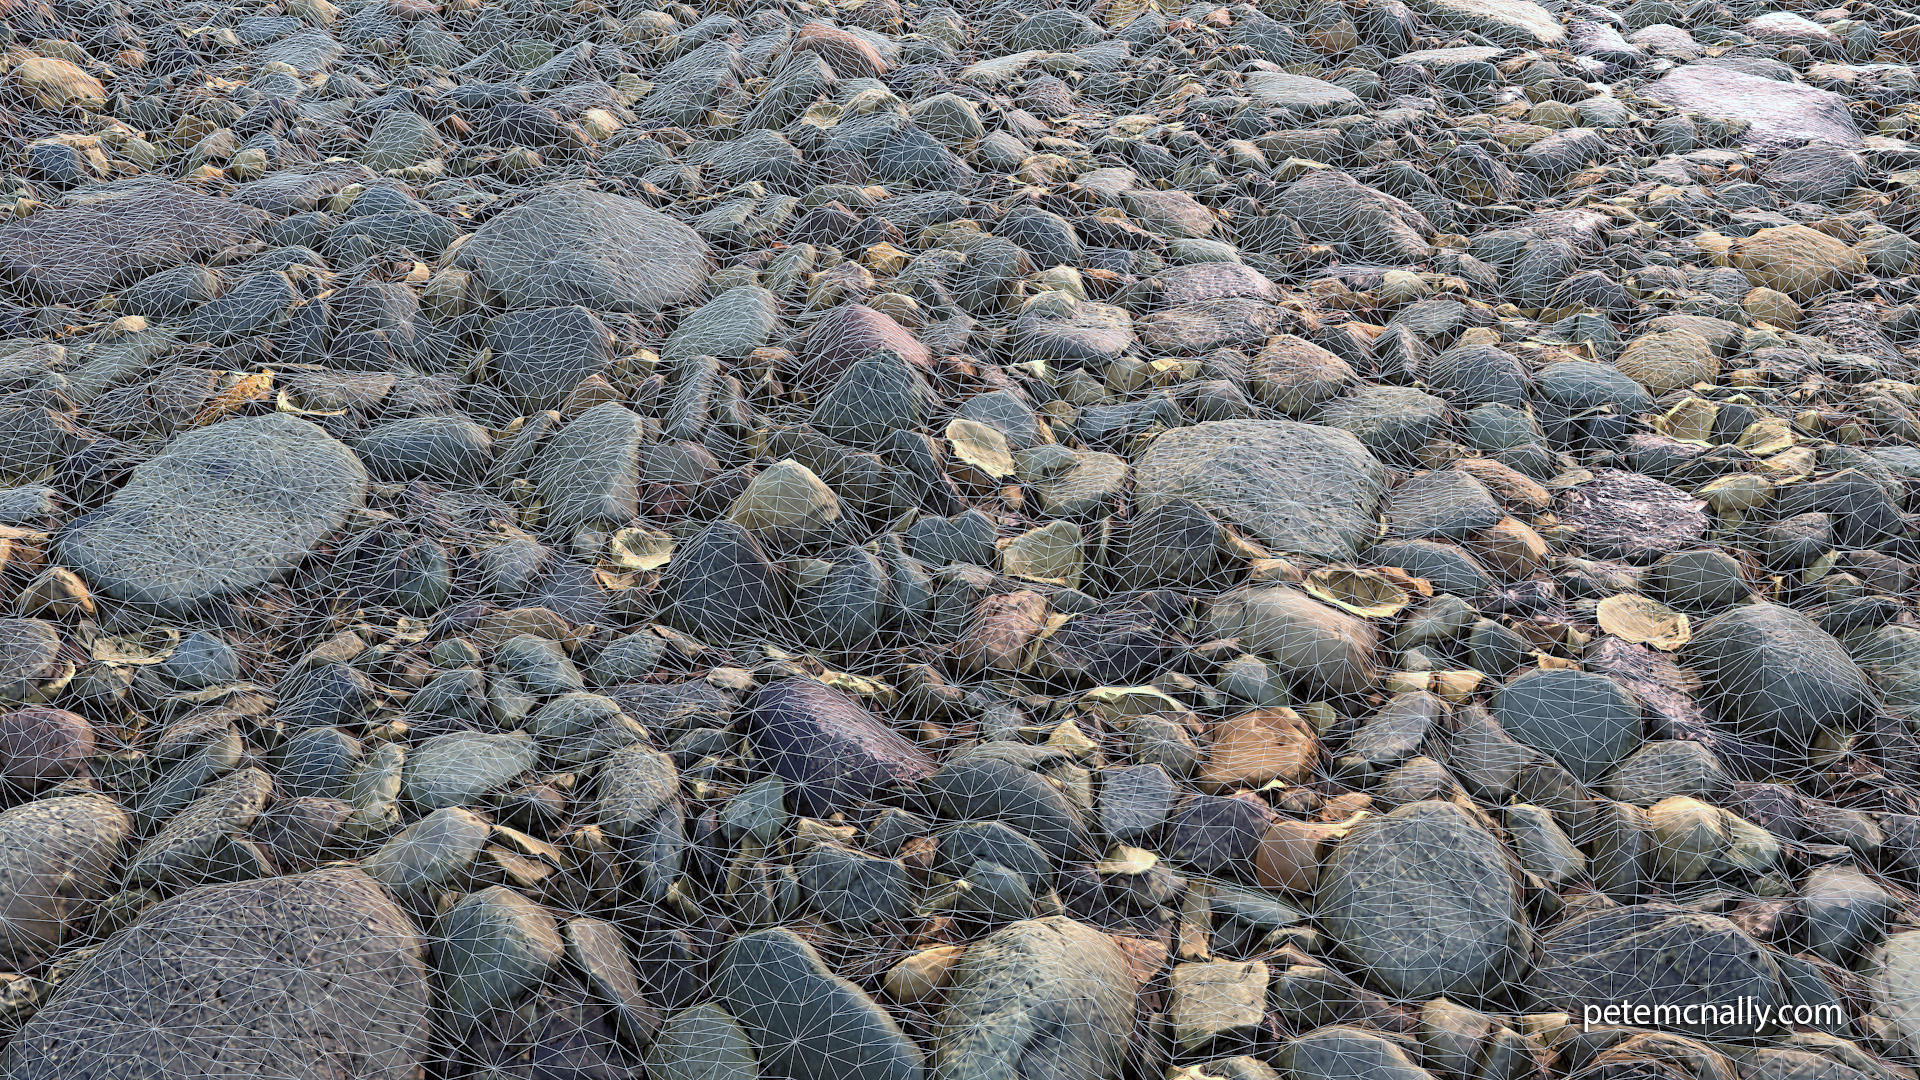
Wireframe (with PN triangle tesselation, displaced from a plane primitive)
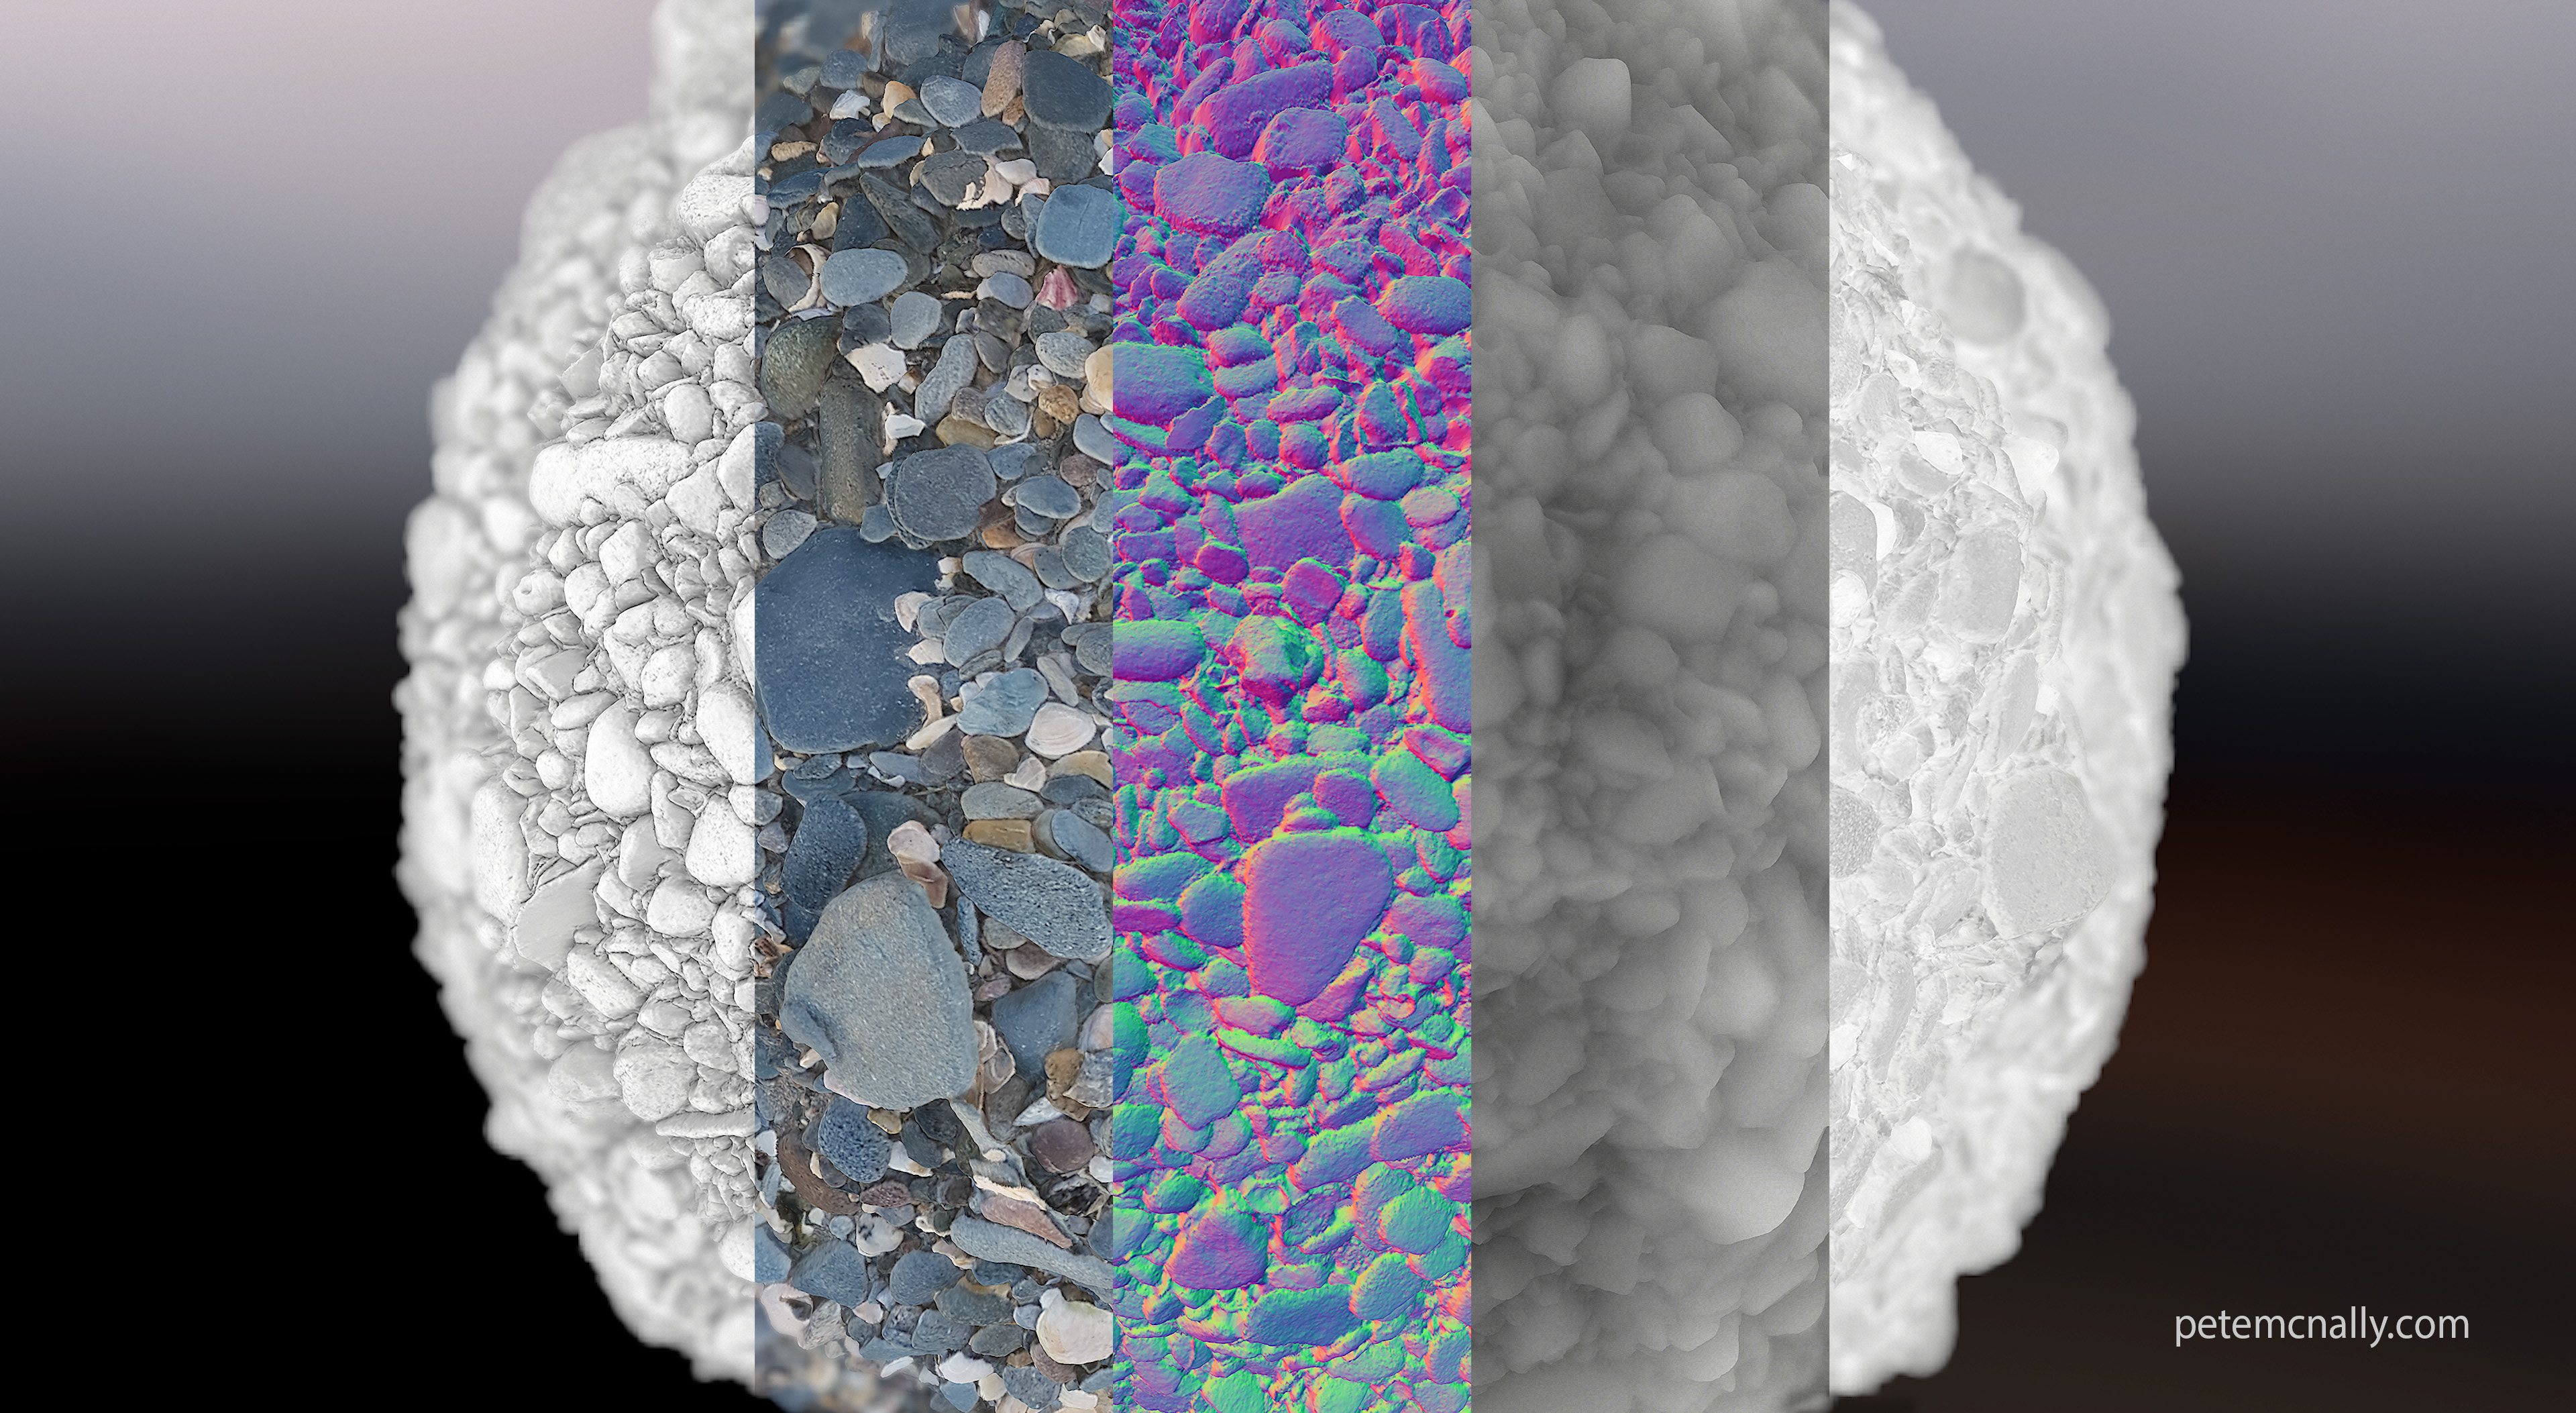
I took all 5 textures into Toolbag to test how they responded to PBR lighting
And here is the real-time material applied to a sphere in Sketchfab
This material was scanned near Malin Head, Ireland’s most northerly point last week, on this beach near the “Wee House of Malin”
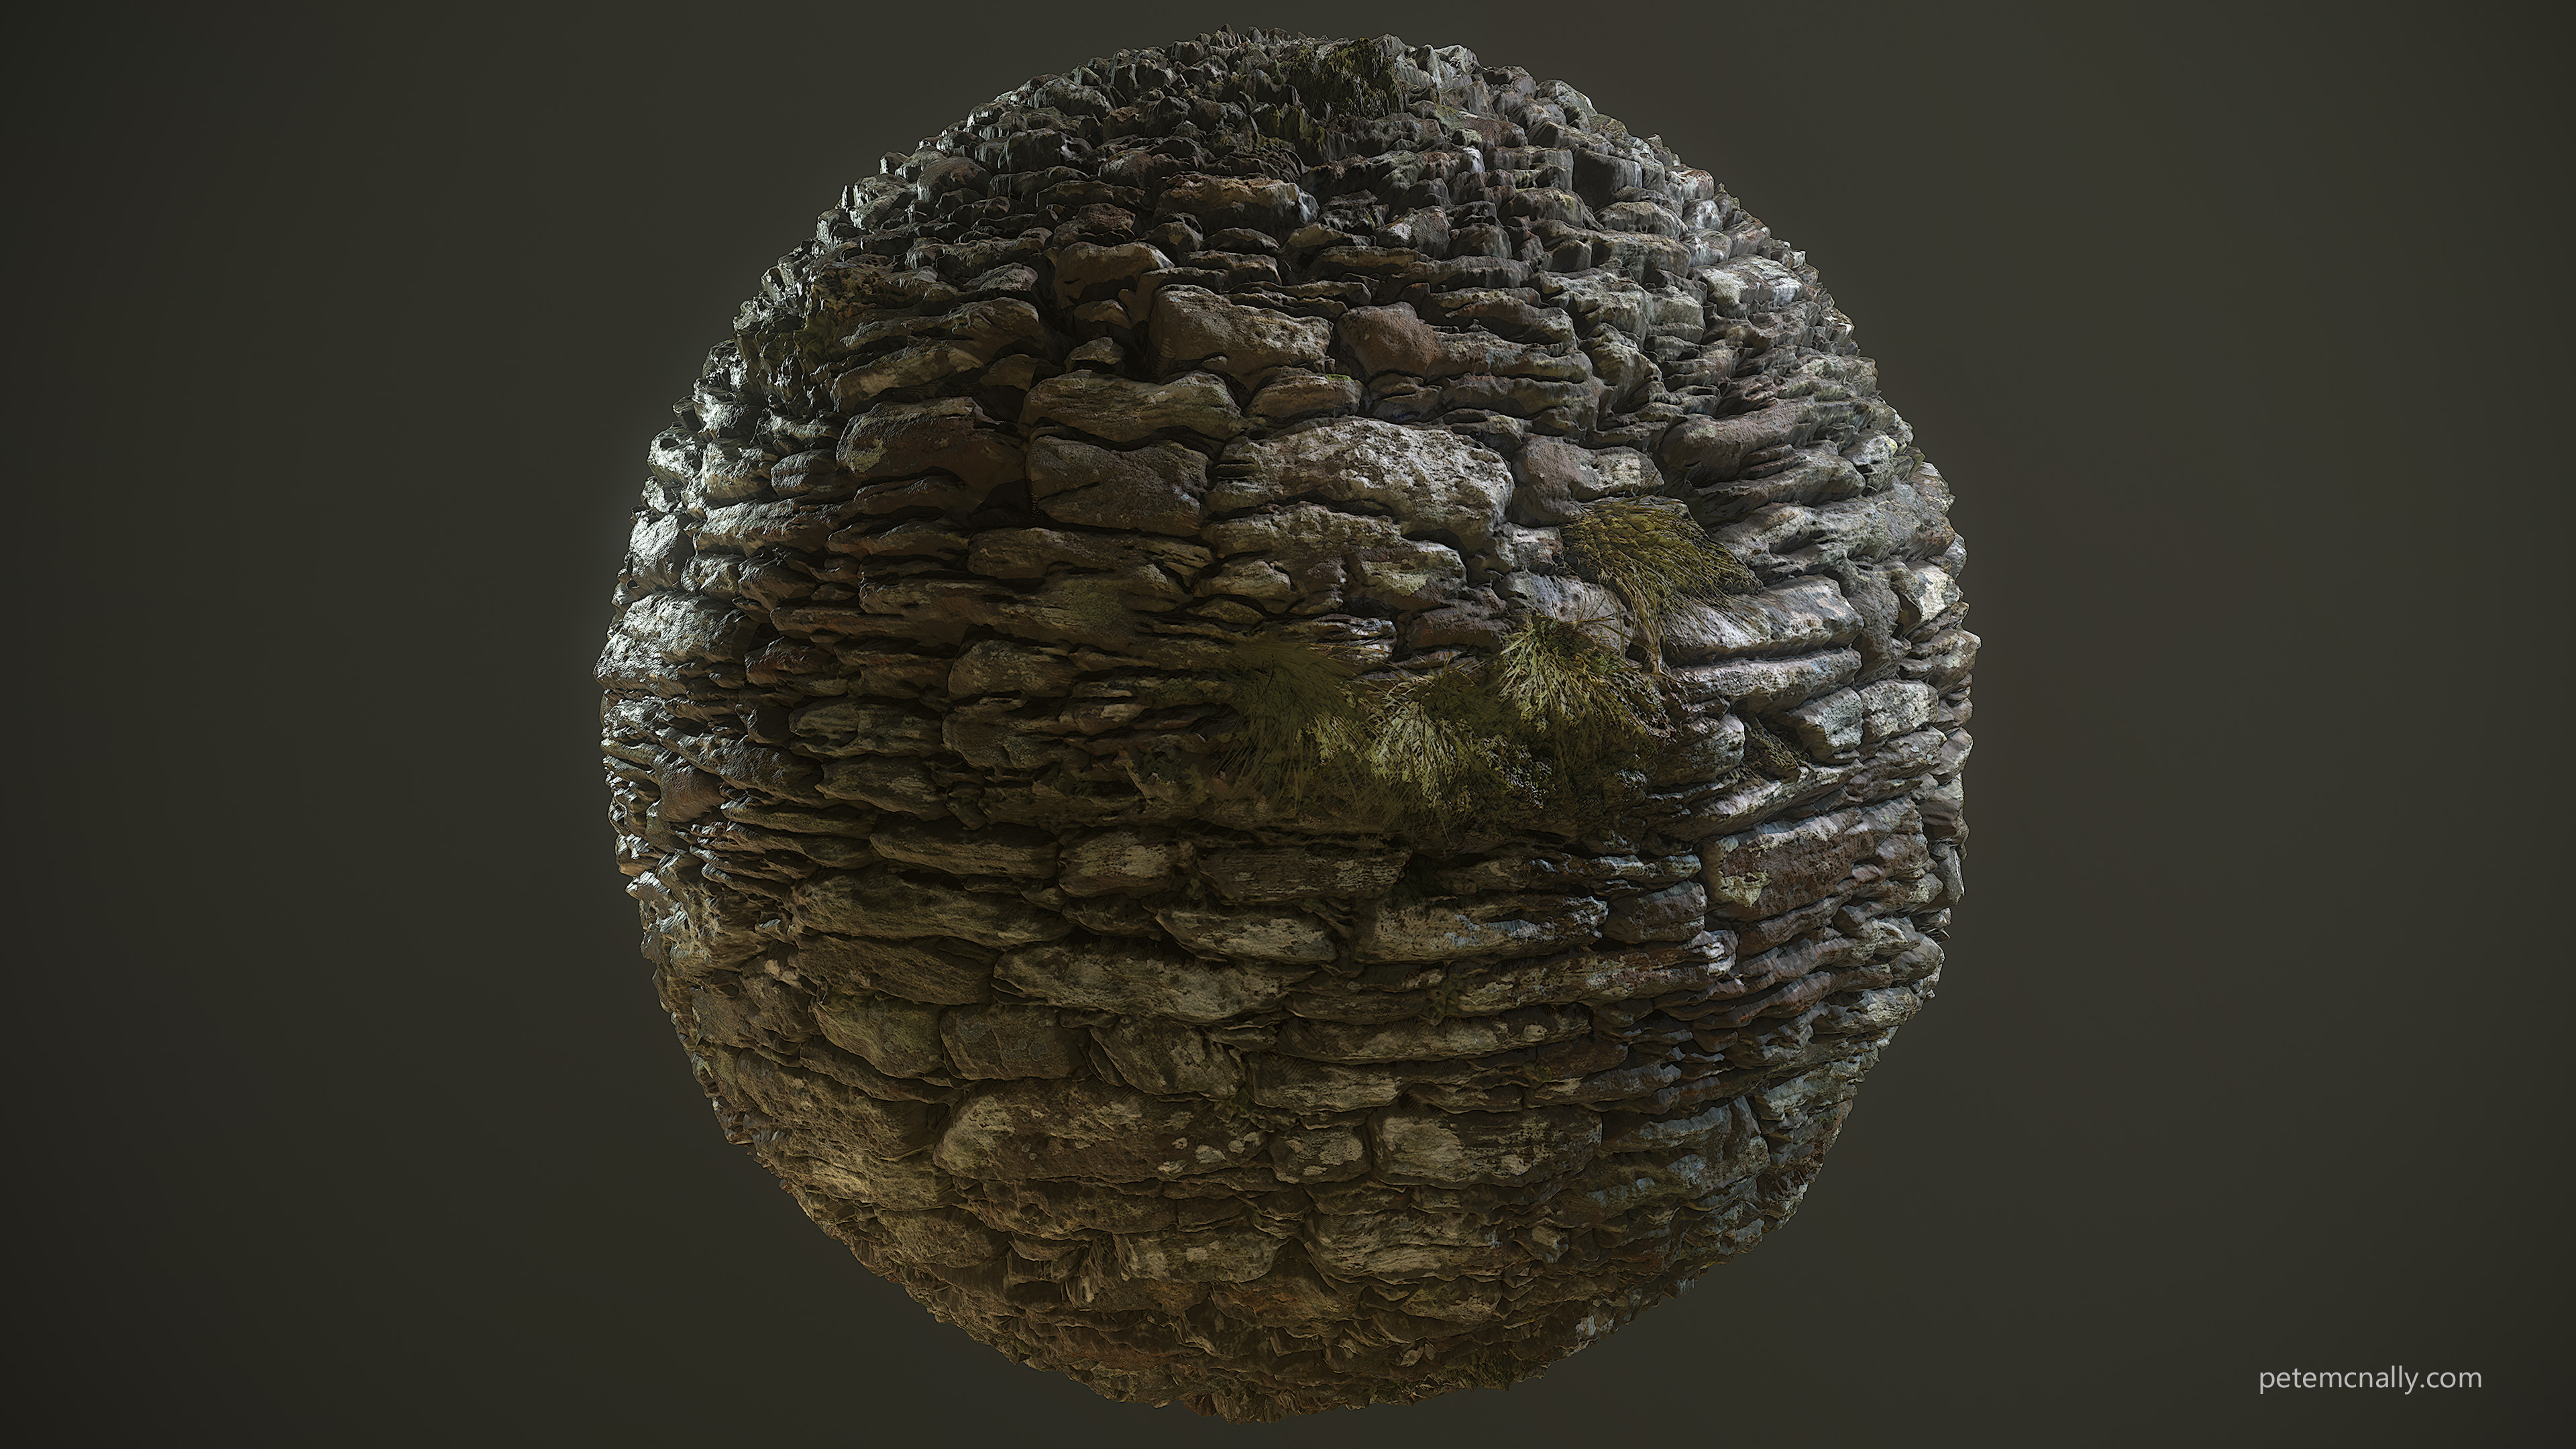
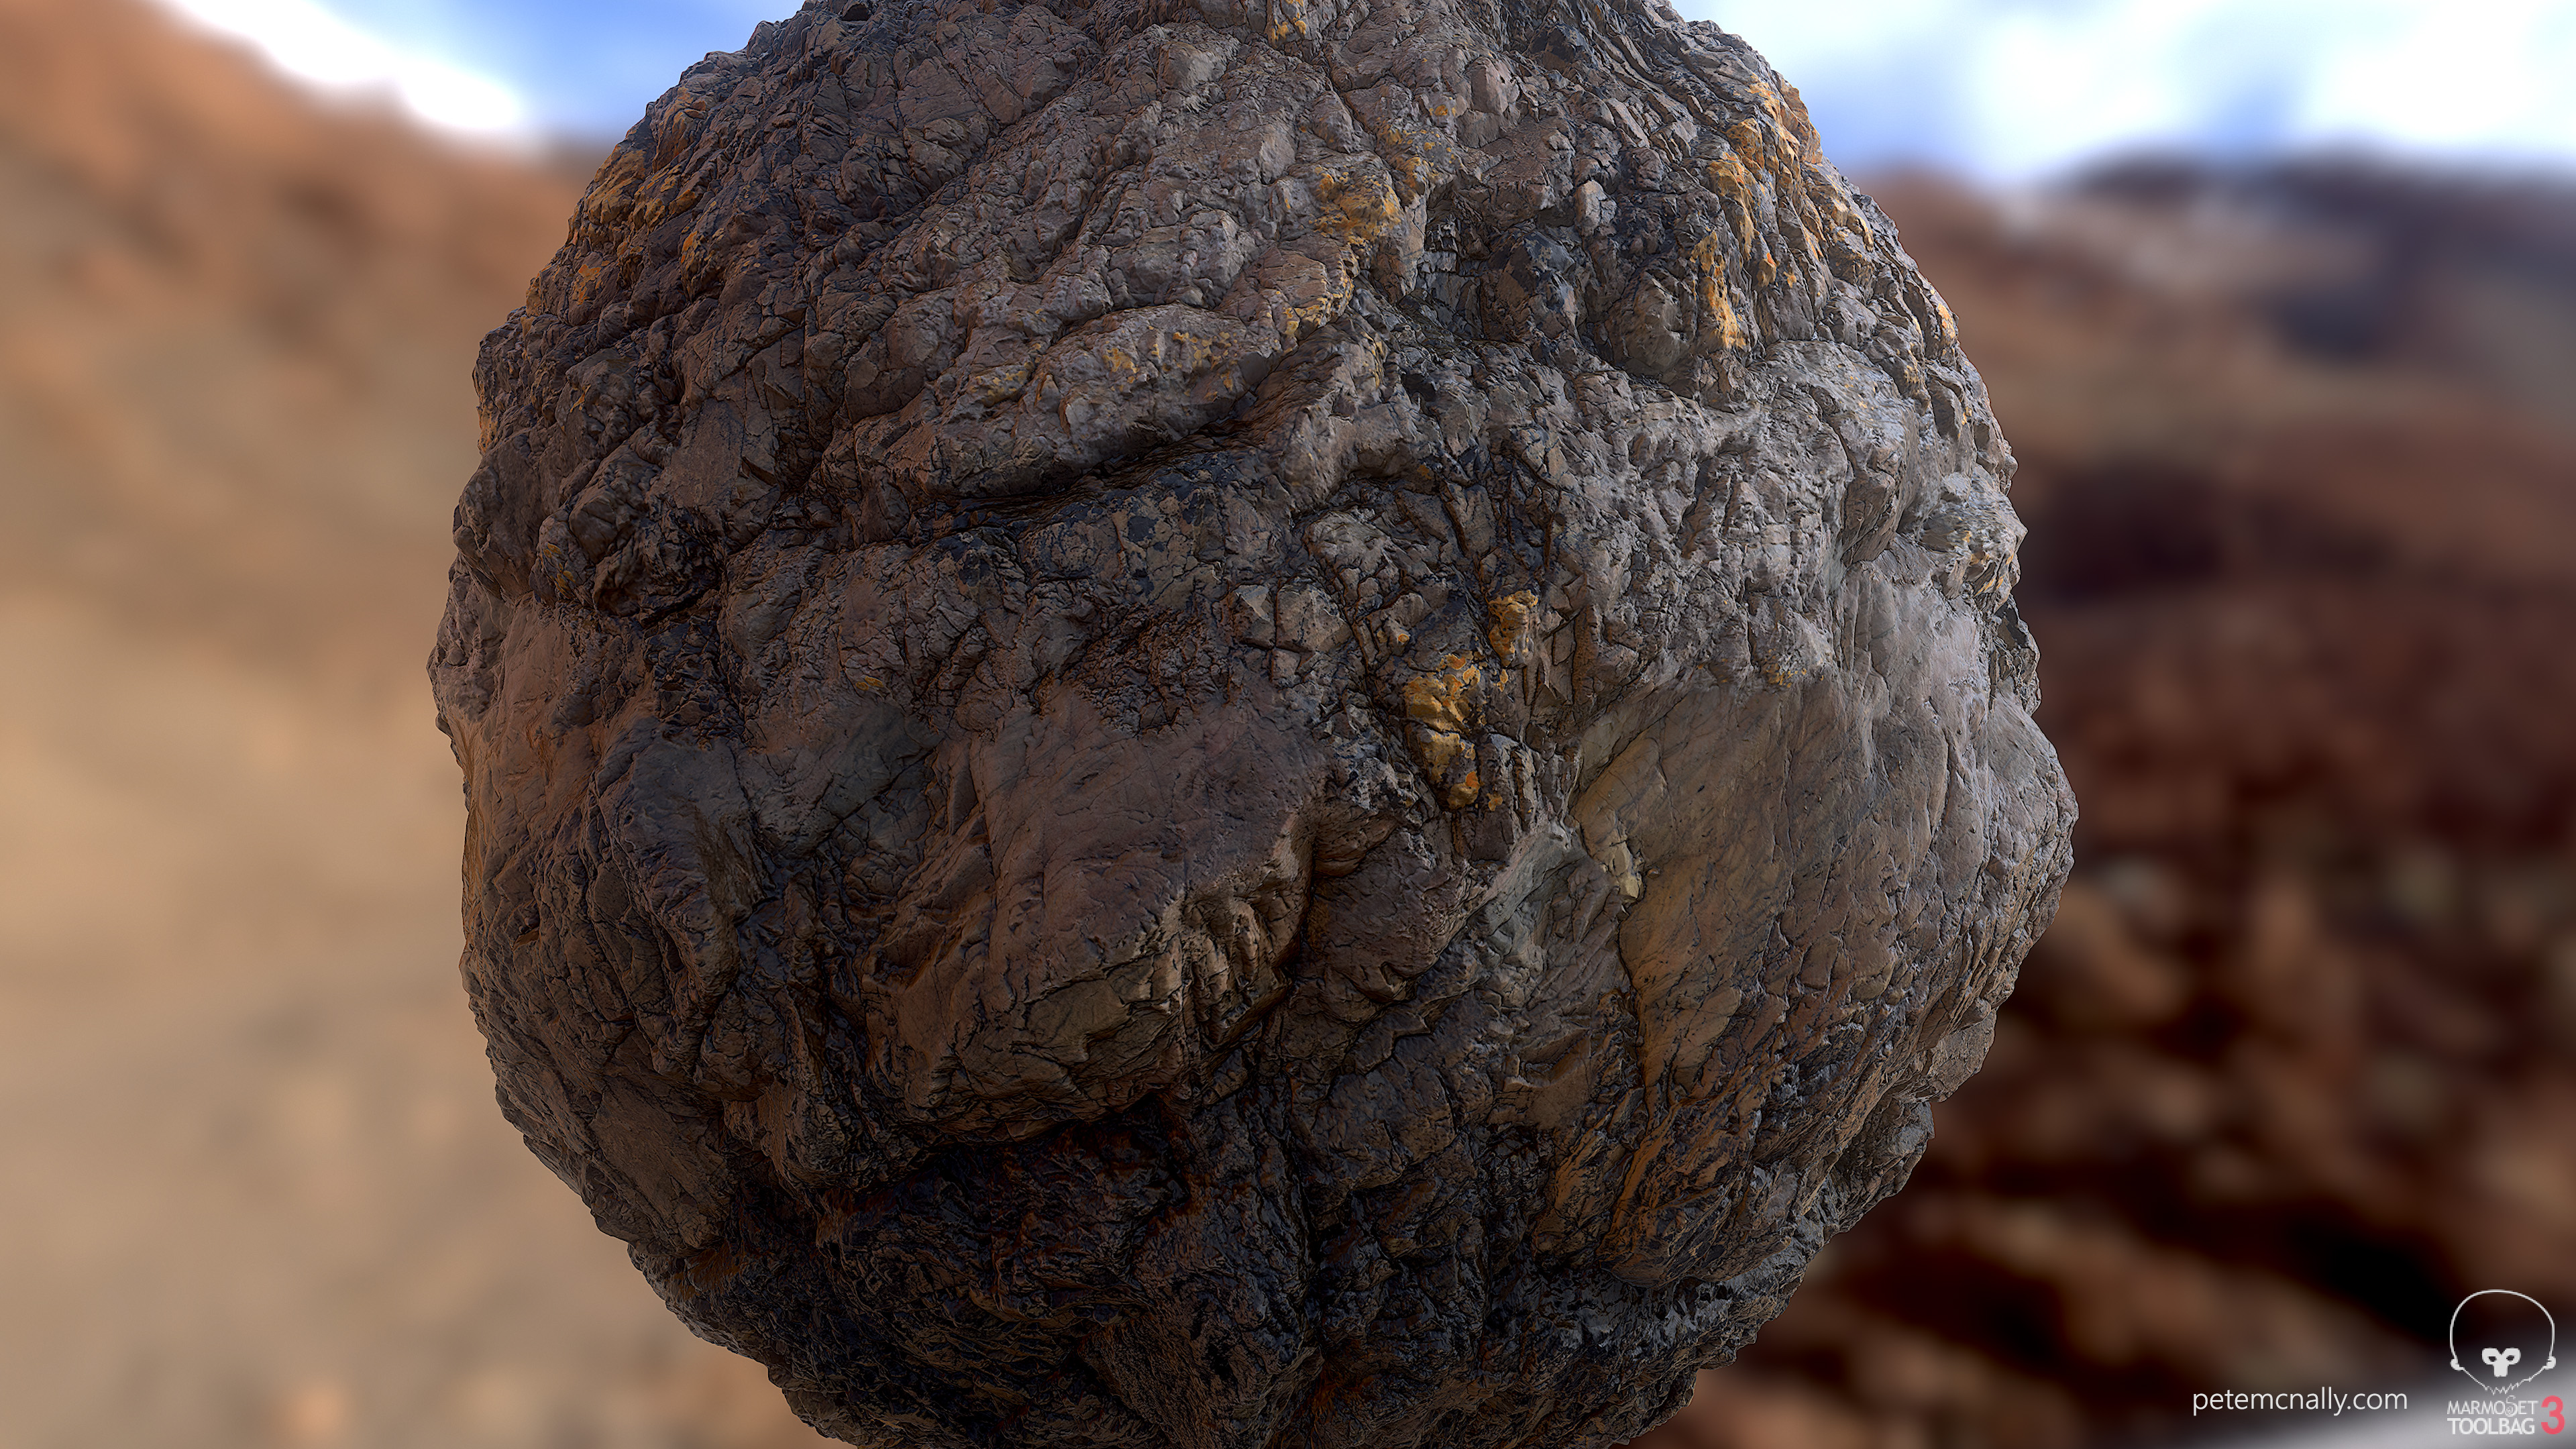
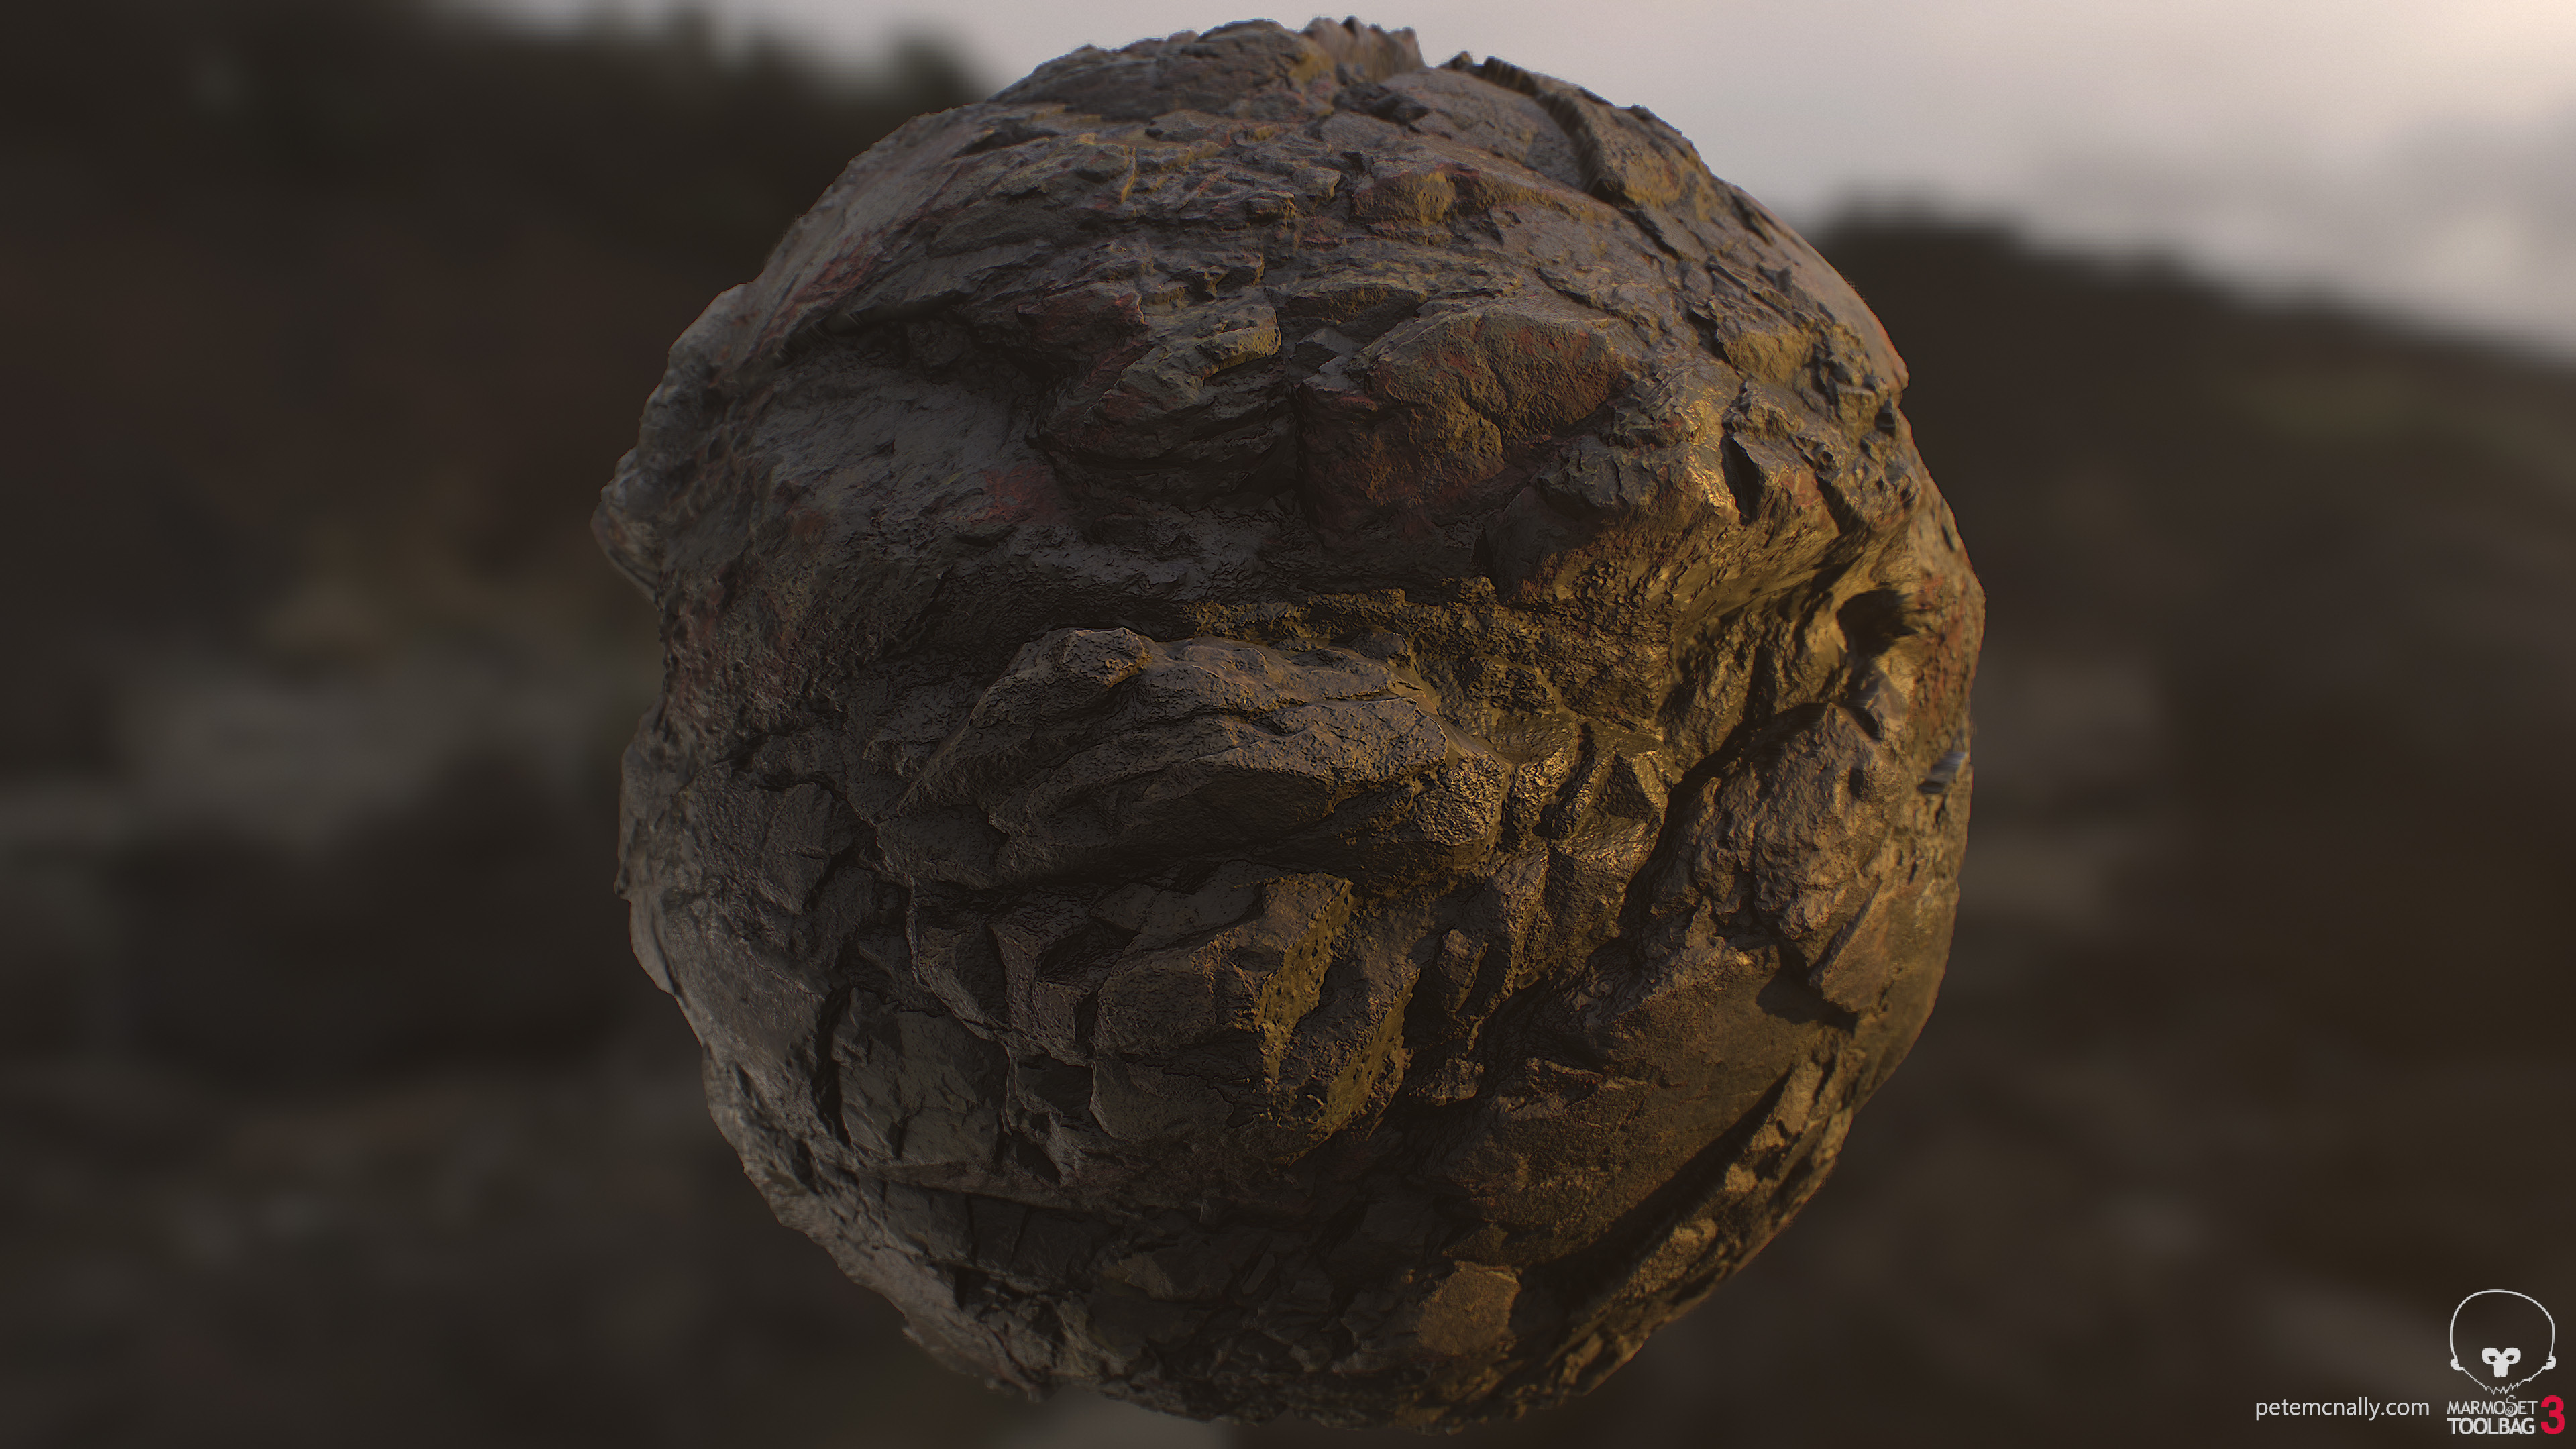
I brought the DSLR this time, and I there’s a healthy increase in quality over some of the phone stuff I’ve been doing lately. From 50 odd photos, I should be able to create three separate tiling materials, the first of which is a craggy cliff like material made seamless in Artomatix. Here’s the obligatory material sphere:
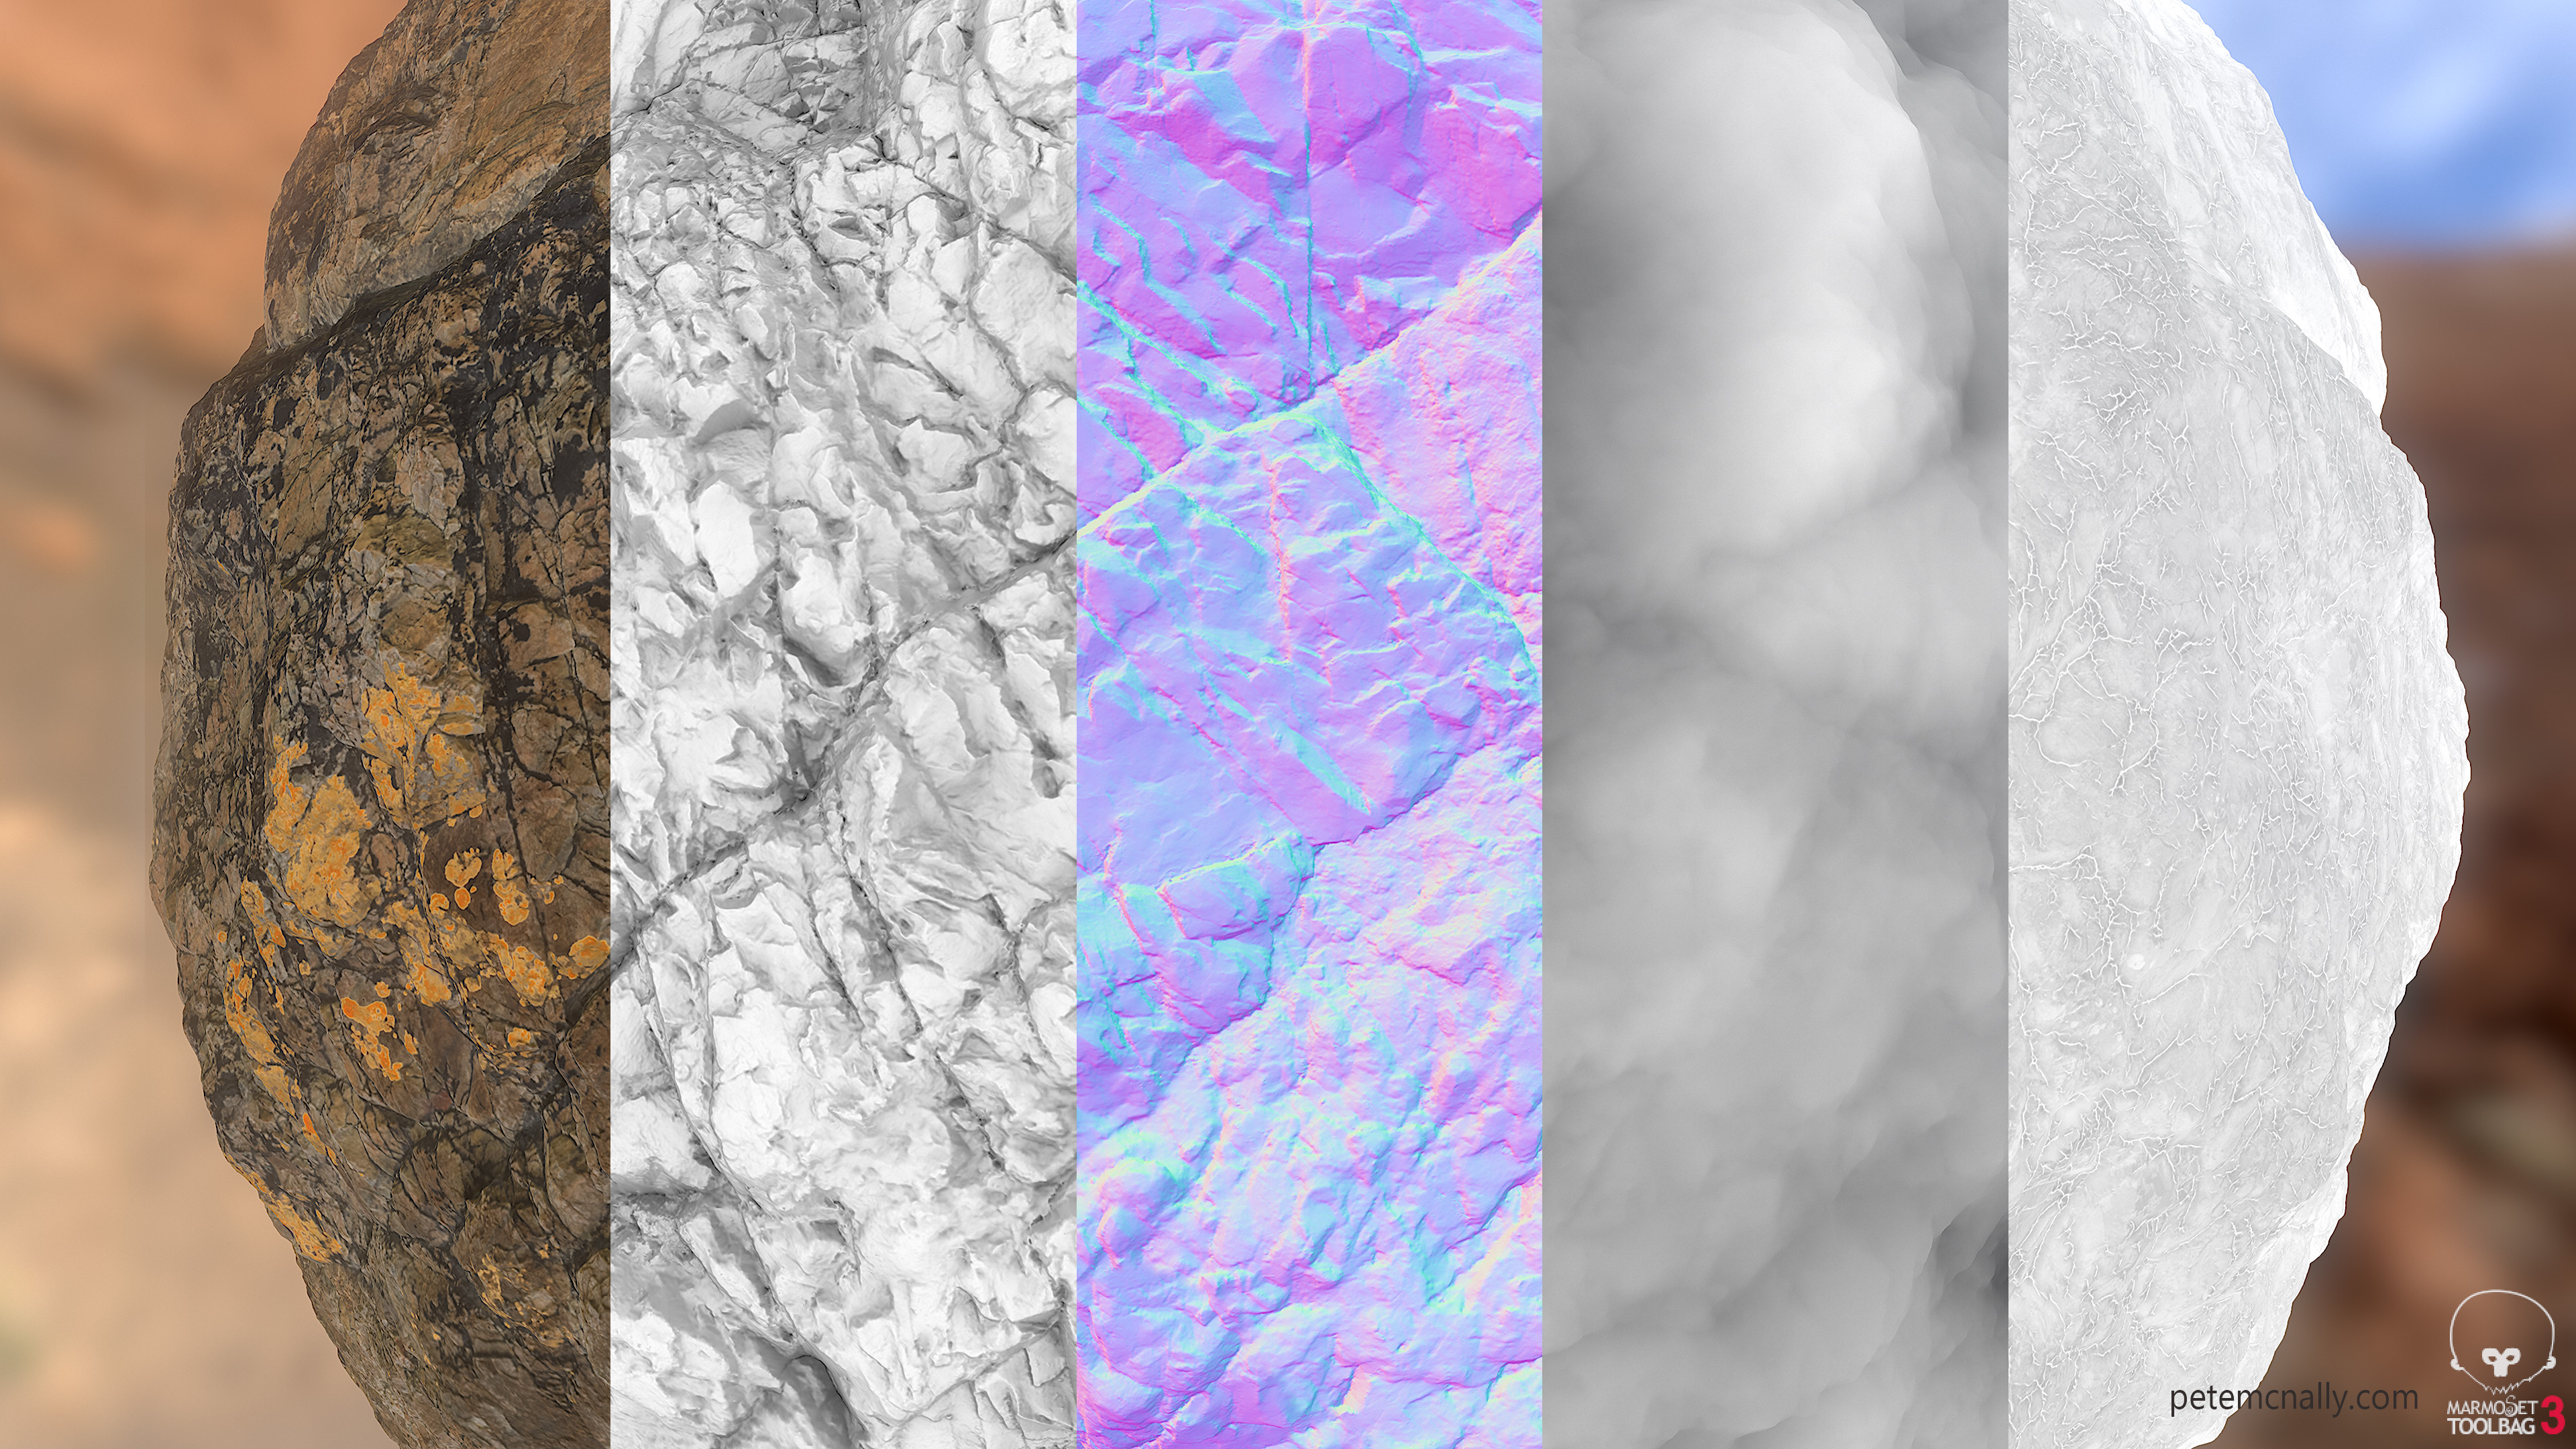
And the breakdown (roughness was constructed by hand and the height map was done in Knald, everything else was baked from 3DSMax)
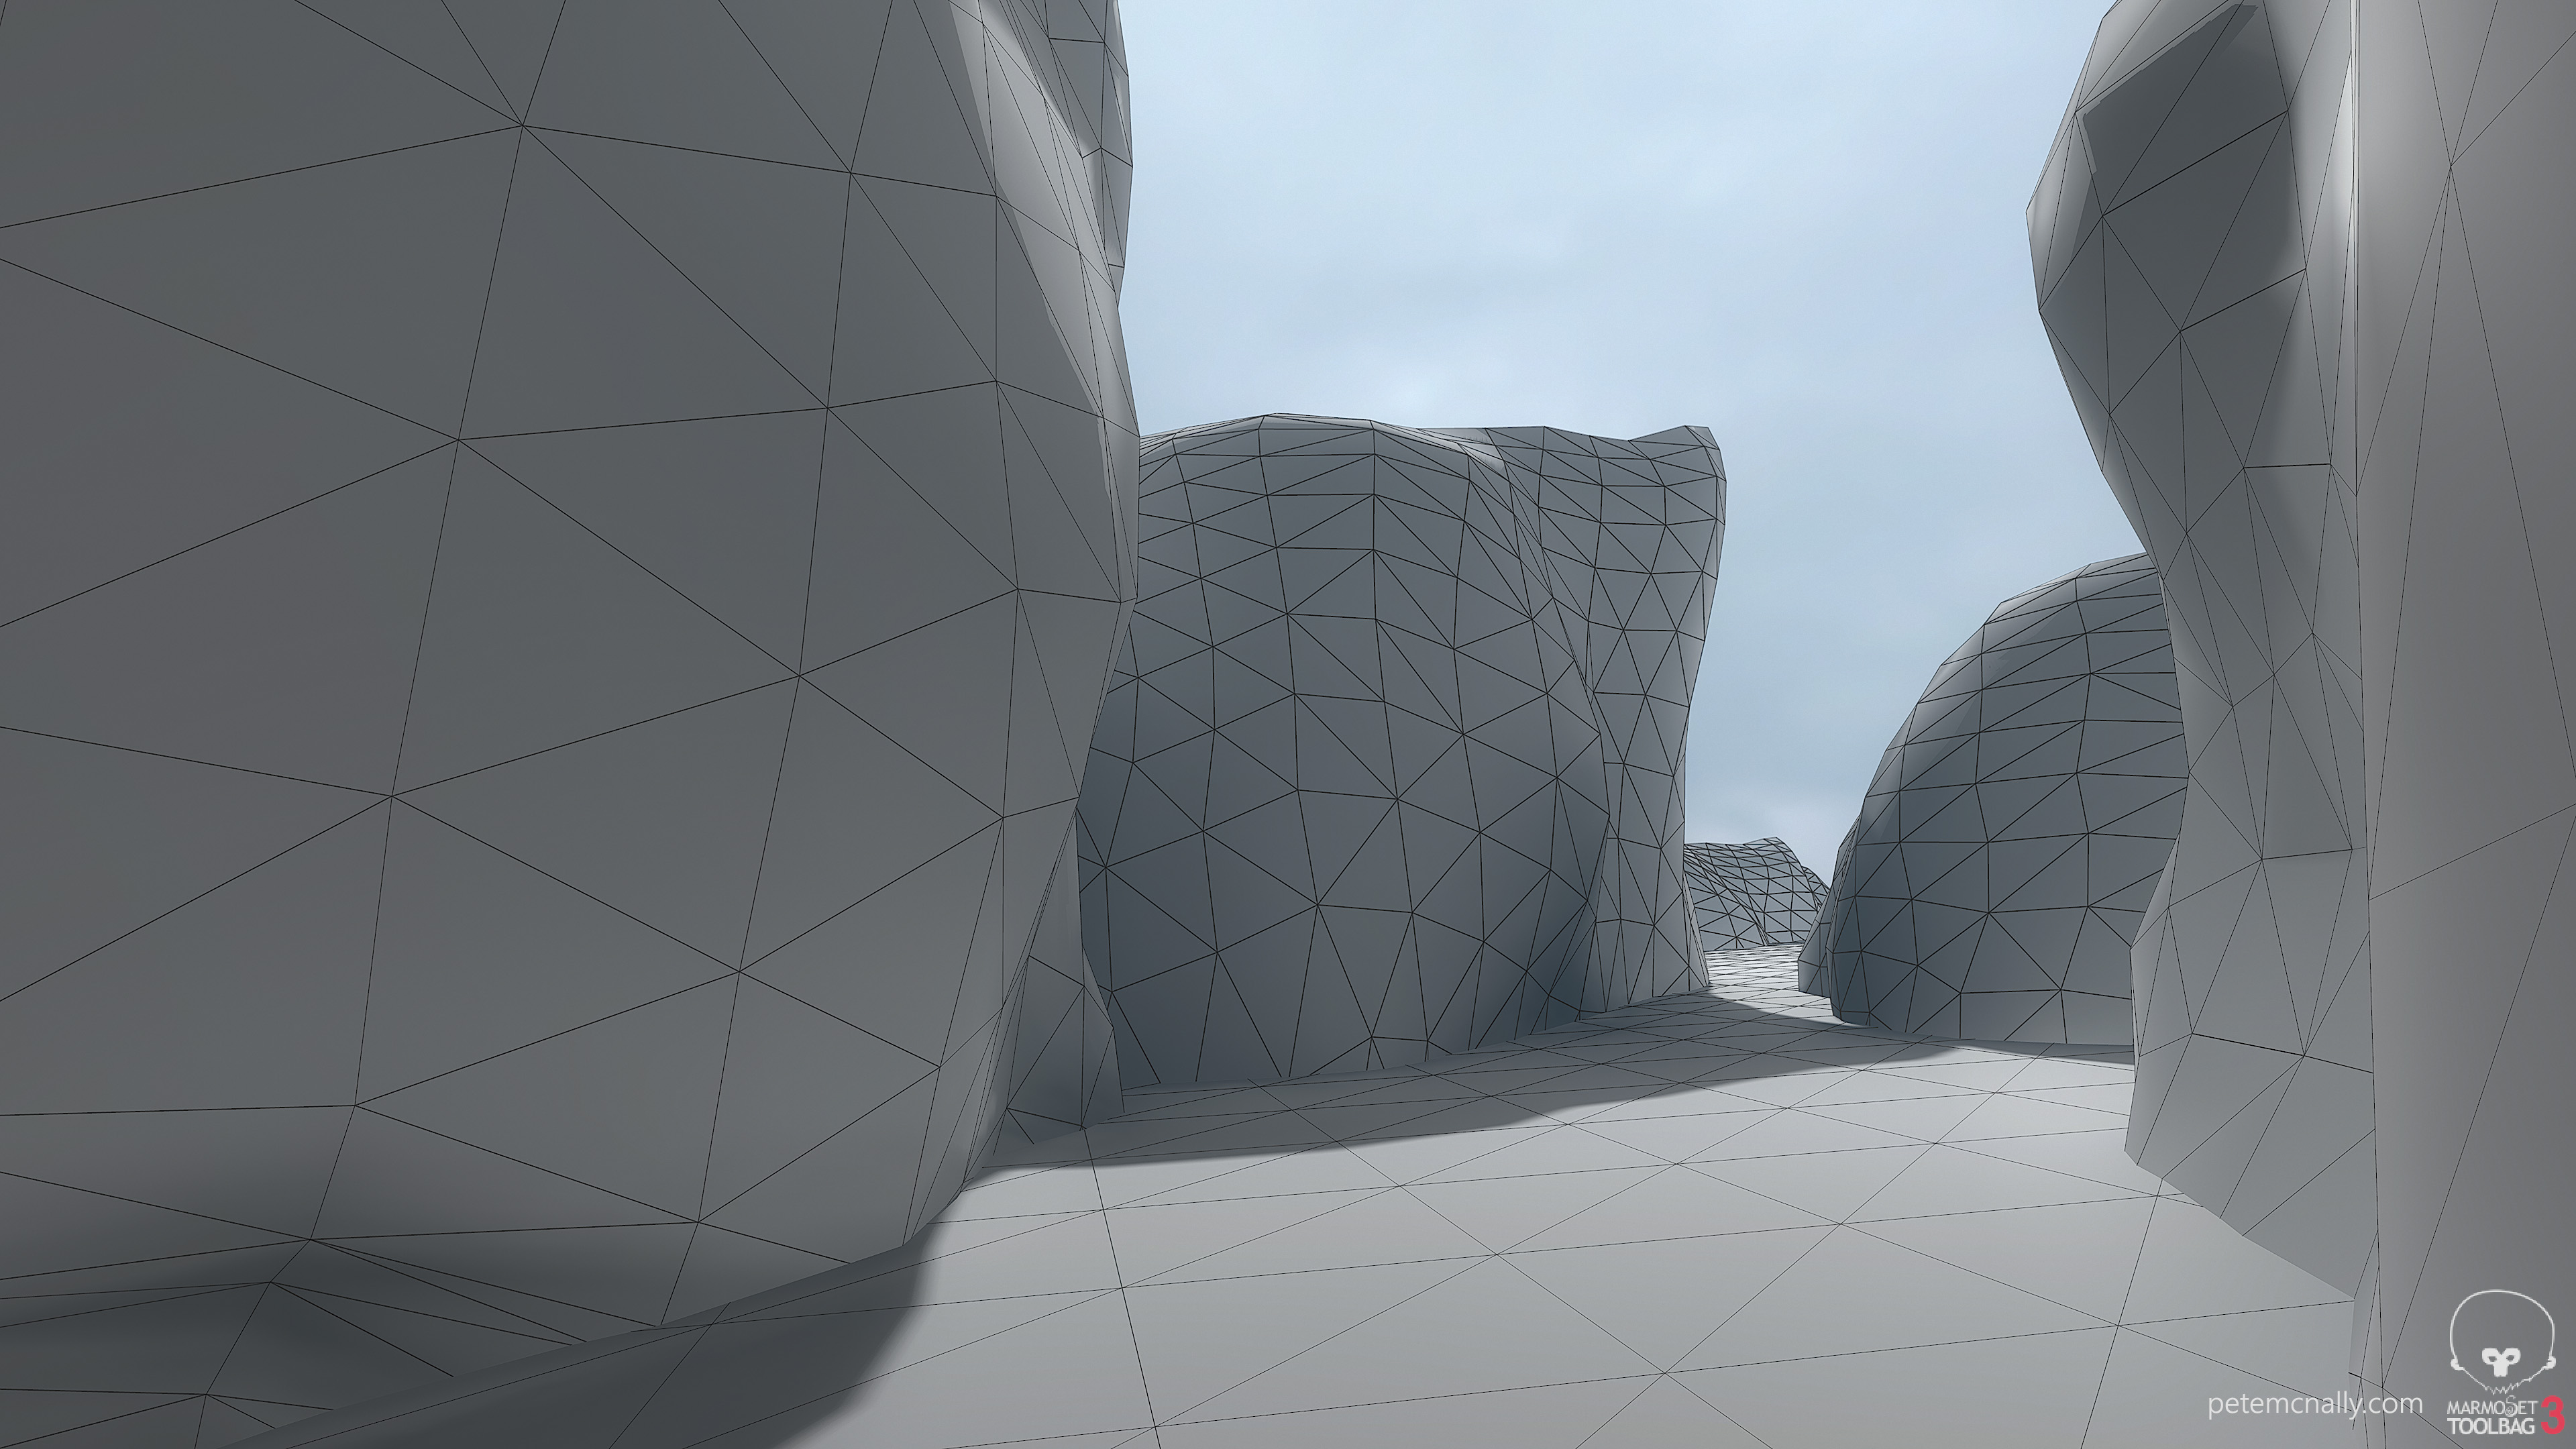
The whole idea of making seamless materials from 3D scans is so that materials can be decoupled from geometry and used elsewhere arbitrarily, in different scenes and lighting conditions. Here’s an example of some simple geometry:
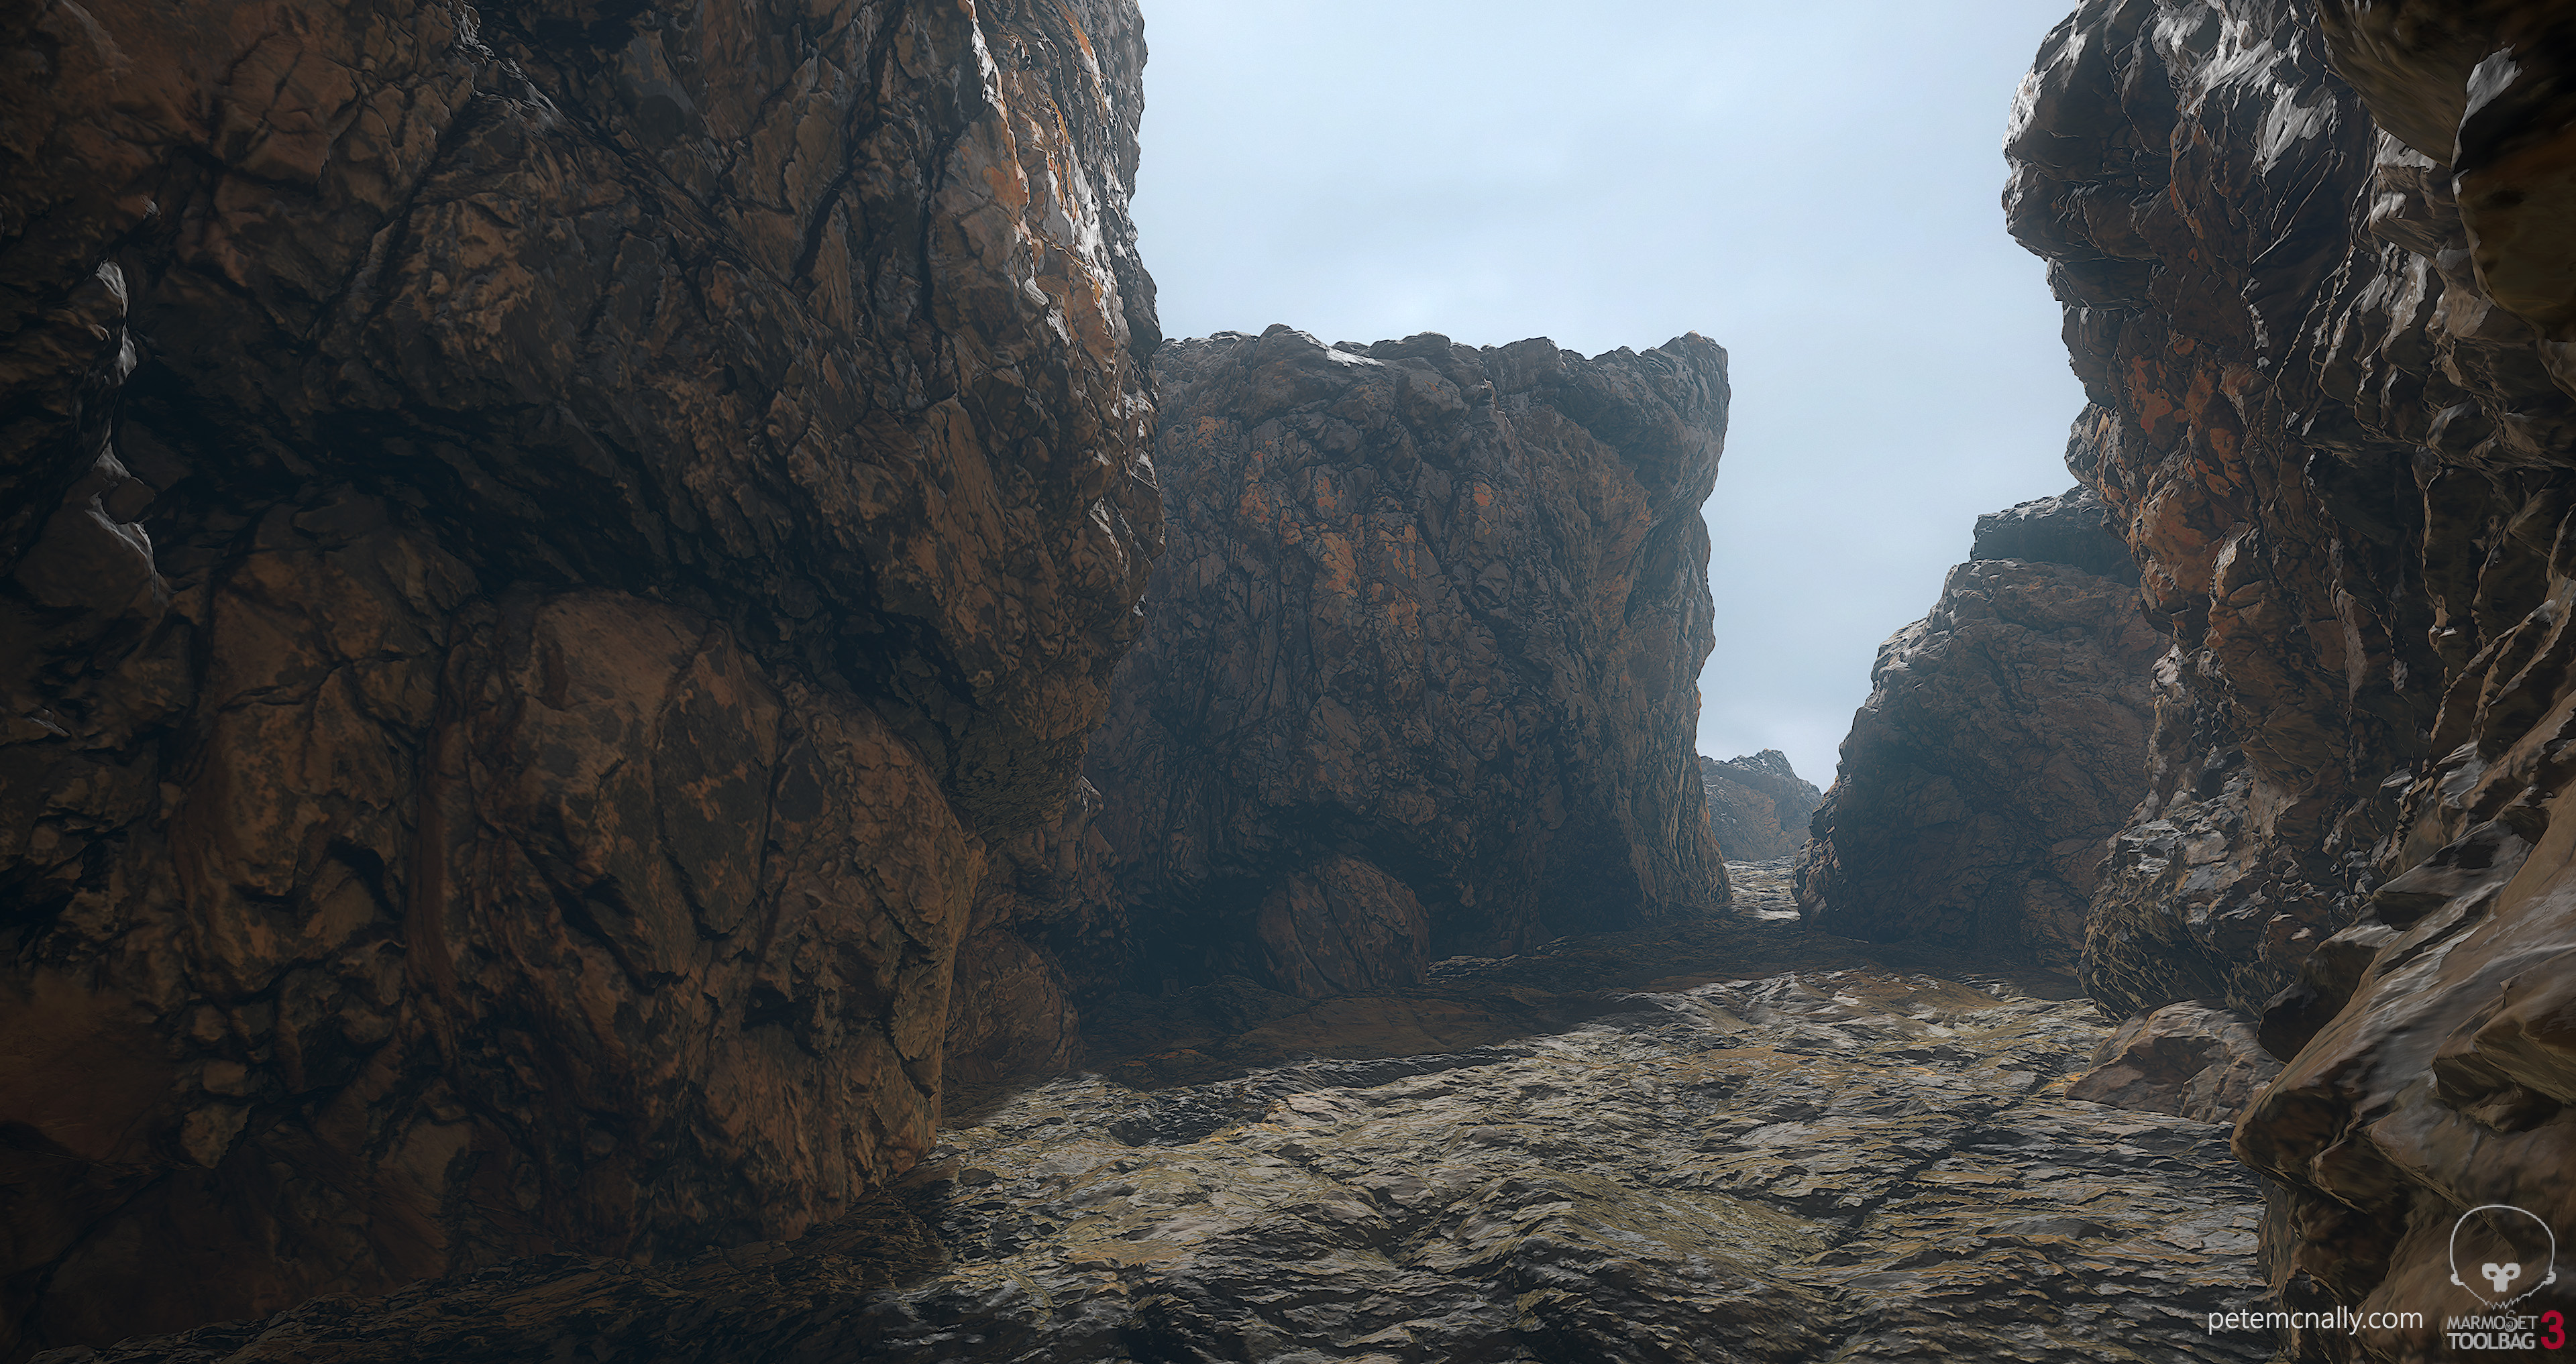
This is how that same geometry looks with tessellation and the material applied (rendered in Toolbag 3, as ever)
I really need to stop making rocks. 😀 Here’s a video, you’d be hard pressed to spot the seams.
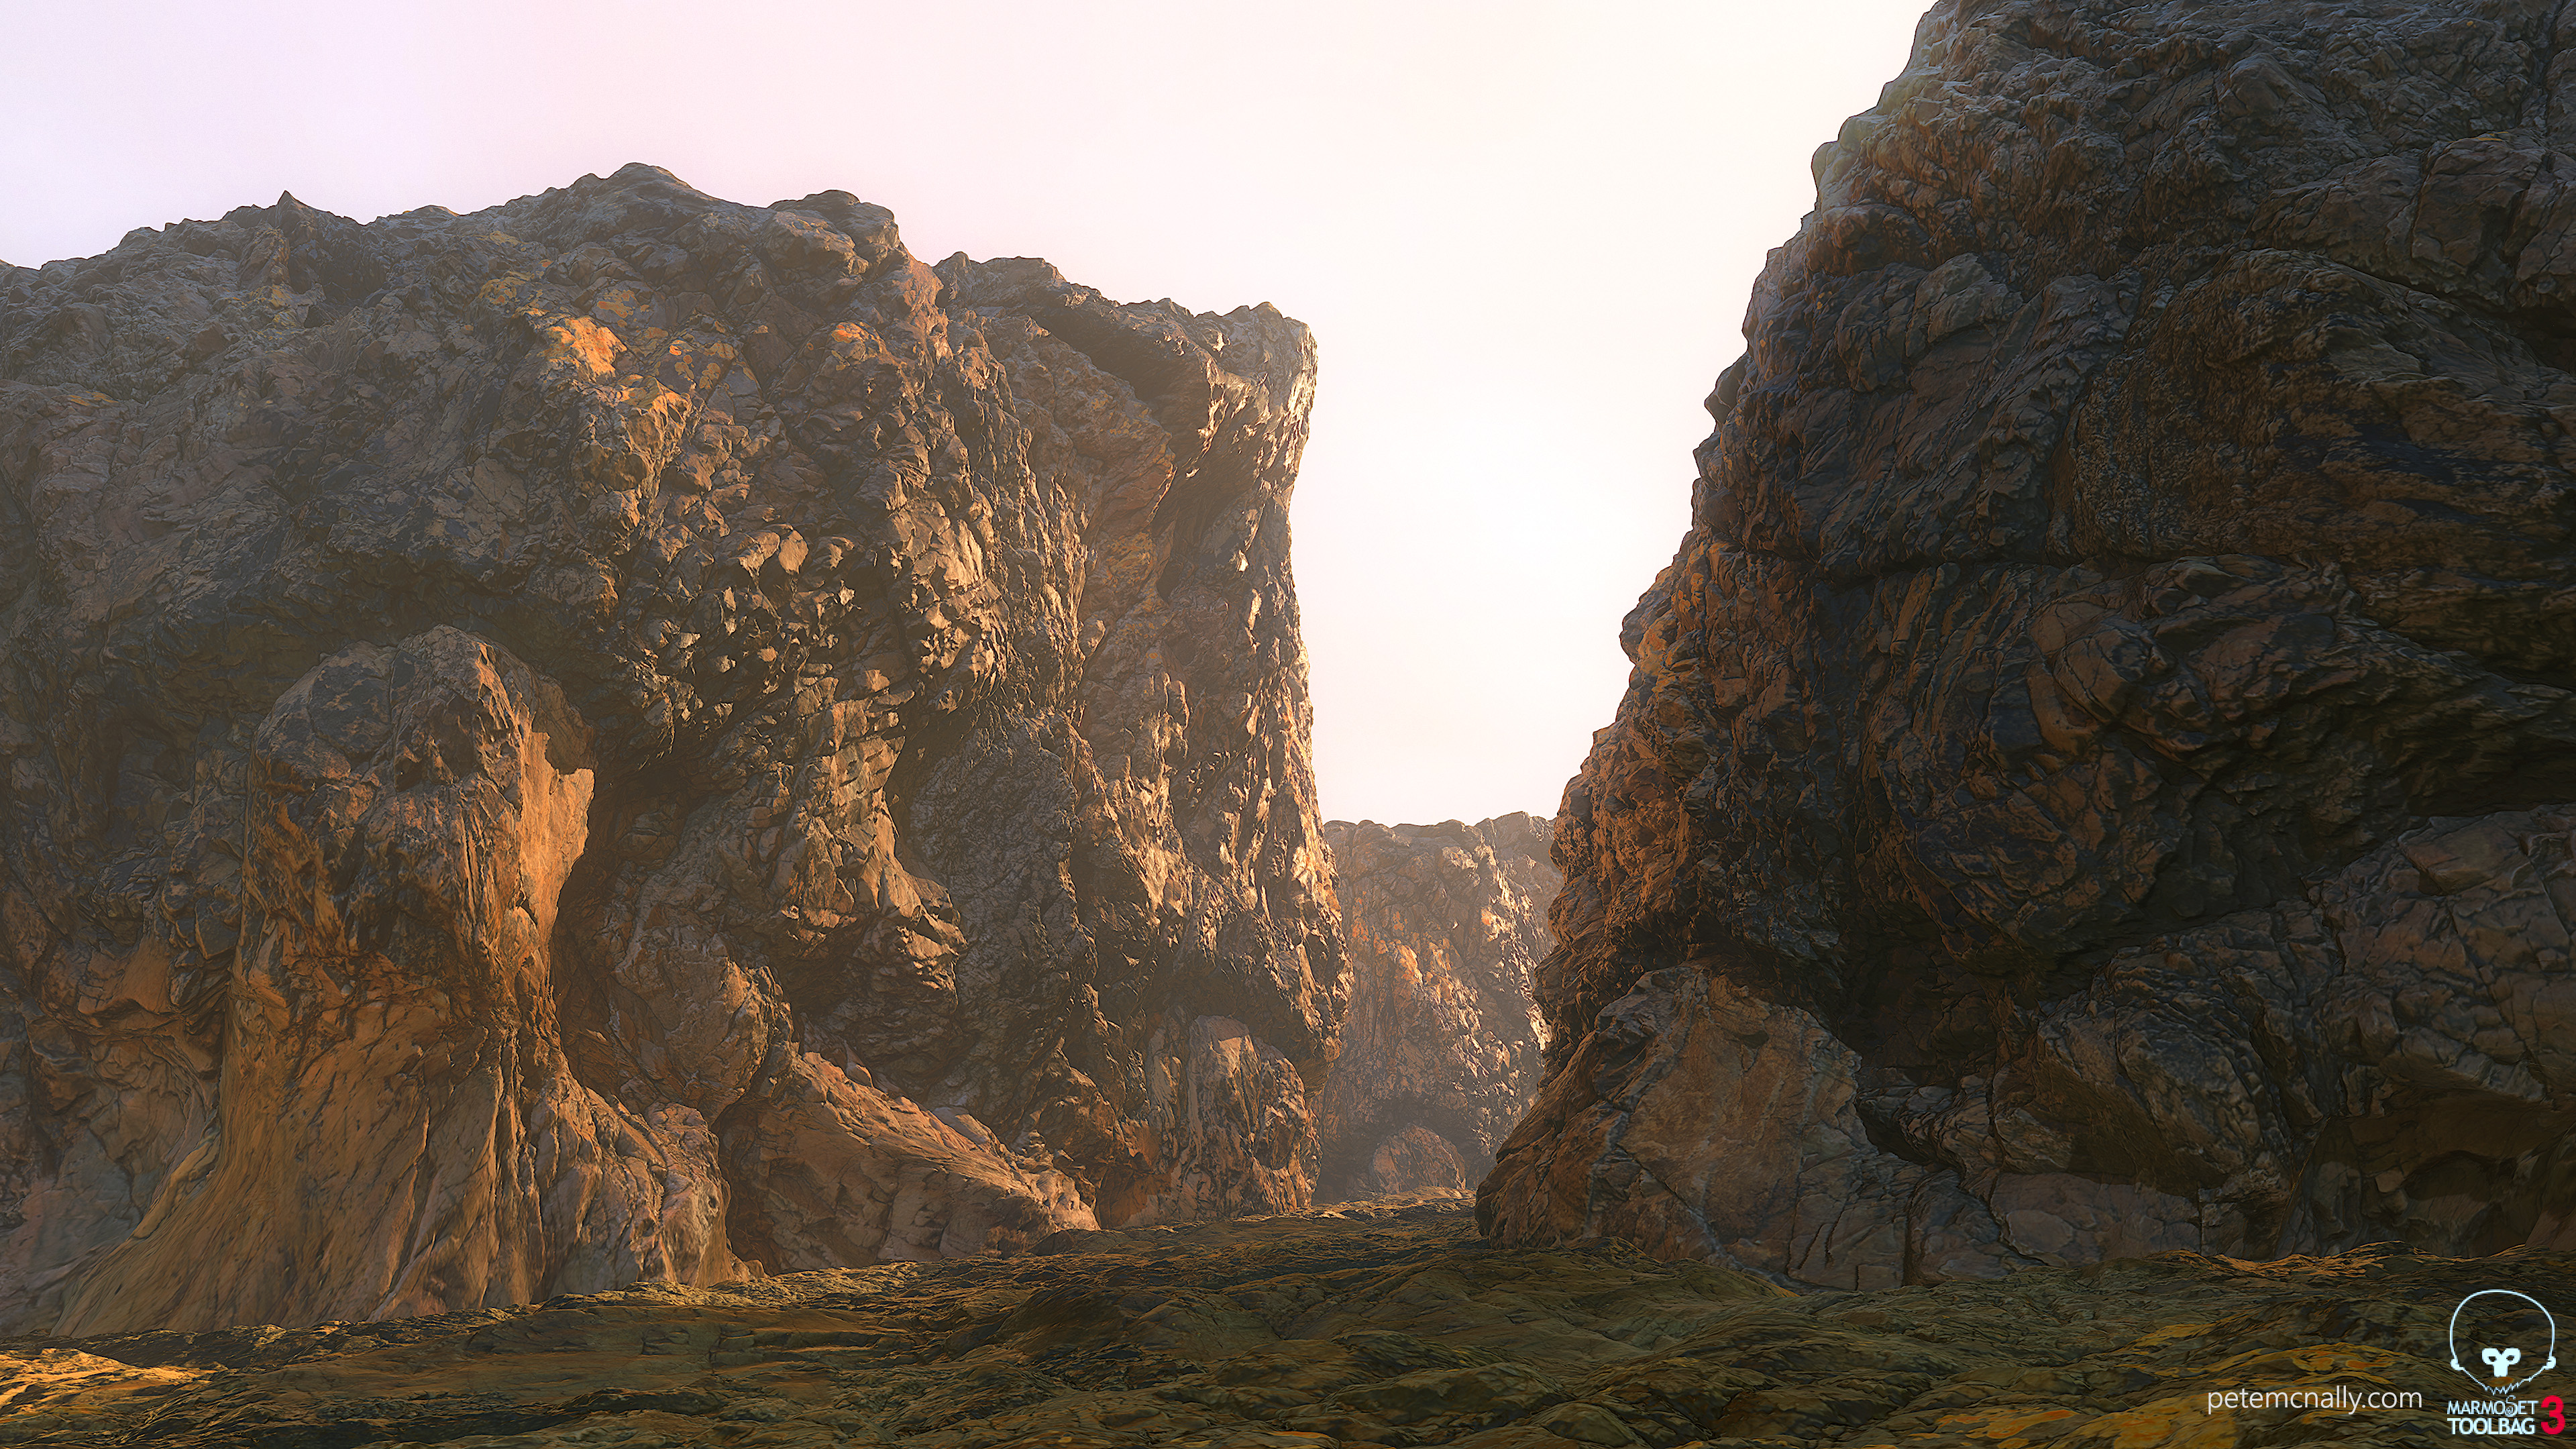
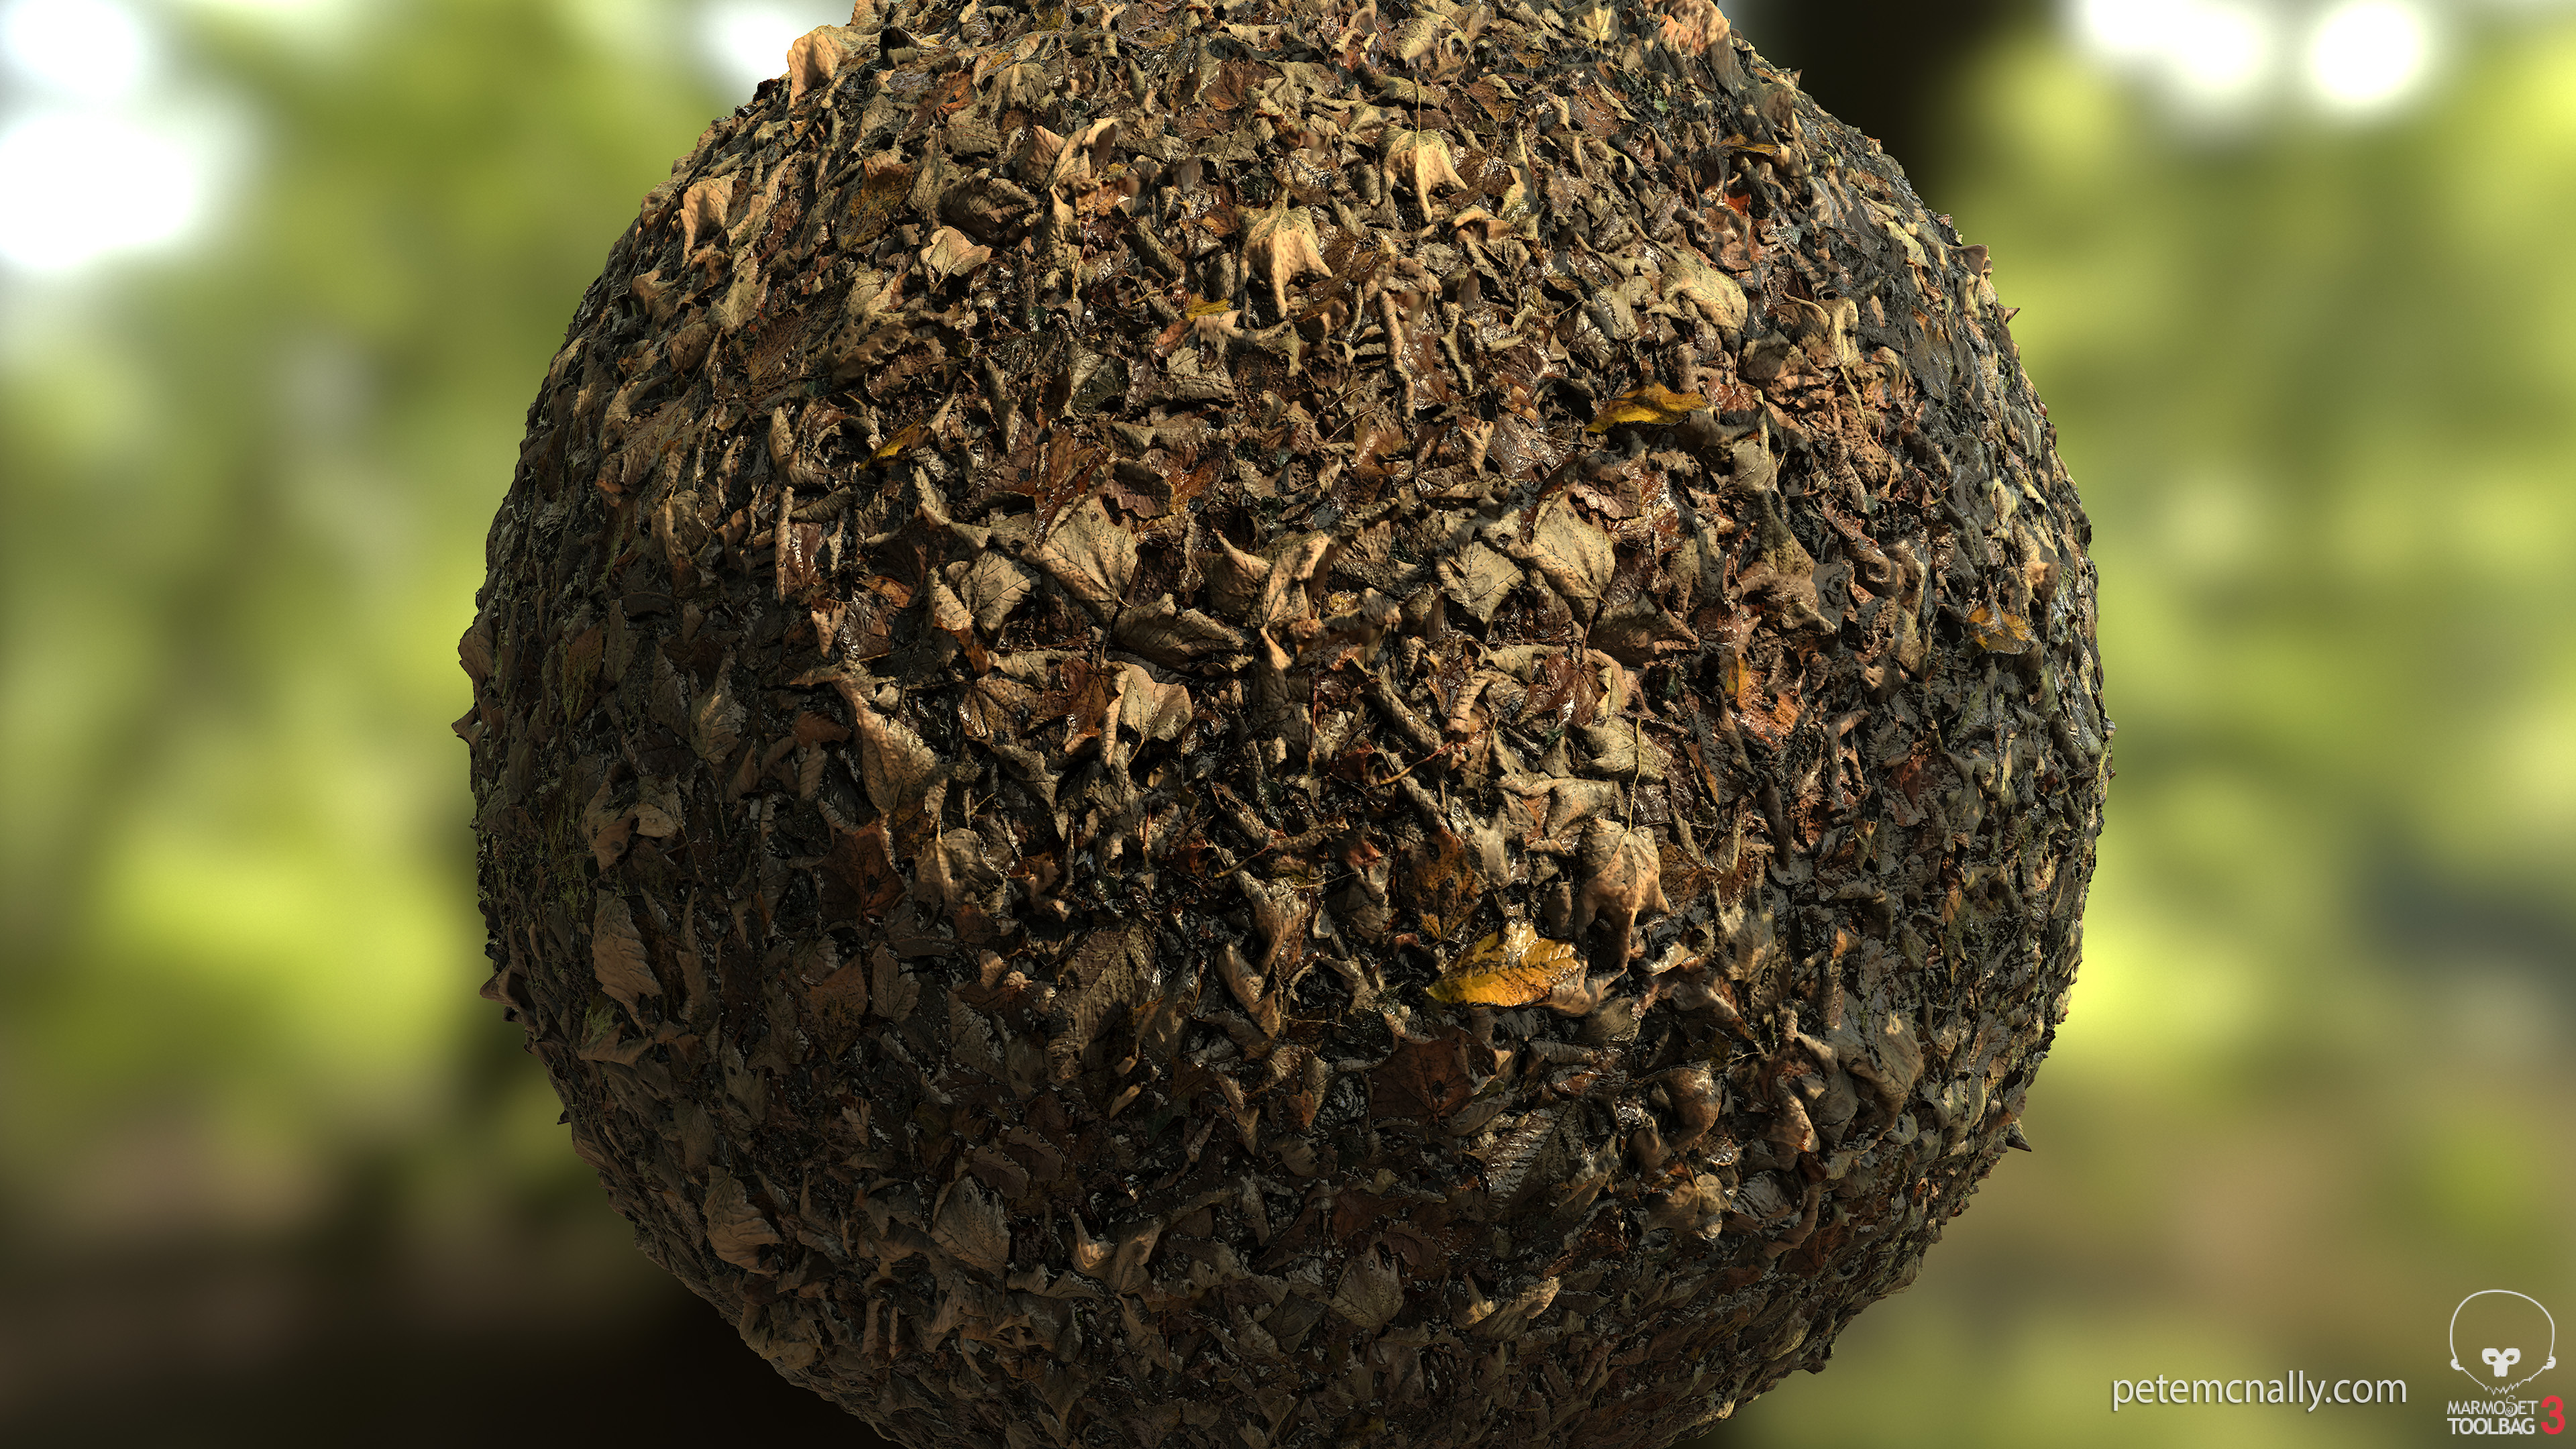
This post is about further experiments with Artomatix and 3D scanning to create usable, seamless PBR materials. A few months back I was standing at a bus stop for what seemed like ages and got really bored, so I took out the phone and started taking photos of the ground around me. There were a lot of fallen leaves around the bus stop, mixed with overgrown ivy and weeds. I took about 20 photos and loaded them into Reality Capture that evening just to see if anything could be made of them. I wasn’t expecting great things due to the small number of photos I had and the half-arsed nature of the shoot, and indeed results weren’t perfect, some leaves were nicely sharp but others were a blobby mess or missing completely. I still baked down the geometry to diffuse, normals, height and dropped the normal map into Knald for quick AO and cavity maps. There wasn’t enough usable info to make a square texture, I settled for bakes of 4096 x 2048. I stuck the assets in my “partial scans” folder and left it for months, until this week.
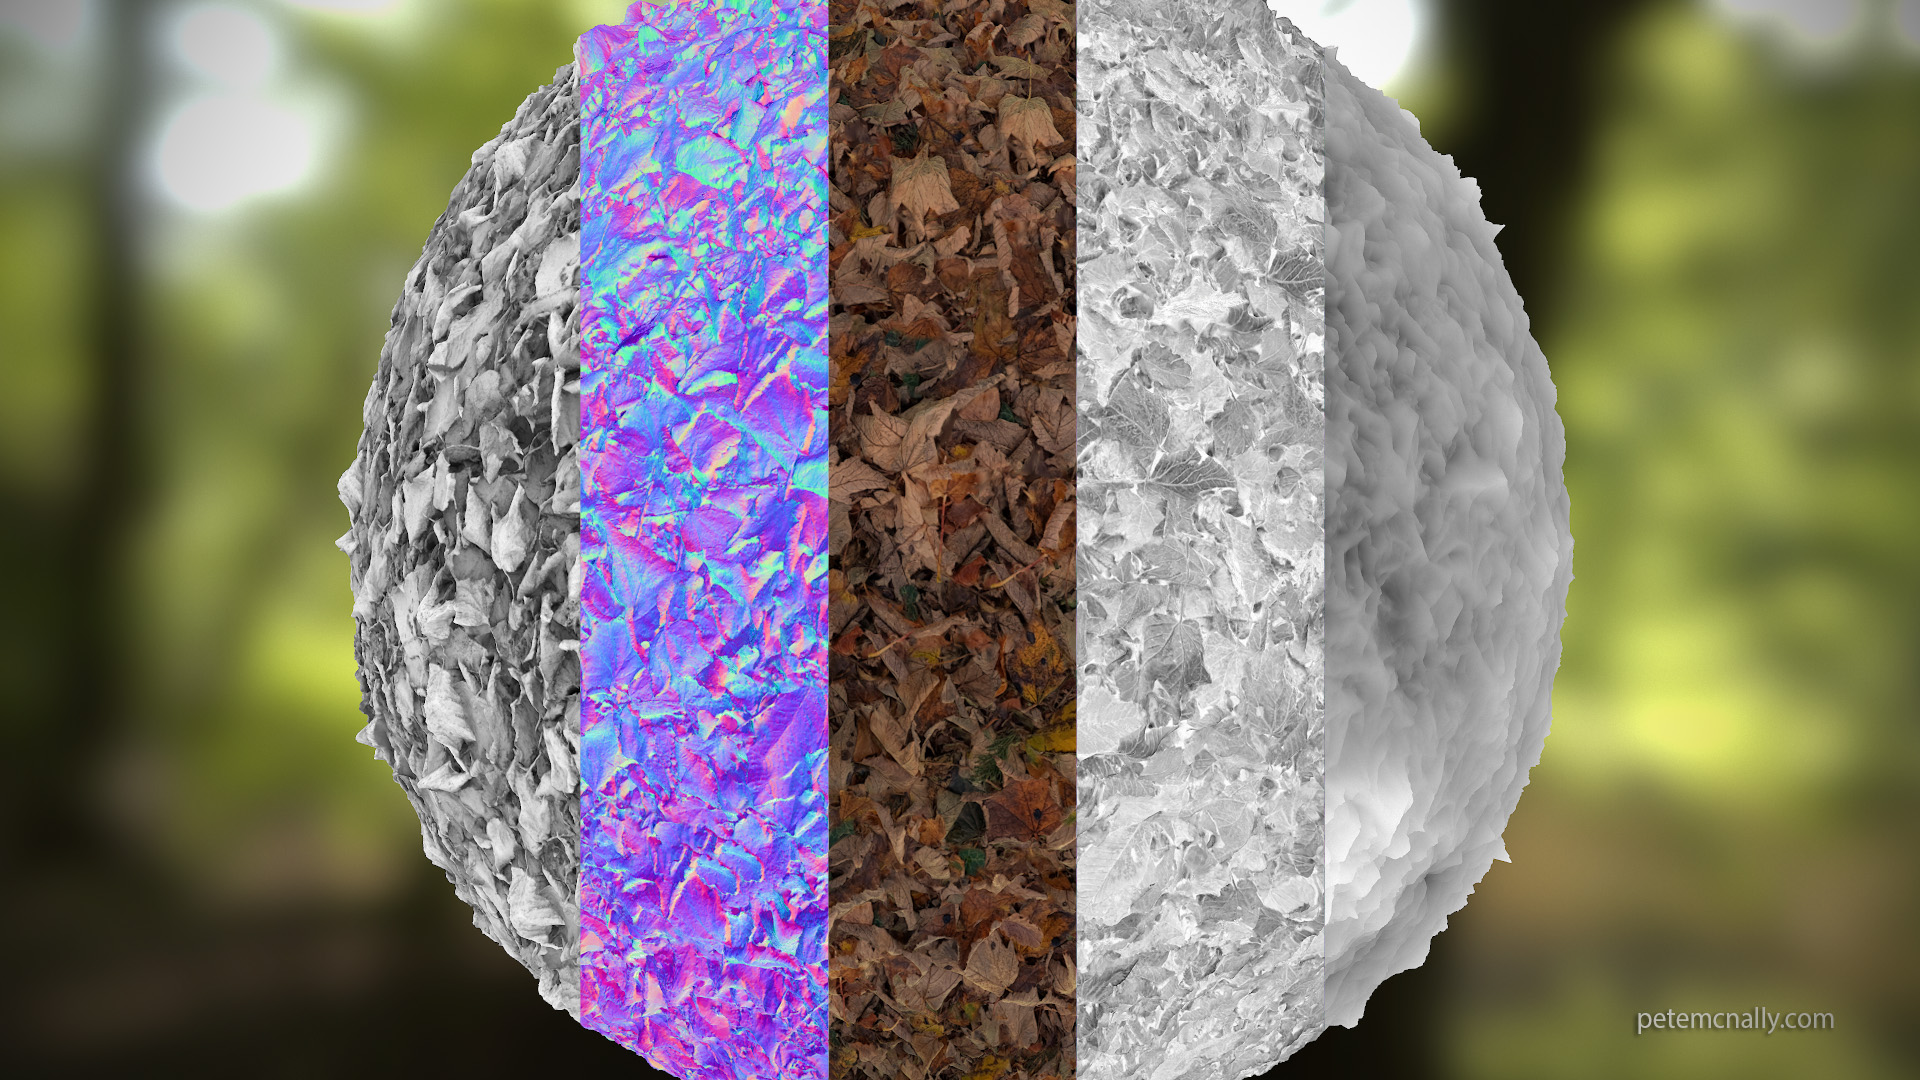
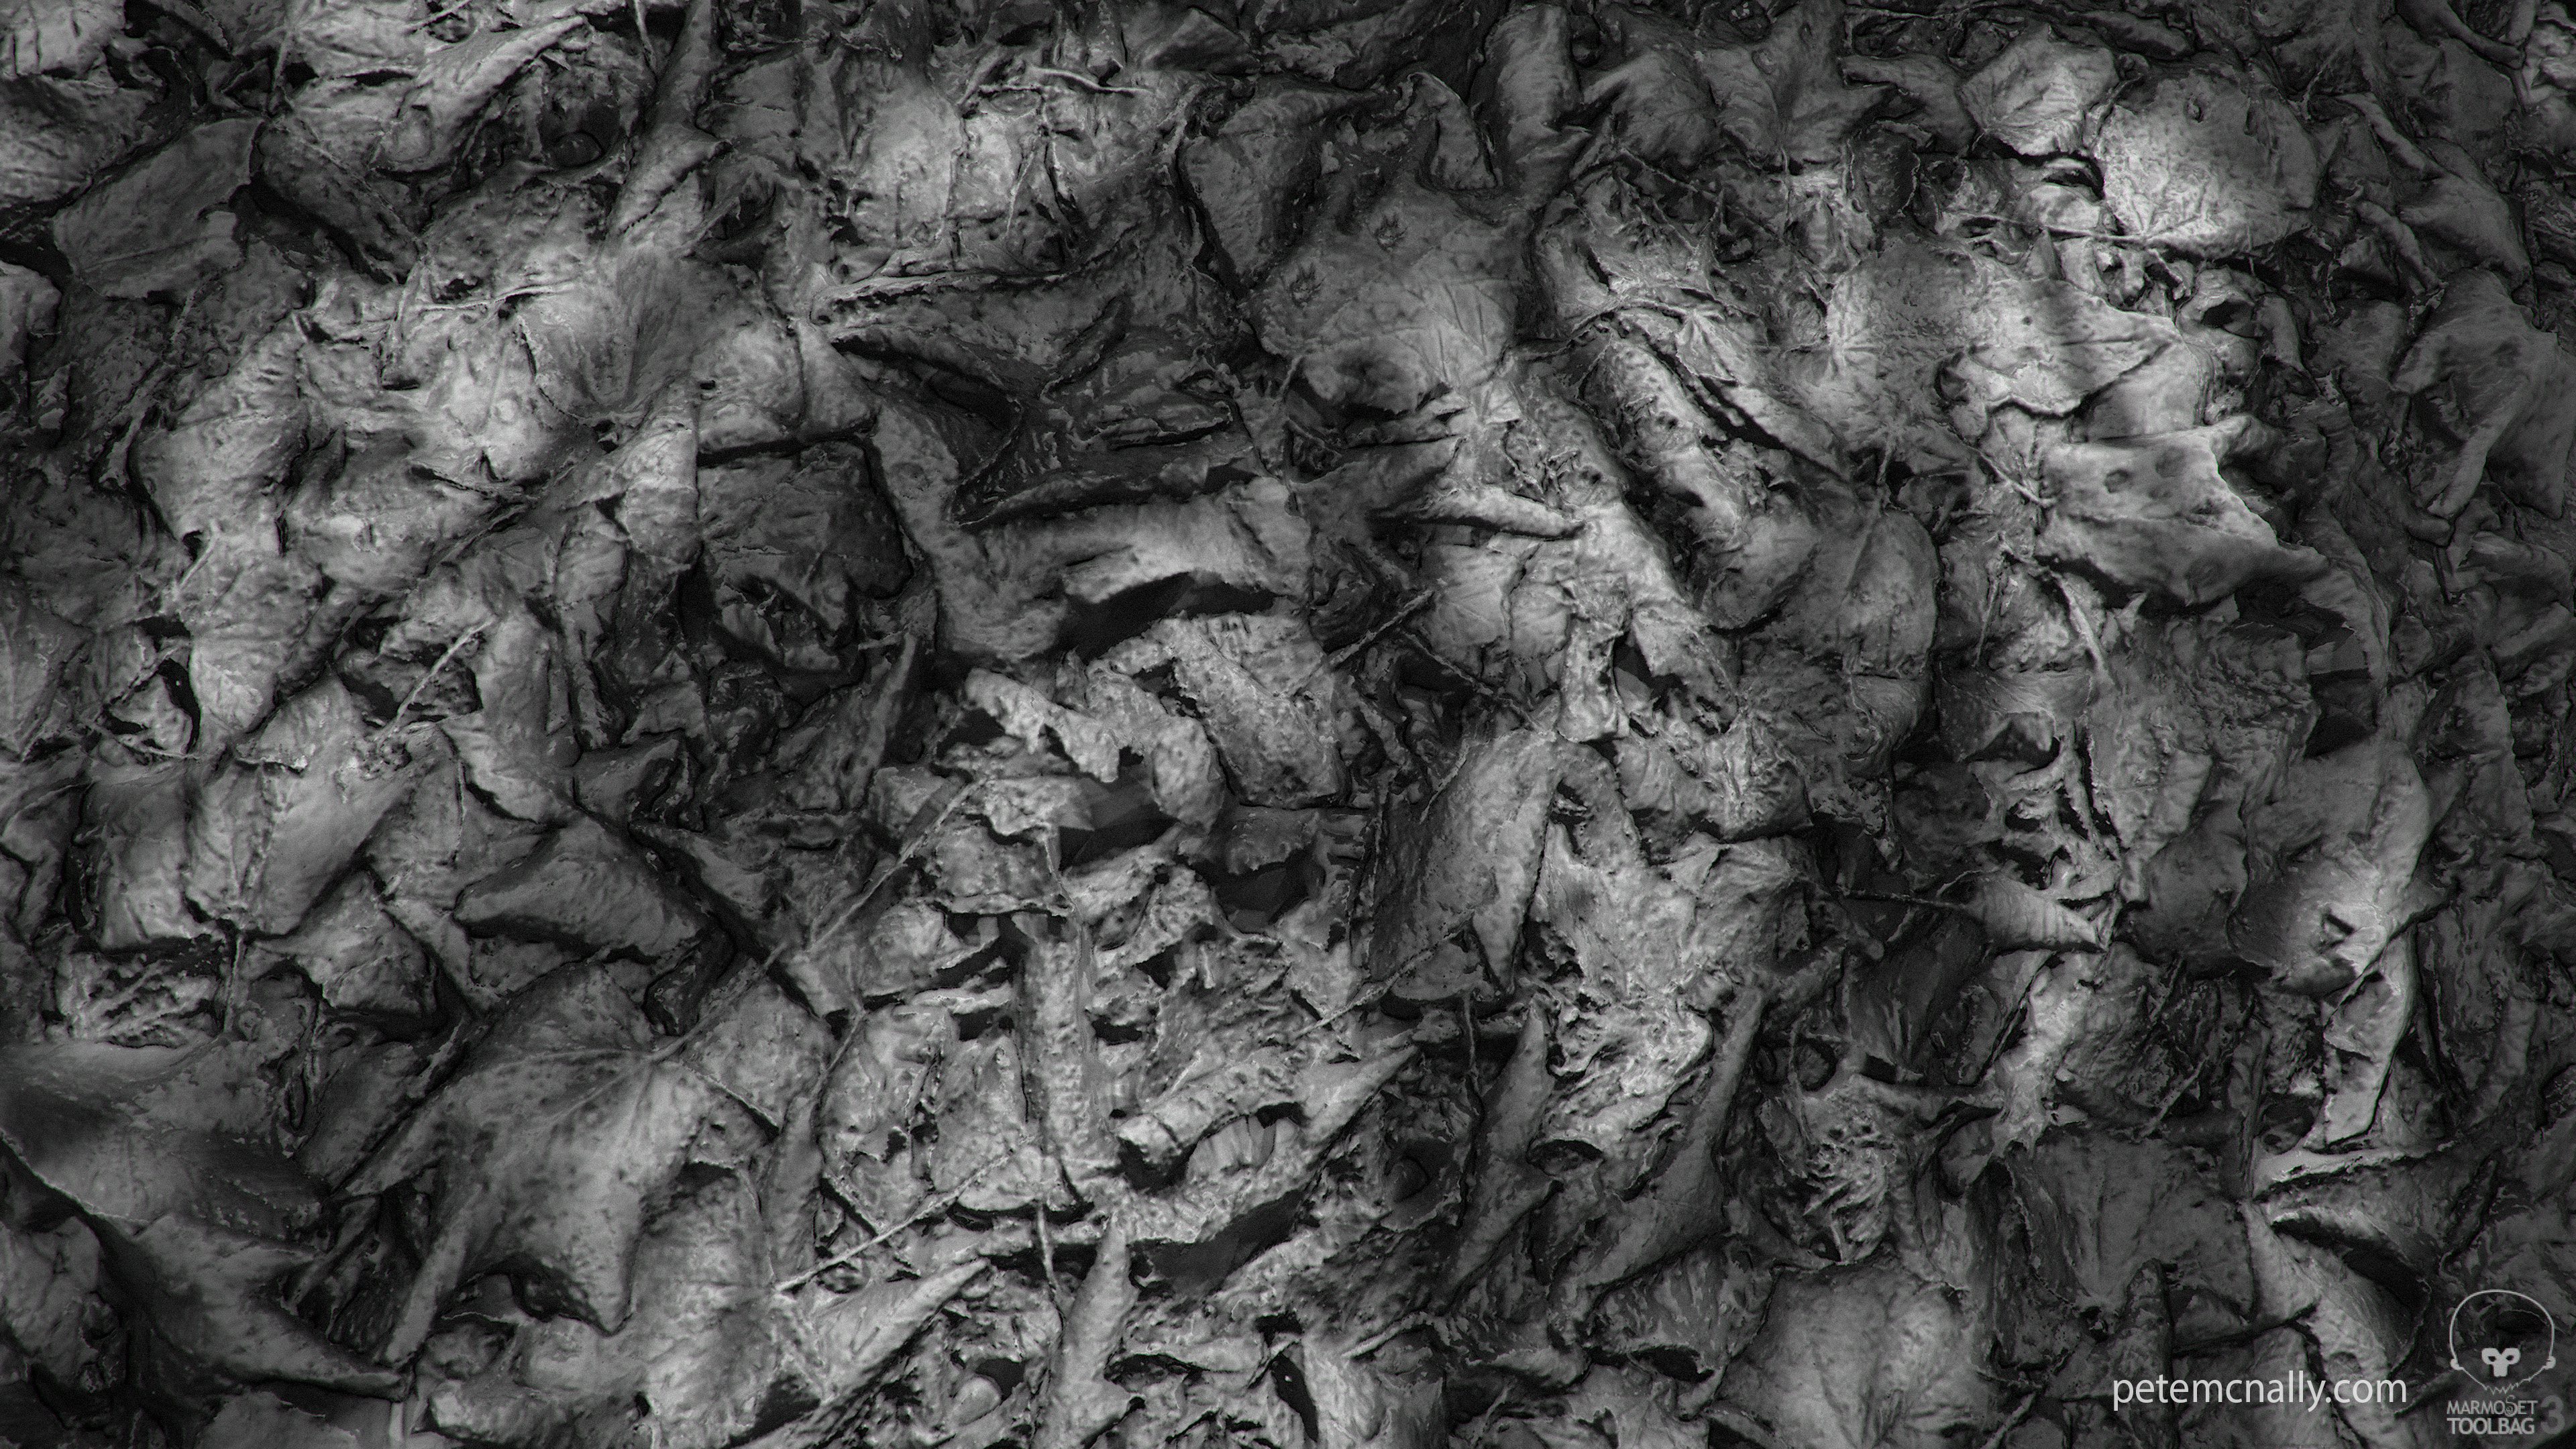
Artomatix came to the rescue, after duplicating the original textures and laying them out side by side in square 4K textures with very obvious repeats, I loaded them into Artomatix and was able to crudely mask out the problem areas and generate a tiling material from the 3DSMax bakes. I also saturated the diffuse to create a sub surface scattering map on the fresher leaves. Height could be better so I’ll revisit when time allows. This is the albedo input, the painted mask and the output from Artomatix:
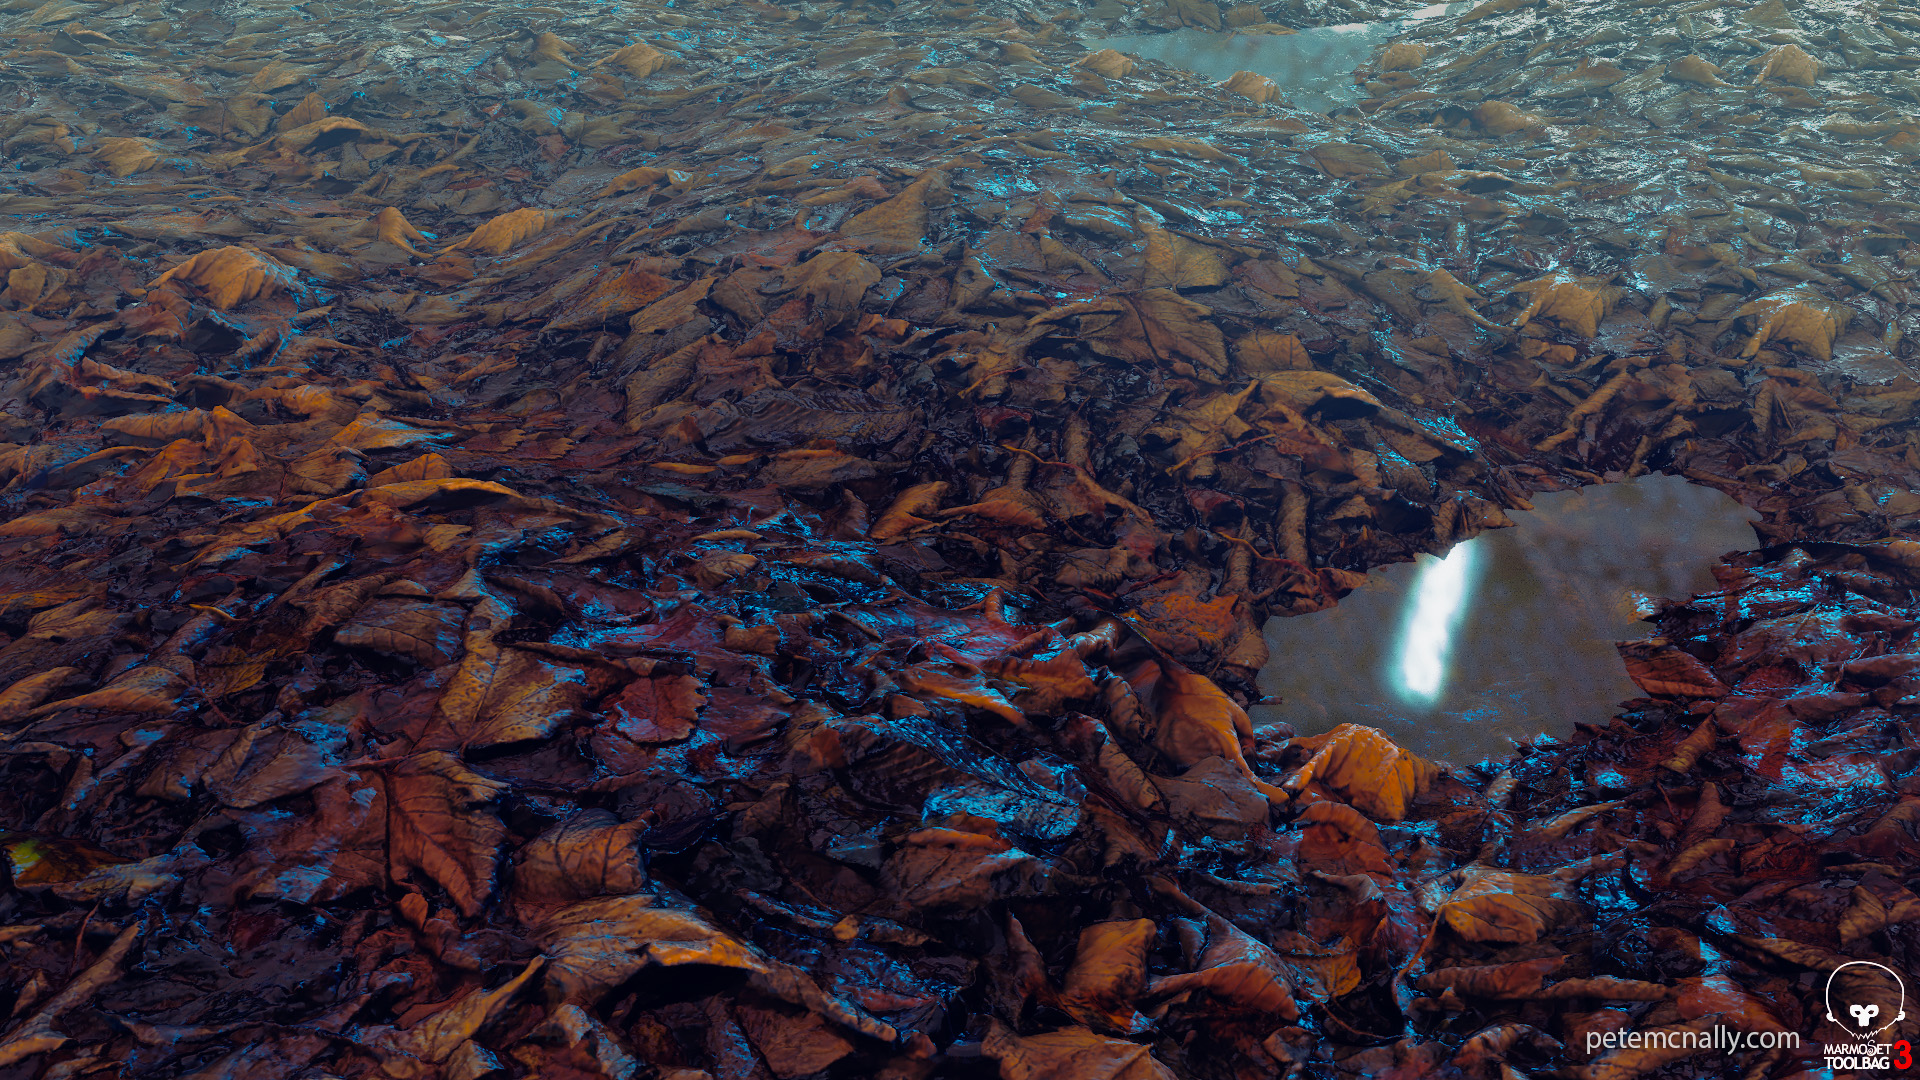
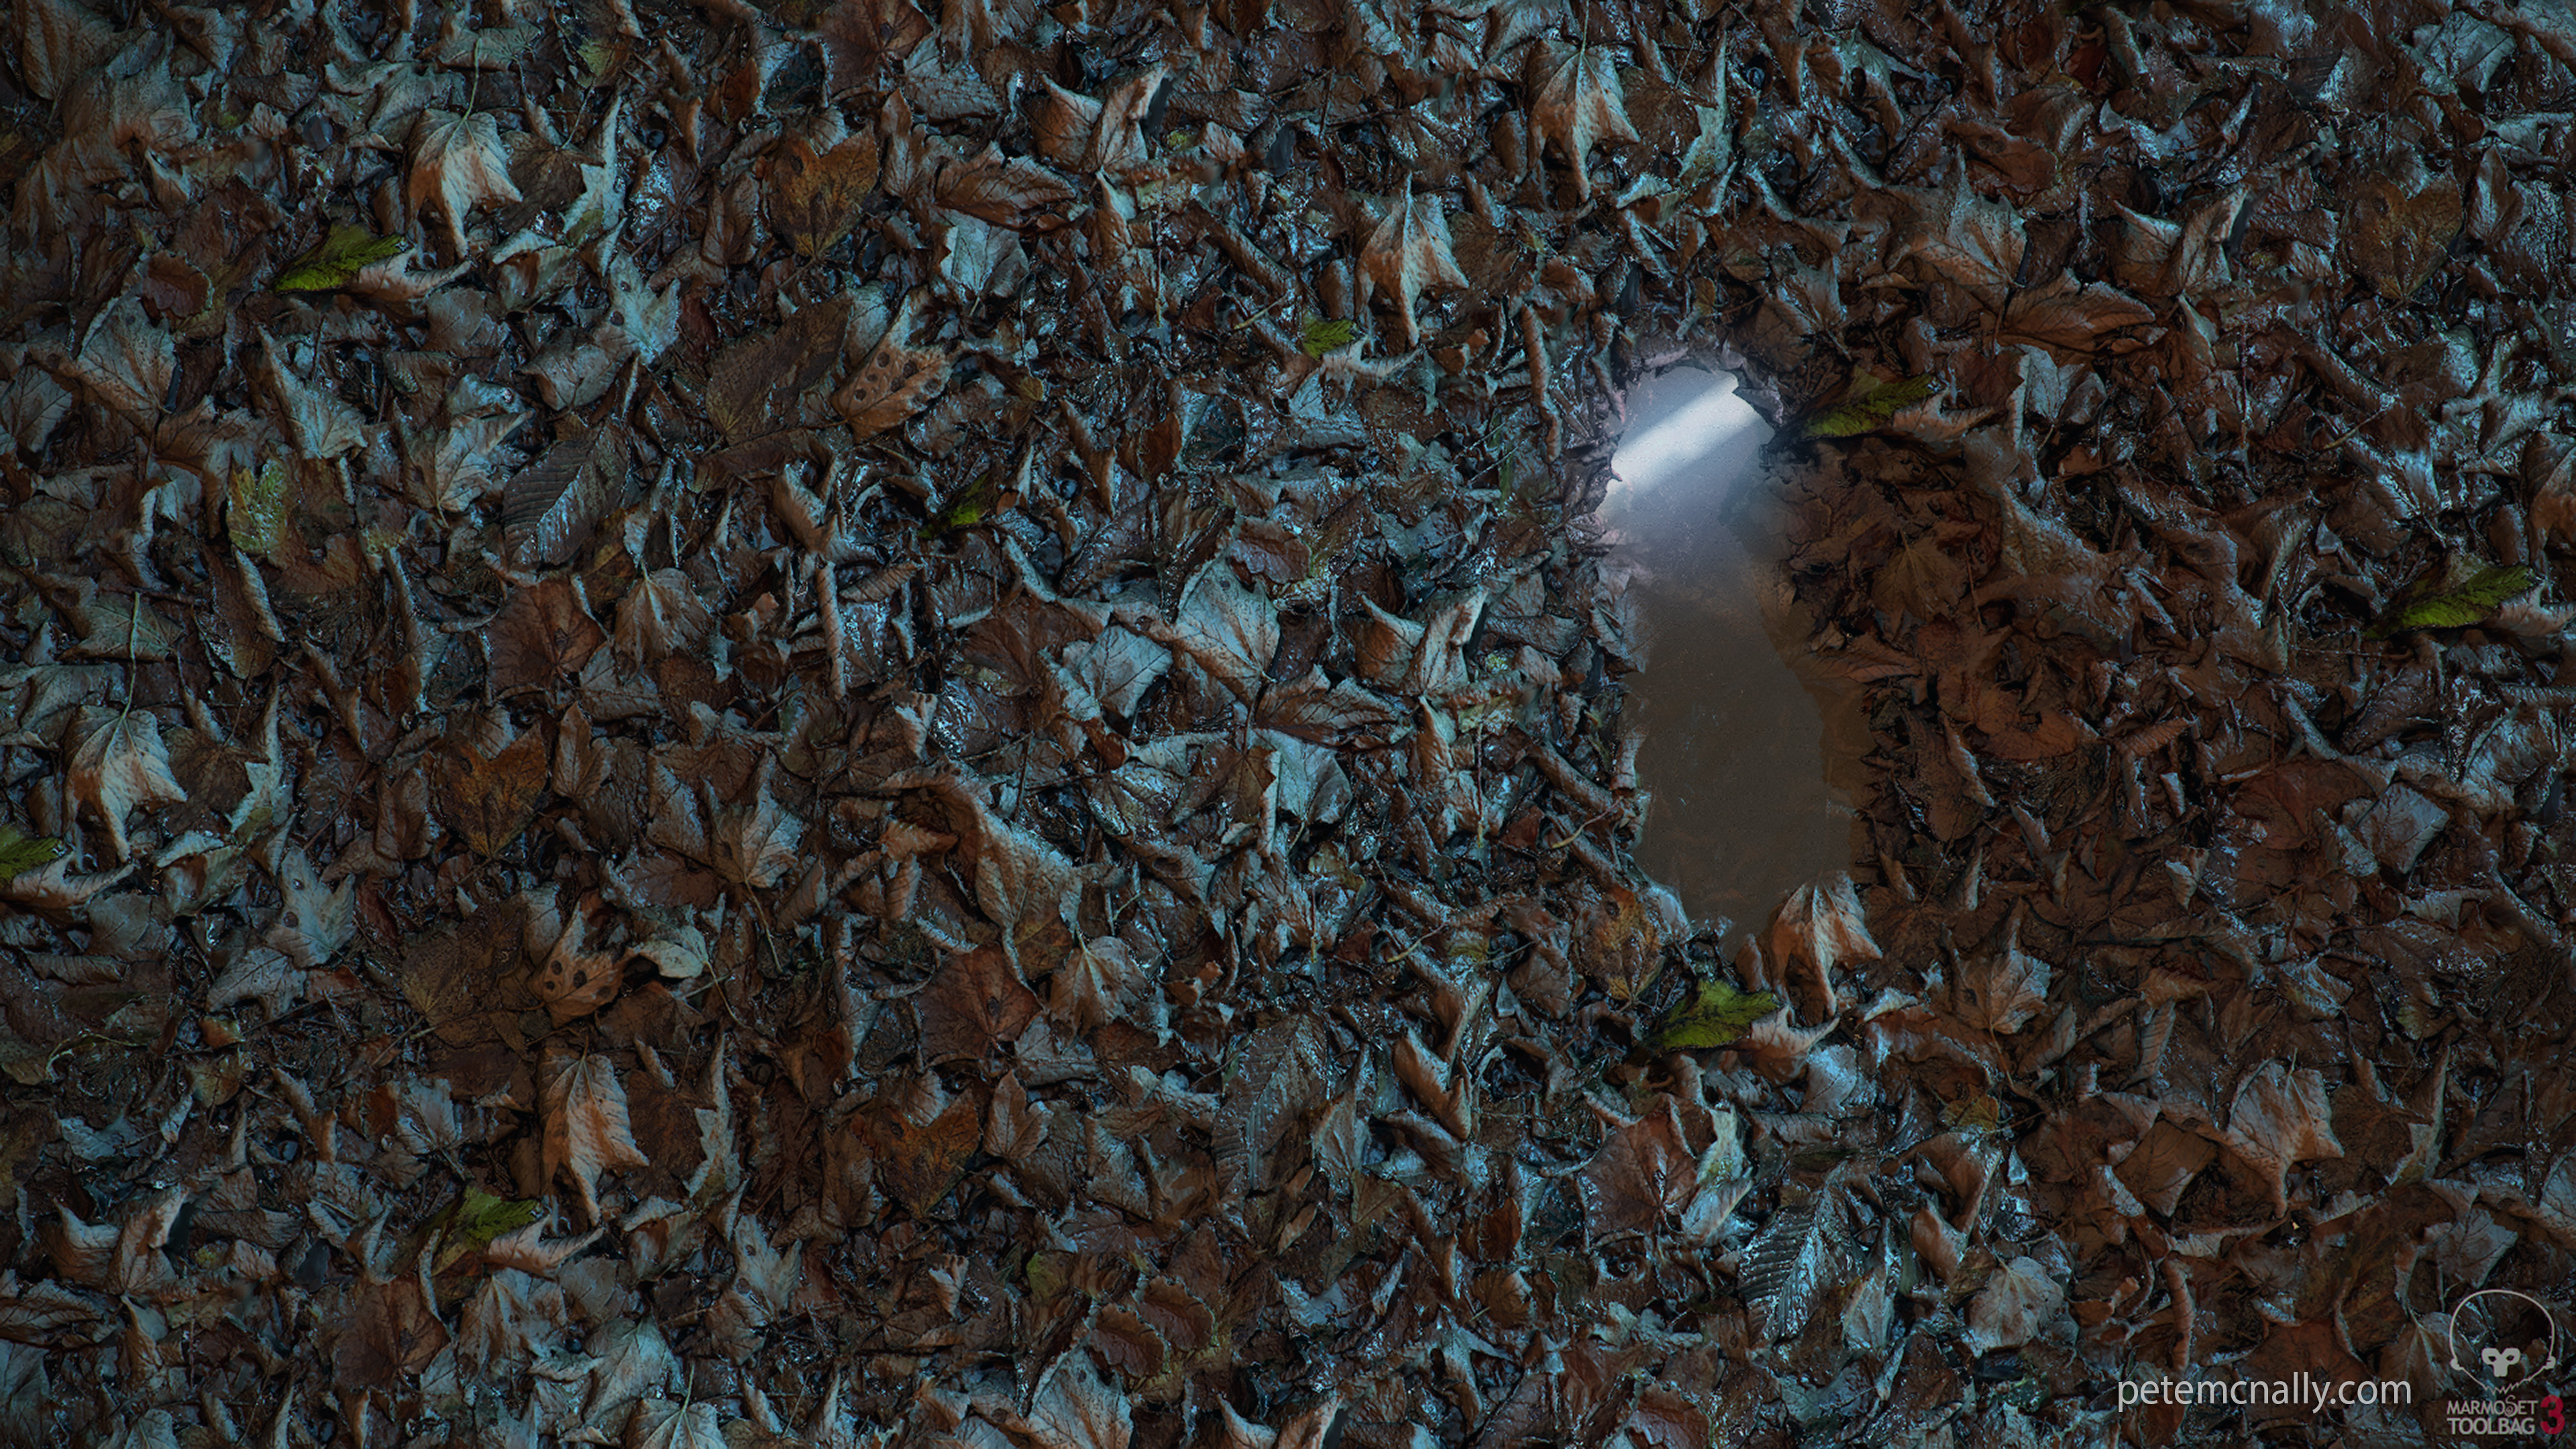
Here are the results, all rendered in real-time in Toolbag 3:
Quick post – some time ago I made a post on here about making a simple cave in 3DSMax in an hour over lunch. This evening I did something similar! I’ve been playing with Artomatix, as per my last post and I was pleased with the results of an experiment tonight and thought I’d post the results here. I had a partial scan that hadn’t resolved well it was wet rock on a very sunny day so large areas of detail were missed or were blurry. I baked out what I had in 3DSMAX, diffuse, normals, AO, height and a shadow map used to help with manual de-lighting in Photoshop. I ran these textures through Artomatix for seam removal and it tiled them quite nicely. After some tweaking, I applied the material to a sphere in Toolbag 3 and tested out some lighting environments, before applying the same material to the inside of a curved cylinder and tiling appropriately, to make the cavernous environment you see below. Not bad for a single material!
Hey! I’m a Senior Designer/3D Generalist with an Emmy award-winning technology company, with over 14 years experience in the Irish games industry. I’ve also done some TV work at a twice Oscar nominated animation studio.


